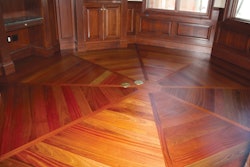

The house is built on the side of a hill with the closest part to the hill on a concrete slab and the suspended areas with a very-out-of-flat OSB subfloor (so we have on-grade and above-grade subfloors). There used to be a lot of leveling compound where the concrete and the OSB meet. The client asked me to install unfinished maple flooring with some borders, diagonal fields, a medallion and inserts in the hallway. Well, I had him choose the wood from samples I had provided but as to the rest, it was a result of our long and detailed consultation. Thanks again to the NWFA, the staff, all the instructors, students and friends I acquired over the years who taught me a lot. I probably spent four to five hours total on selling this job before I got it. It takes a little longer to sell a job like this when the other four contractors are cheaper and don’t grind and seal the concrete! In the end training, education and experience win over just experience.
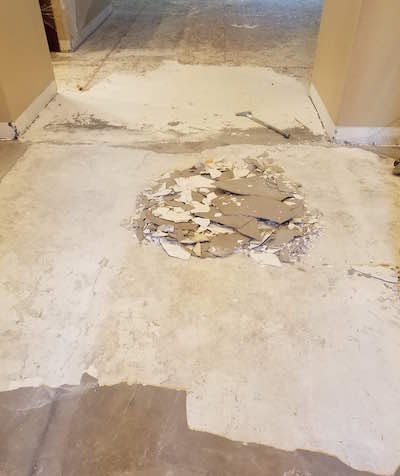
Step 1: Remove and haul away baseboards and laminate floors. Oh my God (and yes, like California style: oh my Gooood) the baseboards were mitered around the radius outside corners. We will fix that later in this project. Once the demo was completed, we discovered multiple areas with leveling compounds. I tapped with a wooden piece on those areas and found them to be loose. We used hammers, scrapers and grinders to remove the loose areas. We then used grinders to profile the concrete for epoxy (in this case, “profiling” is not wrong!) moisture barrier application. We sprayed the slab with water as we were grinding to minimize silica dust in the air, used proper respirators and HEPA-filtered vacuums attached to all machines.


We had to use door skin and 30-pound roofing felt to feather the OSB areas where they met the concrete.
Compared to the other contractors, we probably added a good amount of time to the job in preparation and moisture control alone. In my opinion, all this work is not an option and must be done to guarantee a successful installation. I don’t care that in some cases according to the Guidelines a moisture barrier is not a must. I seal the slab on every job.
[Read Part 2 of this series here]