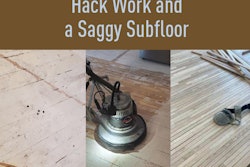
Every wood floor poses its own challenges, but installing one can be even more difficult if the subfloor has peaks and valleys. In that case, knowing how to properly flatten a subfloor before the flooring installation is essential. This job is a good example. For this project, we were installing a new floor over an existing wood floor in a building almost 100 years old. First we made sure the existing floor was squeak-free, undamaged and still fastened securely to its subfloor. We then inspected the subfloor from underneath, in the basement, and found that the floor was being held up by a series of jacks, which was indicative of how unusual and old this floor was. While we tried to flatten this the best we could, there still may be some high and low points in the floor. With old construction such as this, it's important to let the customer know up front that getting a perfectly flat floor won't necessarily be possible.
SUPPLY LIST
- Safety glasses
- Ear protection
- Chalk line
- Circular saw
- Scraper
- Shims
- Hammer
- Nails
- OSB or plywood
- Edger and abrasives
- Moisture retarder (such as asphalt-saturated kraft paper or #15 or #30 felt)
Step 1

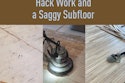
First we located the uneven areas. Here, it wasn't difficult to see the obvious hump running the length of the room. We measured the difference between the high and low points of the entire floor; it was more than 3 inches. We decided to rip out the existing flooring over the hump in an effort to flatten it.
Step 2

We cut out the old flooring in an area 6 feet wide down the entire length of the room. Although this was an old building, I was confident that this floor didn't have asbestos or finish containing lead. If you have any doubts, have a sample tested before you begin ripping out an old floor.
Step 3

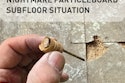
Once we took out the old flooring, we were surprised to discover an existing 1/2 -inch-high sleeper system, which meant that just by taking out the sleepers, we could lower the hump by 1/2 inch.
Step 4

After removing the sleepers, old nails and other debris from the area, we placed shims every 12 to 14 inches down the length of the floor on either side of the cut-out opening.
Step 5

We used two to three shims per area, stacking them on top of one another to get the desired height, remembering to leave 1/2 -inch at the top for the plywood.
Step 6

We then nailed the shims into place.
Step 7

We dry-fitted the plywood over the shims to make sure the new subfloor was even with the rest of the flooring. We measured and marked where the joists were so we could nail into them.
Step 8

Using a chalk line, we checked the difference between the high and low spots just as we had in Step 1. There is still a slight variance, but it's minimal compared with the original floor.
Step 9

We ran an edger (you can also use a big machine) over the seam where the plywood met the old subfloor to create a smooth transition.
Step 10

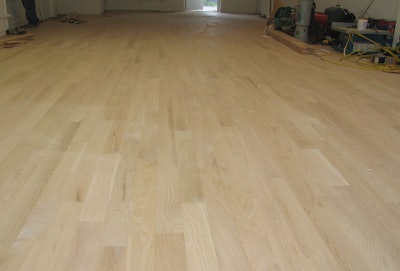
Then we covered the entire floor with #15 felt paper and installed hardwood flooring over the new plywood and the existing flooring.
Step 11

With the new flooring installed, you can see that the 3-inch height difference has been greatly reduced.