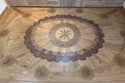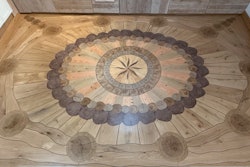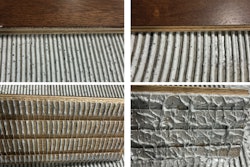

When there's a scratch on a factory-finished wood floor's surface, your first reaction might be to try to repair the finish. While some contractors have developed their own methods for repairing finish,using everything from eyedroppers to artist's brushes, it's usually easiest and fastest to simply replace the board. It's also the repair recommended by most factory-finished wood flooring manufacturers.
Using tools on hand, it doesn't take a lot of skill for a contractor to be able to remove and replace the damaged board(or boards). And, using the method I demonstrate on the following pages, the repair requires no top-nailing and no putty. In fact, once the replacement is done, the customer shouldn't be able to tell where the problem area was.
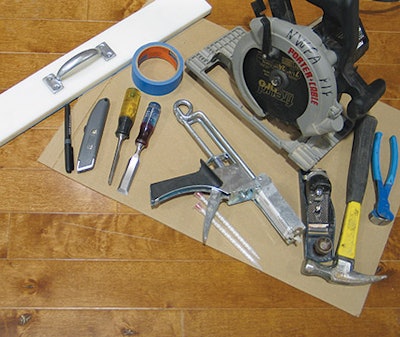
Necessary tools and supplies:
- cardboard or other floor protection
- blue tape
- black marker
- chop saw
- circular saw
- chisel
- hammer
- razor knife
- block planer
- straightedge
- vacuum
- two-part epoxy or wood glue
- safety goggles
- nail set
- bull nose pliers
- plastic tapping block
- wood floor cleaner
Step 1:

First, I make sure the replacement board will blend in with the grain and color of the surrounding floor. (When installing a floor, it's a good idea to leave some boards with the customer to use for future board replacements.) Then, I use a razor knife to score the replacement board, marking my cut. Next, I use a chop saw with a sharp blade to make the cut.
Step 2:

While I'm at the chop saw, I also bevel off the tongue end of the board and the bottom of the groove end.
Step 3:


Next, I use a metal straightedge and the razor knife to score the bottom side of the replacement board's groove. Then, using a hammer, I carefully knock off the bottom part of the groove.
Step 4:

Then, I use a small block planer to smooth off the rough edge where I knocked off the groove.
Step 5:

Working on prefinished floors requires taking extra precautions to protect the surrounding boards. I use plenty of blue tape to prevent damage to the finished surface.
Step 6:

I plan on making four passes with the circular saw—two long cuts down the length of the board about 3/8 inch from either side, and two diagonal cuts connecting those lines. To help guide me with the saw, I mark my cuts with a black permanent marker.
Step 7:


Before cutting,I check to see that the saw depth is slightly deeper than the board. I also check that the bottom of the saw is clean and will not damage the finish.
Step 8:

Next, I make my two long cuts and then my diagonal cuts, being careful not to cut too far and damage the other boards.
When using the saw, always wear safety glasses, and never kneel directly behind the saw.
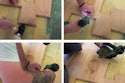
Step 9:

To remove the cut pieces, I use a hammer and chisel. Again, I'm careful not to damage the other boards.
Step 10:

With the middle chunks of the board removed, I use a nail set to sink the fasteners I cut with the circular saw. If the fasteners aren't cut cleanly, sometimes bull nose pliers are necessary to pry them out. Then, I use the chisel again to carefully separate the long, narrow cut pieces from the adjoining boards.
Step 11:

Once all the pieces are removed, I vacuum the opening to make sure nothing will get in the way of the replacement board.
Step 12:

Now, I carefully dry-fit the replacement board. Since I'll be using two-part epoxy to glue the new board in, I'll have a limited window of time once I apply the glue. That doesn't leave time for trying to make adjustments to the board if it doesn't fit correctly.
Step 13:

Now that I'm confident the replacement board will go in, I spread two-part epoxy on top of the tongues on the side and the end, as well as on the subfloor. Be careful not to let the epoxy drip onto the finish.
Regular wood glue also can be used instead of two-part epoxy, but epoxy allows for a quick set-up time.
Step 14:

To persuade the board to go all the way in, I use my hammer on top of a plastic tapping block, which won't mar the finish.
Step 15:

While the glue sets up, it's a good idea to place something heavy (like this toolbox) on top of the board. Be sure to protect the finish before placing the item on the board.
Step 16:

Once the glue is set, I remove the tape at the recommended 90-degree angle. Never leave the tape on the floor longer than the time recommended by the manufacturer. Different tapes have different times, so read the directions before using the tape.
Step 17:

I want to be sure I leave the job site as clean as possible, so I wipe down the floor with a recommended wood floor cleaner, double-checking for any epoxy drips.
Step 18:

Our replaced board is now indistinguishable from the rest of the floor.