Yippee ki yi yo, Keith Long here with Thunderheart Flooring, reporting from the high plains of Northern Colorado’s Front Range. Snowpack here in the Rocky Mountains is well above average this year—the skiers and snowboarders have had great conditions, and there should be plenty of irrigation water for the farmers and ranchers this upcoming warm weather season.
Let’s carry on with the subfloor preparation for the 4-inch select herringbone project with Kimminau Wood Floors in Kansas City we started going through last week.
Being an owner-operator of my own flooring company, large projects can take me a while when working by myself. It always amazes me to get around a bunch of young, able-bodied flooring technicians. Ben Kimminau sent four young craftsmen per day plus myself to work on this project—things can materialize pretty quickly with that many motivated people making things happen.

I view subfloor preparation as extremely important. Anything that throws off the flatness of the substrate will affect the overall flatness of the finished product. Insulation had previously been blown between the floor joists in this room, and then the holes covered with tin that was secured down with galvanized roofing nails. We removed these obstructions where the herringbone pattern and border would be installed, and we left them where the marble was to be laid by the marble setters.

Next, the entire room was gone over with this flooring scraper. Any obstruction that hung up the scraper was addressed.

If framing nails were standing proud, they were set with a hammer.

As the flooring scraper ran into carpet tack strip nails, they were pulled with a pair of dikes. Many of the carpet pad staples came up with the scraper. If they didn’t, we made sure to address them until they were up and out of the way.
Here’s Jace with Kimminau Wood Floors sanding the plywood seams with 36-grit paper on a flooring edger.

If a person is not accustomed to doing this before every installation of wood flooring, it may seem like a time-consuming proposition. I have found that taking this step before each install actually saves time and materials by the time a person gets to the end of the job.
The reason for this is because it takes less time to install hardwood flooring over a flat substrate, with less overwood (high/low spots in the wood flooring installation that need to be addressed) as a result. When there is less overwood, less time and sandpaper are required to get the floor sanded flat in preparation for stain and finish. I have found that the more flat a wood floor installation is, there are fewer issues that arise while running the big machine, namely side cut and paper tracking issues. I have discovered I get to the finish line the fastest and with the least amount of hassle by sanding the subfloor seams and high spots flat before each wood floor installation.
The marble that is to picture frame this herringbone pattern will be a total of 1 inch tall between the marble, underlayment and thin-set mortar. Since our wood flooring is ¾ inch thick, we built up the subfloor with 3/16-inch plywood. Accounting for a layer of adhesive 1/16-inch thick between the existing subfloor and the 3/16-inch plywood, and another layer of adhesive 1/16 inch thick between the 3/16-inch plywood and the hardwood flooring to be installed, we calculated we would arrive at 1 1/16 inch total thickness before sanding. After sanding, we figured we would be just over 1 inch thick. Donna, the designer with Schloegel Home Remodeling, told us that would be fine, since the marble setters could work with their thin-set mortar to build the marble up and make that last 1/32 or 1/64 of an inch difference perfect with the height of the wood.

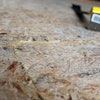
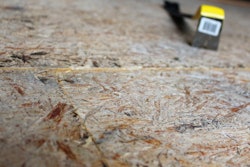
Since we would be gluing plywood to the subfloor, we wanted to scarify the existing substrate for good adhesion between the two layers of plywood. John with Kimminau Wood Floors Velcroed a 16-grit buffer paper to a thick red pad and proceeded to knock the paint and drywall dust off the subfloor.

Jace and Aaron work together as an installation team on a daily basis at Kimminau Wood Floors. They’re both motivated, willing workers with tons of positive energy. They see the next thing that needs to happen in the process and they get right to it. They’re so fast, I’ll bet either one of them could turn off the light, and be in bed before it gets dark! As their speed, athleticism and willingness to make things happen are coupled with these more refined installation skills, they are becoming top hands that Ben Kimminau is glad to have in his employ. Here’s Aaron tracking off the 3/16 inch plywood at the correct width…

…and after troweling down some adhesive…

And here’s Jace and Aaron using ¼-inch-wide-by-1-inch-long crown staples to staple the 3/16-inch-thick plywood at the appropriate nailing schedule, ending along the perimeter of where the herringbone pattern will end and the 5-inch white oak border will begin:

We snapped chalk lines to know where to stop gluing and fastening. That way, when the excess 3/16-inch plywood becomes cut off for the border, there will be no adhesive or staples holding down what we will want to remove.
Let’s congregate again next week to carry on with this project as we map out how and where to lay this herringbone pattern. Until then, stay sharp out there, fellow craftsmen!