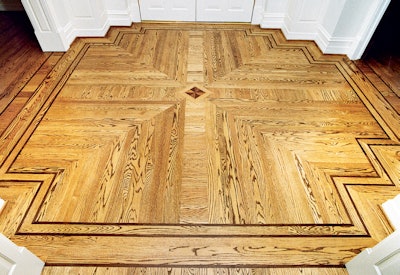
After a few seconds on a job site, a top-notch wood flooring craftsman can discern the quality of someone else's work. One of the first things he notices is how much filler the job did — or didn't— require. A meticulous craftsman takes the time to carefully match all joints so no filler is necessary. Sometimes, as when mitering the corner of a feature strip, this may simply be a picky detail. Other times, as when cutting a custom parquet pattern or assembling your own custom design such as the one pictured at right, having a cut that is a little bit off can turn into a real headache. That's why it's so important that your miter saw is cutting true. You may find that even though it says it's on the 45, you get a cut that's slightly off. Here's a quick, easy trick to find out if your miter saw is cutting it.
Necessary tools/materials:
- miter saw
- wood flooring or, preferably, dimension lumber
Step 1:

When they suspect their miter saw isn't cutting a true 45-degree angle, most contractors quickly reach for their framer's square and make an adjustment on the saw. But, depending on the square, this may not be very precise. You can do the same thing more accurately without having the square...
Step 2:

...by simply using a piece of dimension lumber or a piece of wood flooring with the tongue and groove sides ripped off. The piece must be straight along the edges, and the wider the board, the more accurate it will be.
To start, make a 45-degree cut on one side of the board.
Step 3:

Then, flip it over so the opposite side is facing up.
Step 4:

Make the same 45-degree cut on this side, leaving you with a triangle of wood.
Step 5:

Continue the process of flipping the board over and cutting 45's until you have four triangles.
Step 6:

To see if the cut is true, assemble the four triangles together to make a square. All the sides should meet perfectly. Here, you can see that there is a gap on the outside of the square where the corners should meet. This indicates that the angle on the saw needs to be increased slightly.
Step 7:

These triangles leave a gap where the points meet in the center of the square.
A gap like this demonstrates that the angle on the saw needs to be slightly decreased.
Step 8:

Here, the miter saw has been adjusted to a true 45, producing angles that form a perfect square.