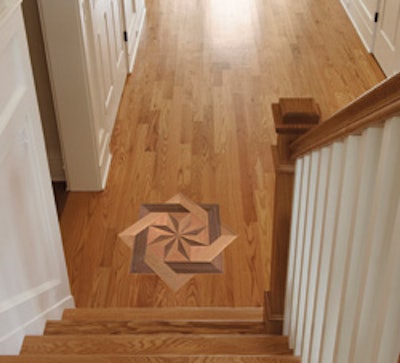

Now more than ever, contractors need something that will set them apart from the competition, and nothing is more instantly eye-catching than an inlay as a focal point. You can make your own or go the easy route of buying one already manufactured.
Although installing an inlay may seem intimidating, it's a straightforward process. If you have the template and the right router bit, being proficient with a router and a chisel are the main skills required. Beyond that, a little patience always helps, too.
Following are the basic steps involved in dropping in an unfinished inlay. The steps are largely the same for a prefinished inlay (see "Prefinished Possibilities" in the August/ September 2001 issue for specifics on prefinished inlay installation). As always, follow the specific directions from the manufacturer of the inlay you're installing.
SUPPLY LIST
- Inlay and template
- Stud finder
- Pencil
- Hammer
- Router and flush-mount trim bit
- Eye protection
- Hearing protection
- Vacuum
- Nail set
- Chisel and/or corner punch
- Wood adhesive
- Screws
- Drill
Step 1

Choose the placement of the inlay and use the template to mark it. Be sure to check the position with the client, and also check the cuts that will be required—you don't want small pieces of wood to be left in the field. Use a stud finder to check for fasteners in the floor and mark their locations on the floor.
Step 2

Affix the template to the floor.
Step 3

Use a router with a flush-mount trim bit to start routing out the area for the inlay. Don't try to go down the full ¾ -inch depth in one pass—do it in a minimum of three passes. So, for the first pass, go down a depth of about ¼ inch. Go in a clockwise direction as you use the router and go slowly where you expect to hit a fastener. Then vacuum out the sawdust.
Step 4

Use a hammer and nail set to sink any fastener heads that have been exposed. Then, adjust your router bit to a ½ -inch depth and follow the same pattern. Vacuum the area again. Then, go down the full ¾ -inch depth with the router and vacuum again.
Step 5

Remove the template and the nails used to affix the template to the floor. Then remove the boards and the moisture retarder where the inlay will go. Next, use a chisel or a corner chisel to remove the flooring in areas that couldn't be reached by the router. Vacuum the entire area well, making sure there is nothing left that will interfere with placing the inlay.
Step 6

Now it's time to dry-fit the inlay. Be sure you can remove the inlay after it's dry-fit. Some contractors use blue tape under the inlay; others use suction cups. As you dry-fit the inlay, don't hit it directly with a hammer or mallet—if you need to persuade it into the space, use an extra piece of flooring between the hammer and the inlay.
Step 7

Once you are confident the inlay will fit well, remove it and spread the recommended amount and type of adhesive on the subfloor with the correct trowel. Be sure to cover the entire area. Some inlays also come with knockouts—small areas where the top layer can be removed so you can screw the inlay down and then glue the knockouts back in place.
Step 8

Put weight on top of the inlay to allow the adhesive a better bond. Once the adhesive has cured, the inlay can be sanded and finished along with the rest of the floor (not waiting for the adhesive to cure can cause bubbles in the finish).