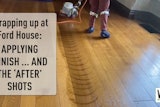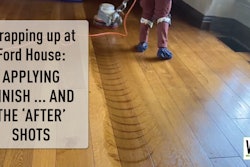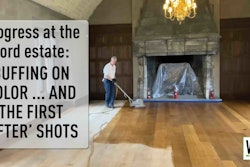
Ask any contractor what the majority of his callbacks are, and it's a safe bet they're related to finish problems. Finishing is a process that needs to be done carefully and with thoughtful planning, and it shouldn't be rushed. Unfortunately, since finishing comes at the end of the job, when things are usually running behind, contractors often take shortcuts. That's risky on any job site, but even more so when there are difficult finishing conditions. Here are six job sites that, for one reason or another, present challenging finishing conditions. See if you can predict the complications with these job sites and what you need to do about them. (The following scenarios discuss general guidelines for most finishes; for specifics, always refer to the manufacturer of the finish you're using, and remember to use all the recommended safety equipment, especially respirators.)
Job Site #1: In the Dark
It's December, and you installed a maple floor in a living room and dining room for a couple who are on vacation in the Caribbean. You promised that the floor would be ready for them when they get back, but one of your guys quit and you're running behind. Now it's dark out, and you need to get the first coat of finish down so you can complete the job before the happy vacationers return.
The Challenges: Not having any natural light makes it hard to see sanding flaws like drum marks, edger marks and buffer swirls before you coat the floor (and they'll be especially obvious on a species like maple). While you're coating, it's also more difficult to see missed spots, puddles, drips and debris in the finish. Oftentimes you may do the first coat, come back in the morning and suddenly see all sorts of problems that weren't visible the night before, requiring time-wasting repairs.
The Approach: When you have to coat in the dark, illuminate the floor as much as possible. Before coating, use halogen lights at floor level shining across the floor to highlight sanding marks. While coating, plug-in light sockets with 60-watt bulbs can be used to provide low, bright sources of light. Some contractors plug them into timers so the lights will turn off in a few hours instead of burning all night in their customers' homes. Headlamps like the kind used by backpackers also are useful in a lowlight situation.
Note: Plug-in light sockets are inexpensive and can be purchased at most hardware and big-box stores. Headlamps are available at any outdoor sporting goods store or auto-supply center.
Job Site #2: A Hot Spot
You're coating a floor at a high-end home in sunny Southern California. The house's great room features a two-story wall of windows offering an expansive view over a golf course.
The Challenges: The wall of windows presents two potential problems: hot spots on the floor and lots of natural light on the floor that will make flaws in the sanding and finishing job obvious. Hot spots make the finish set up too quickly, leaving applicator marks and, potentially, sheen differences.
The Approach: First, plan ahead to deal with the direct sunlight streaming in through the windows. There are two options. First, you can coat the floor in the morning or the early evening, when you still have natural light but hot sunlight won't be beaming in directly on the floor. Second, you can hang protective film that blocks direct sunlight but lets in some light. In this situation, hanging the film will require using ladders or scaffolding.
To prevent obvious sanding and applicator marks, you simply must do the best sanding and finishing job possible. Don't skip any steps, and keep the job site meticulously clean. Inspect the floor on your hands and knees after each sanding and finishing step and use extra light, looking at the floor from different angles and keeping in mind where the sun will hit the floor throughout the day. Develop a game plan for your finishing process to avoid problems such as stop marks in focal points of the floor. While finishing, use new applicators, and wear protective booties over your shoes.
Note: In this situation, you might need to bid the job higher than usual—working odd hours might increase your labor costs, and hanging the film will incur extra time and expense.
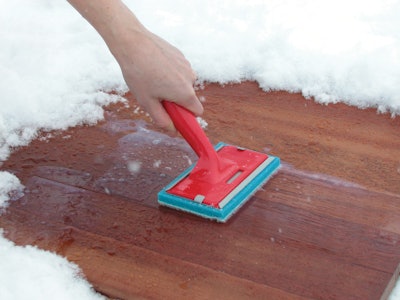
Job Site #3: Deep Freeze
It's January in Minnesota, and you need to finish an oak strip floor in the living room of a new ranch home with a basement. The heat is running at the job site, but only during the day and only enough to keep the tradespeople from freezing to death.
The Challenges: There are two main concerns with applying finish in cold conditions. First, the cold temperature makes the finish more viscous, so it is difficult to apply. It doesn't flow well, and it is difficult to get the correct coverage rate. Second, in temperatures below their comfort zone (typically 65 to 75 degrees Fahrenheit), most finishes will have extended dry times and other drying problems. In particular, waterborne finishes may not cure properly—they may take on a white, hazy appearance and never form the correct film, causing durability problems and, ultimately, a total resand.
The Approach: Because problems with finish on a cold job site are nearly a given, this issue needs to be addressed before you bid the job. If the GC can't guarantee that the house will be at normal living conditions when you apply the finish, it's best to walk away. Some contractors try to deal with the problem by bringing in alternative heat sources such as propane heaters, but propane heaters tend to introduce lots of humidity to the job site, which can cause other problems.
Even if the GC agrees to turn on the heat, be clear that it needs to be operating before, during and after the coating of the floor. You can't simply arrive at the job site in the morning, crank up the heat until it feels comfortable and start coating the floor. Although the air may be the right temperature, wood is a good insulator and takes much longer to heat, so the heat needs to have been running long enough that the wood floor itself is at the correct temperature. (For that matter, the wood flooring shouldn't even be installed and sanded while the job site isn't at normal living conditions, but that's another issue). To make sure the heat can reach the floor, check the basement to make sure the vents are open and heating the floor from below.
As always, during finishing, all HVAC systems should be turned off to minimize airborne debris and too much air movement over the floor. After the finish is dry to the touch, the heat should be turned back on immediately to maintain the correct job-site conditions. Once the whole finishing process is complete, be sure the heat will stay on while the finish cures (but make sure the windows are cracked open or there is some other way for the solvent to escape).
Remember that it isn't just the floor that has to be the right temperature. The finish does, too. So, you can't grab the finish that's been sitting in your van all night in an unheated garage and start applying it. Also, each finish has a certain number of freeze/thaw cycles it can endure, so keep that in mind if you work in a cold climate.
Note: This problem can be even harder to deal with over crawlspaces, which lack heat vents to open to heat the floor from below. The only option is usually to close off the crawlspace's outside ventilation and try to heat the crawlspace by opening the hatch and using air movement to force the heat inside the house down into the crawlspace.
Job Site #4: The Gym Sauna
A high school gym in Alabama needs a screen and recoat with waterborne finish in August. The school does have air conditioning, but it's only running in the classroom areas, not the gym. All the gym doors from the school and the outside are open, and there are ceiling fans running. The temperature is about 87 degrees Fahrenheit, and the sky-high relative humidity makes it feel like a sauna in the gym.
The Challenges: As often happens with gym jobs, the job-site conditions are difficult to control and not within the recommended ranges for temperature or humidity, which can cause problems with the finish curing.
The Approach: On gym jobs, the first step is to talk with the maintenance person to find out how much the HVAC system can be run (in this case, not at all), and who is in charge of turning it and any ceiling fans on and off.
While the floor is being screened, all doors should be left open to help move the airborne particulates out of the job site (gym contractors rarely use dust containment equipment). Air movers and large fans should be set up to draw air (and dust) out of the gym. To help make them more effective, plastic film can be hung surrounding the fan or air mover to increase the suction. Once screening is done, the floor should be swept, vacuumed and wet-tacked with a recommended wood floor cleaner.
Once the floor is ready for coating, as suffocating as it seems, all doors to the gym should be shut. Temperature, relative humidity and the floor's moisture content should all be recorded. As always, while applying finish, there should be as little air movement as possible to prevent accelerated finish drying and decrease the amount of dust and other debris being blown onto the finish.
Once coating is done and the finish is skinning over (as early as 30 minutes but possibly 45 minutes or more because of the high humidity conditions), then it's crucial to get as much air movement as possible. The maintenance person should turn the ceiling fans back on, and the fans and air movers at the doorways should go back on to draw the air out of the gym. It's critical that the air be drawn out of the room, not just recirculated. Although the humidity levels will still be high, drawing the air out of the gym will also draw out the solvents, allowing them to migrate out of the finish. The fans should be left on for a minimum of 24 hours; longer is even better.
Note: If oil-based finish were being used instead of waterborne finish in this scenario, the process would be exactly the same, except that it would take longer for the finish to skin over, and the curing process would take much longer.
Job Site #5: Wide Open Spaces
You're going to apply finish on a floor in a grandiose Arizona house that features a vast, open floor plan including a cathedral ceiling.
The Challenges: In tall, open spaces, there is lots of air for the solvent to evaporate into and more air movement. This means there's potential for fast drying of the finish, especially since you're in a dry climate. Fast drying on a big floor can mean lots of flaws in the appearance of your finish, since the product doesn't have as much time to flow and level, and it can make it more difficult to keep a wet edge during application.
The Approach: As always, during application, air flow should be limited as much as possible. All doors and windows should be shut and the HVAC system turned off. Then, it's important to apply the finish with the fastest application method possible, so choose your applicator with that in mind (for waterborne finishes, a large T-bar may be fastest; for poly, a large lambswool block or a T-bar with a woven applicator head). Also, in very low humidity, it can be helpful to apply the finish toward the heavier end of the manufacturer's recommended coverage rates—the thicker the coat, the longer the dry time.
Note: On any large job site, to ensure uniform sheen levels throughout the floor, it's wise to figure out your coverage rate and then mix several gallons of finish into a large, clean container like a 5-gallon bucket. That way you'll avoid the risk of seeing minor differences in the sheen from different 1-gallon containers.
Job Site #6: Job-Site Claustrophobia
You shouldn't have, but as a favor for your best builder client, you agreed to do the wood floors in a house that's in the middle of construction. Because of the tight schedule, you need to install, sand and apply the initial finish coats before the other trades are done. Then, when everything else is complete, you'll apply the final coat.
The Challenges: Having other trades on the job site while you're working on the wood floors is asking for trouble. The industry mantra is that the wood floor contractor should always be the last sub on every job. Other trades on the job site means nearly unlimited potential for dents, dirt, damage and contamination on your finish.
The Approach: While you are in the process of applying finish, you need to be in control of the job site. If you can't do that, your best option is to not do the floor. It is nearly impossible to get a decent finish job when there is other work going on in the house, and if the finish is unacceptable, you aren't going to get paid.
If you already have finish on the floor and other trades are going to be on-site, you probably want to cover the floor, but keep several things in mind. First, covering the floor interferes with curing. Ideally, the finish needs to cure before it's covered; if it hasn't cured, you can end up with finish durability problems, and the finish may look hazy. A good guideline is to wait as long as you would if you were going to put area rugs down after the floor is done. If that isn't possible (and often in these situations, it isn't), the covering should be put down for as short a time as possible. So, if you have a coat of finish down and then the plumber needs to walk through the hallway to work on the bathroom, cover the floor while he's there that day, and then remove the covering as soon as he leaves.
Second, choose the covering wisely. Avoid any materials that contain oily or waxy substances. Many contractors use kraft paper, but the best is probably sheets of corrugated cardboard, which offer some protection from dents when things are dropped on the floor (some suppliers sell rolls of corrugated paper that can be rolled out and cut to fit). Third, before you put the covering down, clean the floor thoroughly. Any dirt trapped under the covering will act like sandpaper on the floor when people walk over it. Fourth, when taping the covering in place, tape only to the other pieces of covering, not the floor itself. Finally, some subs view a covered floor as if it were impervious to anything. Remind everyone on the job that the floor will be damaged by water or other liquids spilled on the floor.
Once you come back for the final coat, clean the floor thoroughly (how long the finish has been down will determine whether you can use a recommended wood floor cleaner or not). As you're cleaning, carefully inspect the floor for damage. Better to fix any problems at that point, before you have the final coat on the floor. Also recheck the moisture content of the floor.
Note: When covering wood floors, always cover every bit of the floor, or you may end up with variations in the color of the wood, causing a total resand. This is especially true for many exotic species, which can change color dramatically with light exposure.
As any wise wood flooring contractor will tell you, you can do the most beautiful installation and sanding job of your career, but if there's something wrong with the finish, your invoice will go unpaid until you fix the problem. That's why it's critical to understand the basics of how finish works, and then think about how each individual job site will affect your finish. Once you do, you can produce a beautifully finished floor, even in imperfect finishing conditions.
Sources for this article included Johannes Boonstra, Synteko; Cameron DeMar, Glitsa American Inc.; Craig Dupra, Lenmar Inc.; John Mayers, Dura Seal; Todd Schutte, BonaKemi USA; and Brent Sorbet, Basic Coatings LLC.