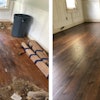

In last issue's Step By Step column, we began a floor repair for three boards. After the floor was stained, dents in three boards had become apparent and had to be removed. Without using any topnails or damaging any nearby boards, the offending boards were removed and replaced. Now it's time to sand them down and stain them to blend in with the original floor.
The key to any good stain job is the right sanding job. This repair is no different. In order for the repair to blend in, the new boards need to be sanded, scraped and hand-sanded ending with the same abrasive grit as the rest of the floor. With the right techniques, the boards can be blended in so that no one will ever know it was a repair.
Necessary materials:
- stain
- new abrasives
- rags
Necessary tools:
- edger
- hand-scraper
Step 1:

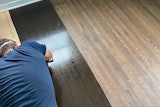
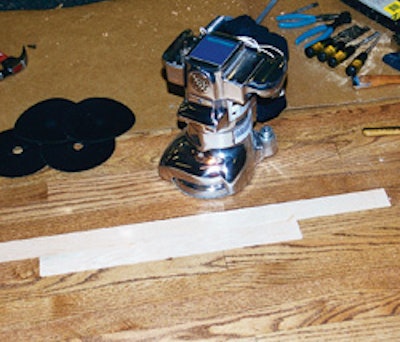
The floor needs to be sanded down to the level of the rest of the floor. First, the edger is used, feathering out substantially into the surrounding boards. Typically, 80- or 100-grit is used. Knowing your edger set-up is crucial to doing this well (see sidebar on page 109).
Step 2:

A sharp hand-scraper is the most important part of a good stain repair. It should be sharpened so that instead of a flat blade, the edges are contoured. This keep the tips from cutting in and gives you the ability to tilt the scraper to adjust how wide you want to cut. You will use this, along with changes in blade angle and the scraper's pitch to the floor, to cut precisely where and how you need to.
Step 3:

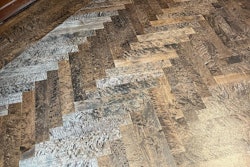
In order for the stain or finish to blend into the rest of the floor, it is helpful to "chase the grain." Scrape into surrounding boards, following the pattern of the grain and skipping about every other grain pattern. Start in the middle and work your way out.
Step 4:

Scraping the floor closes the grain. If left like that, the stain would not take as well and would appear lighter in the repair. To avoid this and open up the grain, abrading the floor continues. Use the same abrasive grit that was last used with the big machine—usually 80 or 100. Edger paper works well for this (here, a piece of abrasive from the drum machine is used). With this abrasive, stay within the damaged area.
Step 5:

Just as you should on any sanding job, remember to clean diligently between each sanding. If you don't, the debris left will create more scratches in the floor.
The next abrasive used for this floor is a maroon pad with abrasive strips. Typically, grits 180 or 240 are used in this step. At this point, don't be afraid to overlap generously into surrounding boards.
Step 6:

The floor is again hand-sanded. Note the hand position during sanding—the flat part of the bottom of the hand is used. This avoids leaving finger marks in the floor, which would cause the stain to take unevenly. Also, sanding is done in only one direction. For this grit, go out even a little farther into the rest of the floor.
Sweep and vacuum the floor so it is as clean as possible before stain application.
Step 7:

If at all possible, find out which brand and color of stain were used on the floor. If it was a job you did, you should have this information on file. If you don't know, do a test board in an inconspicuous place such as a closet. Knowing your stain colors is important.
Apply the stain on the floor and wipe it off as you would with any other job. Of course, it will appear darker than the rest of the floor while wet. Remember to dispose of stain rags safely to avoid spontaneous combustion.
Step 8:

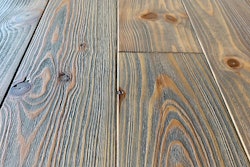
After drying briefly, the replaced boards are indistinguishable from the original floor. The customer would never be able to pick out which are the repaired boards.
As with any other job, don't rush drying times. Although it can be tempting to go over the floor right away with a coat of finish, you need to allow the stain to dry completely before coating. After that, the only step left is to ask for your check.
KNOW YOUR EDGERIdentify the cut:
The standard edger cut is a little wider than the size of a quarter. Typically, it is located between 11 and 2 o'clock. To identify exactly where and how much your edger is cutting, place the edger on the floor and run it for two to three seconds without moving the unit. Look for the scratch pattern—the cut should be 1 1/2 inches deep (from the front back) and not dig in toward the center of the pad.
Clocking the edger:
Once the cut is located, "clock" the edger so the cut is working with you, not against you. A cross-cut flattens the board faster and reduces dish-out. The edger should never pull across the grain or be uncontrollable. An edger that is set up correctly can be run with one hand, allowing the operator to feel the floor with the other hand. As the board becomes flatter, reduce the angle of the cut.
Feather it out:
Now that the board is flat and the same height as the field, clock the edger so the cut or scratch is with the grain. This step makes the handwork easier and hides the work done with the edger. The key is using the edger just enough so the replaced board looks like the field. Use a straightedge across the replaced board and feel it with your hands so you can tell when you're done. |