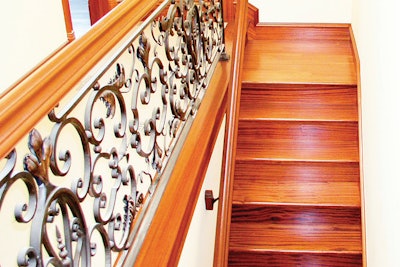
Historically, the hardwood flooring contractor's job ended on level ground and an experienced trim carpenter would be called in to construct stairs.
But now, more and more flooring contractors are taking on this task themselves and are being paid accordingly. The following process illustrates one method of installing boxed-in stairs. Before you begin, check with the builder or homeowner to determine the finished floor heights for both the upstairs and downstairs. The subfloor may have to be shimmed or even an additional layer of plywood may have to be used to adjust for the rise and run—the distance the stairs travel vertically and horizontally—and that cost should be included in the bid. Consult local building codes for minimum tread depth and riser height. Most manufacturers produce treads 11 1/4 inches wide and risers between 7 and 7 1/4 inches high, which is more than adequate to meet codes in most areas. Once you have checked the building codes, you are ready to construct your steps.
SUPPLY LIST
- treads and risers
- level
- tape measure
- pencil
- chop saw or jigsaw
- belt sander
- table saw
- orbital sander
- elastomeric, polyurethane-based adhesive
- small-diameter nails
Step 1

Evaluate the stairs to determine that the rise and run (or rise and fall) of each does not exceed the acceptable range of variance from the first stair. Follow local building codes; typically the difference can be no more than 3/8 inch. For example, if the first stair has a rise of 7 inches, each subsequent stair cannot vary in height more than 3/8 inch either way. This is a safety measure to prevent tripping.
Step 2

Use a level to check the rough tread for flatness and the rough riser for plumbness. Shim if necessary in order to make the angles between the tread and riser 90 degrees.
Step 3

Using the plywood base, accurately measure for the length of the tread. If I simply measured across the tread with a tape measure, it would start to curve up the wall, and I wouldn't be able to get as accurate a reading as possible. Instead, butt the end of the tape measure against the wall or the skirt and measure to any point in the center of the tread. In this case, I went out 21 inches and marked a point on the tread.
Step 4

Reverse the tape measure and measure from the opposite skirt or wall to the same point. Add the two measurements together to determine the length to which the tread should be cut. Repeat this process for the first riser.
Step 5

Use these measurements to cut the tread and riser for this first step. Accuracy is crucial. Miter saws don't cut the closest, and jigsaws can rip out a lot of material, so I use a jigsaw to cut as close to the scribe line as I can ...
Step 6

... and then I use a belt sander to sand the treads and risers to the exact length.
Step 7

Repeat Steps 2 through 5 for each stair. Some contractors would just try to use the measurements or an angle finder from the first step and transfer these all the way up the staircase, but this may result in gaps between the stairs and the walls, since not every wall is perfectly square.
Step 8

Dry-fit the treads and risers. Never force a tread or riser into place. If it's too snug, remove and trim it as necessary. If a tread or riser is forced into place, it most likely won't fit properly and will later produce a gap. Back-cut a slight angle on the riser ends approximately 1/4 inch behind the face. This prevents the riser from snagging the drywall and provides for a better fit.
Step 9


Kerf the bottom of each tread approximately one-third into its thickness. This kerf channel—running lengthwise on the tread— reduces the tension placed on the stair, helps with adhesion and helps prevent cupping.
Step 10

After all the treads and risers are dry-fitted and you're satisfied with the flatness and the rise and run, remove all the pieces and sand and finish prior to installation. This avoids the headache of taping off walls, moldings and skirts.
Step 11

Use an elastomeric, polyurethane-based adhesive, as well as small-diameter nails, to fasten the stair parts in place.


