“Just stop and look at it.” It’s a mantra that Will Dennis of Plaistow, N.H.-based Premier Woodcrafting LLC employs when solving a particularly challenging flooring puzzle—not always an easy task on a busy, high-pressure job site.
"To me, when someone gives you plans and says, ‘Go ahead and do something crazy,' you hyperventilate a little bit because you're panicked,” he says. “But I think once you calm down and really look at it … all it is is just connecting dots.”
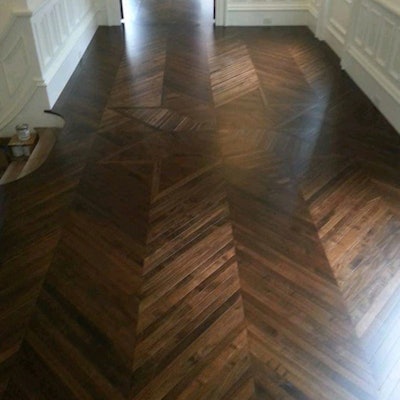
Dennis connected those dots in this 4,000-square-foot Boston brownstone “full-gut” renovation, which included 1¾-by-29-inch walnut chevron, walnut Versailles panels and, the pièce de résistance, a 6-foot walnut star intertwined with the chevron.
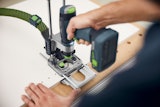
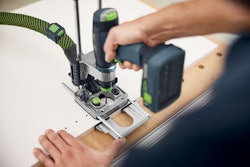
Dennis and his crew began by cutting the boards using a track saw and sanding the edges to give them a micro-bevel. “They wanted it to look old but be new,” Dennis says of the clients. The Versailles panels were shipped ready for installation. “In chevron and herringbone, it's probably more difficult to do it when it's long versus wide,” Dennis says. “Because when they're long, you can curve them a lot easier by accident. When they're short they stay pretty true." Dennis used full-spread adhesive and nails to install the floorboards, which he splined together. They also had to scribe the flooring to a “super-detailed” casing installed throughout the house.

It was a busy job site, and Dennis and his crew had to “flip flop” up and down stairs frequently in the 24-foot-wide home to accommodate other work going on. But the most challenging part of the project was figuring out how to achieve the walnut star on the third floor. Dennis recalls a crew member lamenting, “Dude, I’ll never figure this out.” It was then that Dennis’ “stop and look at it” philosophy came into play.
“The points had to line up in the mitered line of the chevron, and we knew how far apart those mitered lines were exactly,” Dennis says. “So all I did was go in there and snap in that chevron that had to line up from the very front of the unit to the back of the unit, which was like 75 feet.” The doors that separated the rooms on the floor were in line with two windows at the end wall, where Dennis found his center.
“So what you need to do is just snap that control line and then everything went off of that, and you just snap all the lines where the miters are going to go, and that pretty much tells you where all the points are going to hit in the star,” Dennis says.
Dennis drew the star out on the subfloor with a Sharpie. He and his crew then started in the middle of the star and worked outward, constantly checking to make sure they were staying true to the lines as they worked their way around.
"You have zero tolerance. Zero,” he says. “That mitered line, when I got all the way out to the end of the star, I had barely a sixteenth of an inch that I could play with because I can't adjust the size of the chevron. So it had to all fall right where it had to fall."
After the crew had followed Dennis’ map to completion of the star, the architect who commissioned the star design was impressed.
“The architect actually came up stairs and looked at us and said, 'I didn't even know how you guys were going to do that, that was amazing,’” Dennis recalls.

When everything was installed, Dennis and his crew buffed the floor up to 150-grit, then applied three coats of urethane finish.
Dennis says his favorite part of the three-month project was undoubtedly the hardest part—creating the walnut star.
“When you spend that much time laying it out and sweating that it's gonna work, and then you get to the end and it did work … yeah, that's probably the most satisfying part of the job,” he says. “It's satisfying-slash-relieved."
Taking the time to stop and figure out how to do it right turned out to be a huge time saver, as well. "I could do one again, probably in a quarter of the time,” says Dennis. “It's all just about learning how to do it."
Suppliers:
Abrasives: Norton Abrasives | Buffer, Dust collection, Edger, Multi-disc: American Sanders | Finish: Bona US | Nailer: Primatech | Palm sander: Festool | Saws: Festool, Makita