
Janka Explained
I have seen various Janka numbers for the same species of wood. How can this be?
Len Daubler, manager-product support for hard surfaces at Shaw Industries, answers:
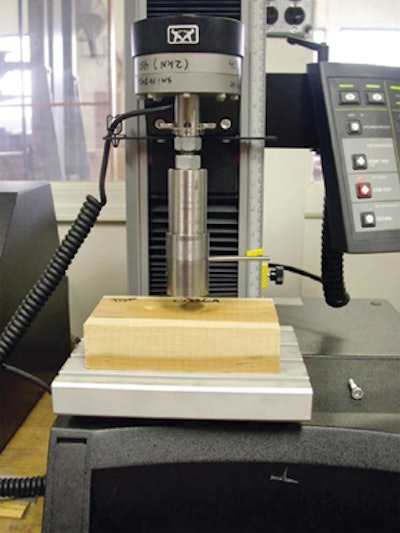
A Janka Hardness test is part of ASTM D 1037 "Standard Test Methods for Evaluating Properties of Wood-Base Fiber and Particle Panel Materials." Hardness is defined as "resistance to indentation using a modified Janka hardness test." The test is a measurement of the load (force) required to embed a modified Janka ball, 0.444 inch in diameter, to one half its diameter into the wood specimen. Two areas on the face of a specimen that is 1 inch thick, 6 inches long and 3 inches wide are tested, and the information is recorded and then averaged.
So what does this mean, and why do these numbers vary? In simple terms, let's refer to the Janka number for red oak, which according to the Wood Handbook is 1290. Let's remember the number generated is an average of two test sites taken from one specimen, so in essence these numbers are a reference point to use and are not an absolute. Each time a specimen is tested, the numbers and average may be different.
Additionally, when looking at an engineered product's Janka number, you have a number of variables that can affect that particular product's hardness rating or psi, which involves the number of plies making up the overall thickness of the product and the construction of the material. Even the species of the underlying plies can contribute to a higher or lower Janka number. For example, say a three-ply red oak product's top ply is red oak, the second ply is balsa wood and the bottom ply is red oak. Now consider a three-ply red oak product that is red oak throughout all plies. These two very different assemblies could produce rather starkly different Janka ratings. Long story short: We have to remember that a Janka number can vary, and no matter how high it is, all wood products can dent or scratch.
On the Level
Can I pour a self-leveling underlayment over an existing ceramic floor and then glue down a wood floor over it?
Enos Farnsworth, president-North America at Florence, Ala.-based Schönox High Performance Subfloors Inc., answers:
Yes, there are new products on the market today that can be poured directly over just about any type of subfloor, including rubber, VCT, vinyl, ceramic, cut-back adhesive, gypsum concrete, plywood, OSB and more.
This newer technology allows the flooring contractor to pour self-leveling compounds over many types of substrates without the labor of tearing out the old floor, and it creates an extremely flat surface. The ability to install directly over varying substrates without the cost of deconstruction while reducing the potential for issues like hollow spots is a great advantage for a professional flooring contractor and one they should use to promote themselves with consumers who also considering the DIY option.
The process for using these self-leveling products is simple: sweep the floor, apply a primer and then pour the product at a thickness of 1/8 to ¼ inch. It needs to dry overnight and then is ready for a wood floor. Once cured, the self-leveling compounds are porous and are suitable for varying types of adhesives-check with your adhesive manufacturer to be sure.
To Test or Not to Test?
The architect I'm working with thinks we should test the concrete slab because it's required in the NWFA Installation Guidelines. But it isn't required by the adhesive manufacturer, so we don't think we should have to. Who's right?
Frank Kroupa, senior director of technical training at the National Wood Flooring Association, answers:
Good question. Testing moisture in slabs is one of the most common topics that comes up on the NWFA tech hotline, and it isn't surprising. Different adhesive manufacturers have different requirements, the flooring manufacturer may have different requirements, and the NWFA Installation Guidelines may say something different, too. For example, in this case, the adhesive manufacturer doesn't require any moisture testing at all, but the NWFA says you should use one of three tests. Yet another adhesive manufacturer will accept an electronic moisture test that isn't accepted under the Guidelines. It makes it difficult for contractors to know what they have to do.
Remember that the manufacturer's directions always supersede the Installation Guidelines. If you run into trouble on a job, you'll only have the support of the adhesive or flooring manufacturers if you followed their directions for that product.
You'll never get into trouble for doing more testing than is required, though. Testing the slab does take extra time and money, but if it were me, I would want the extra insurance of knowing what the moisture levels were in that slab before I installed the floor.