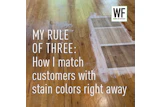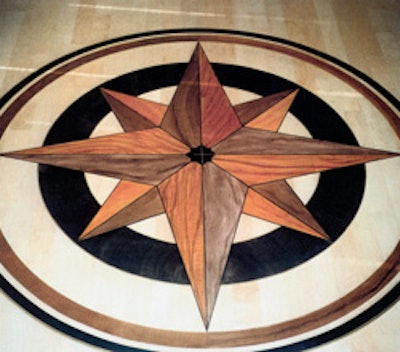

When you want the look of an exotic inlay, you don't always have to use exotic species or even create an inlay at all. It's relatively easy, fast and low-cost to create the illusion of an inlay like the one at left by using artists' tints. Once you have the methods down, it's a matter of using the layout skills you already have to apply easy-release tape and mark off the areas to be painted.
Here, we show how to make a maple board appear to be mahogany. You can also easily make maple look like other species—a single application of a black base can replicate wenge; using one layer of raw siena creates a teak color, for example.
This technique can be done with either a job-site finished floor or a prefinished floor. If it's a job-site-finished floor, it needs to already have at least two dry finish coats before painting. If it's a prefinished product, be careful with microbevels, which are more difficult to tape off.
SUPPLY LIST
- easy release tape
- hand-held roller
- high-grit abrasive
- water
- tack cloth
- latex water-based artist tints in necessary colors
- assortment of brushes
- finish
- sponge
Step 1

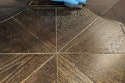
Here on the sample board we are simulating the process for taping off the floor as we would on a real floor (such as the one in the opener photo above). Use easy-release tape to carefully mark off the areas to be painted, and roll the tape to ensure a good bond at the edges.
Step 2

Once the floor is taped off, it must be abraded. Use a grit of at least 220; here I'm abrading the board with 320. If you're doing a large area, you can use a buffer and a maroon pad. Abrading the floor helps the tints stick to the floor and also heats up the tape, creating a better bond at the edges. After abrading, tack the floor with a slightly wet cloth.
Step 3

Now brush on the base coat. Here, to replicate mahogany, I'm using a latex water-based artist tint in a terracotta color and applying it with a brush. When imitating other species, always match the base coat to the background color of that species. Once the tint is dry, apply a finish coat of whatever floor finish you're using.
Step 4

Note that for all these steps, the tints and finishes may require more dry time than you expect.
Once the finish is dry, use a sponge to wet the area.
Step 5

Dilute your next color—here, raw umber—with water. Then apply the raw umber with a long smooth stroke down the board.
Step 6

Next, immediately go over the same area, but this time, slightly jiggle the brush back and forth as you go down the board, creating the look of grain. To soften the effect, just barely touch the tint in a back-and-forth motion with a makeup brush.
Step 7

To create a fleck effect, you can use a small paintbrush or the tip of your finger and then lightly go over the area with the makeup brush.
Step 8

Once the tint is completely dried, apply another coat of finish. Remove the tape before the finish dries (remember to pull the tape away at the correct angle).