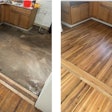

Most installers are familiar with repairing damaged boards on a solid 3/4-inch floor, but with the increasing popularity of prefinished floating floors, installers face new challenges in making repairs on these types of floors. Repairing prefinished floors requires extra care to prevent damaging the surrounding planks. If one or two planks become damaged, knowing how to properly repair the floor gives you another skill to add to your arsenal.
Depending on the age of the floor, the color or the finish sheen of the existing floor may be different than that of the new plank. To achieve the best color match, use planks left over from the original installation as replacements. The right tools and proper technique can make these floors look as good as new, with no sign that a repair has been done. Here is a guide for how to make that flawless repair.
SUPPLY LIST
- Circular saw
- Crowbar
- Drill
- Hammer or mallet
- Pliers
- Replacement planks
- Screwdriver
- Table saw
- Tapping block
- Utility knife
- Vacuum
- Wood glue
Step 1

Identify and mark the damaged boards.
Step 2

Begin by drilling holes in the corners of the damaged plank to serve as stopping points for the saw. These will also provide marking points for creating a sawing pattern. Be sure to vacuum dust and wood chips at each step of the process. The dust contains aluminum oxide that can damage the finish.
Step 3

Mark a pattern on the damaged board that angles in from the corners and outlines a strip about 2 inches wide in the center. When the pattern is complete, the ends of the plank should resemble a trapezoid.
Step 4

Saw the depth of the plank along its length, using your marked guide. As you reach the ends, saw across the plank at the marked horizontal lines.
Step 5

Use a utility knife to cut along the angled markings at the end of the planks.
Step 6

Remove the pieces using a screwdriver to lift the center section if needed, and use pliers to unlock the joints for the side pieces.
Step 7

A crowbar end can be used to remove the end piece. Once the damaged plank is removed, check to see if the saw cut through the moisture barrier underneath the floor. If it did, tape any cuts or replace any damaged sections.
Step 8

Use a tapping block to move the planks at each end of the run approximately 1/4 inch back from the opening.
Step 9

Use a utility knife to carefully remove any chips or splinters from the tongue side of the remaining planks in the opening, and remove any material that may still be in the groove side of the planks. In the groove sides, insert a strip of wood so that approximately 1/4 inch extends from the opening. When complete, the opening will appear to have tongues on all four sides.
Step 10

To prepare the replacement plank, use a table saw to cut away the bottom of the groove on the groove side. This lip will be glued to the tongues of the existing planks.
Step 11

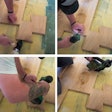
Run a bead of glue completely around the edges of the existing floor planks, then place the new plank into position.
Step 12

Tap the planks at the end of the run to close the gaps at the end of the new plank.
Step 13

Remove any excess glue from the floor.
Step 14

Use weight to hold the new plank in place until the glue sets.


