 Small slats of hardwood wait to be cut into veneers for a floating longstrip floor.
Editor's Note: This is the last in our three-part series on How Wood Floors Are Made. The December/January issue dealt with forestry and lumber milling and February/March detailed the production of solid, unfinished wood flooring. This final article in the series covers the manufacture of engineered and prefinished flooring.
While manufacturing solid strip flooring is a fairly quick, straightforward task that hasn't changed much over the years, manufacturing engineered and prefinished wood floors is a much more complex, multifaceted process that can vary considerably from mill to mill.
Engineered wood flooring manufacturers need veneer to make their product, and how they get it varies from company to company. Some manufacturers buy the veneer from other sources. Other companies create their own "sliced" (also called "sawn" or "lumber-cut") veneer by running dried lumber through a band saw to create thin strips of veneer.
 Logs are kept moist before they are processed into peeled hardwood veneer.
Still other engineered wood flooring mills may begin their manufacturing with the arrival of raw tree trunks, which eventually will become "peeled" or "rotary-cut" veneer. Before purchase, the logs' top and bottom ends are measured to determine their price; then they are marked, weighed and stacked in the mill before they are cut to a specific length.
If the logs are not to be used immediately, they are stored, and methods for this vary. Regardless, the most important part of storage is that the logs must remain wet, either by being stored in ponds of water at the mill or by having water sprayed on them as they are stacked outside.
Once needed, the logs enter the mill again and are run through the debarker, after which they are put into steam vats, where they cook in water at very high temperatures. This process saturates the fibers of the already-wet logs, making them soft and flexible for the milling process.
 Fresh out of the steam vat, the log is held up by spindles for the peeling process.
Depending on the mill, the time spent in the steam vats could range from a day to weeks. Afterwards, the logs travel down a conveyor to be cut to length again, after which they are headed for the lathe. This machine uses spindles on each end to pick up the logs. The log is rotated once, during which laser sights tell the computer how many revolutions it will take to make the log round. The spinning log is then cut round and the cutting blade shaves the log into long pieces of thin veneer.
Next, the still-wet veneer travels down a conveyor, passing under an electronic eye that reads where voids and dark spots are on the veneer. The clipper trims these areas out, maximizing the quality of the veneer, and also cuts the veneer to specific widths, all at very high speeds.
 Small slices of veneer are put into a pattern and glued together for a floated floor.
The clipping process results in partial and full sheets of veneer, which are stacked before being moved by a forklift over to the drier. At this point, the sheets are unloaded and subjected to a combination of hot air — as high as 300 degrees — and steam. The steam is slowly reduced, resulting in the drying of the veneers with as little damage as possible. Whereas the veneer went into the drier with a moisture content of anywhere from 30 to 60 percent, it leaves the drier at a moisture content of 6 to 8 percent, and has shrunk several inches from its previous dimensions. It is vital to the product quality that the moisture content of all layers is at acceptable, consistent levels.
 Stacks of peeled veneer wait to be dried and assembled.
Now the veneers are ready to be assembled. The number of plies in the final flooring product determines how many veneers are glued together. Every other veneer is rotated 90 degrees before gluing so that the grain patterns run in opposite directions, increasing the dimensional stability of the final product. Some engineered manufacturers use softwood or less-expensive species or grades of hardwood for the bottom layers of the flooring, using the face-grade hardwood veneer only for the surface layer, while others use hardwood throughout.
At this stage, the glue is extremely wet — not much bonding is occurring. The panels are sent to a steam press, at which point the glue "trips up," or sets. Some companies precede this step with a repress, which initiates the glue setup process, speeding up time for the steam press.
 A wide-belt sander accommodates 14 planks in a single layer, sanding the top and bottom of the material at the same time.
The panels now endure a series of quality-control checks. Pieces are chipped off at random to check how well the glue was spread and whether it has bonded correctly. Flatness, thickness and moisture content are also monitored for accuracy.
For floating or longstrip products, the assembly process is somewhat different, since each piece will look like several rows of flooring. For the surface layer, small blocks are sliced into slats. These slats are then cut to the necessary thicknesses and lengths for the desired pattern. The order in which the pieces are assembled can vary according to manufacturer. Some manufacturers assemble the pattern as the individual slats are pressed to the cross-laminated panels. Others use a process that glues the top slats to each other, then to the panels.
 Floating floors enter the stainer and exit with a uniform color.
For both floating floors and other engineered products, the next step is cutting grooves (also referred to as "cross curves" or "kerfs") into the backside of the panels. Depending on the manufacturer and the make-up of the panel, the groove may barely skim the board or may go through an entire ply of the product.
The panels now become individual pieces of flooring as the gang ripsaw slices them to width and may also square the ends. (Some floating floors are assembled to the needed width to begin with, and thus don't need this step.) At this point, the engineered flooring process briefly resembles the milling of solid hardwood flooring. A presander involving one or two grits of sandpaper brings the flooring to the correct dimensional thickness — an important process to ensure correct fit of the tongue and groove, which is the next step. The sidematcher not only mills the tongue and groove onto the sides of the boards, but also mills a bevel or ease-edge if necessary.
 Finish is applied with a roller and cured immediately.
Again, quality control inspectors monitor the flooring at random by measuring it with a caliper to determine thickness. The tongues and grooves are checked, as well, and workers use a lay-up table to push pieces of flooring together, checking for fit and flatness.
Defects are cut out of the flooring and the endmatcher puts the tongue and groove on the ends, and the manufacturing line turns to the highly specialized process for prefinished flooring. Workers use filler for small imperfections, and major defects return to be cut out and the respective flooring is endmatched again.
Of course, prefinishing methods vary from manufacturer to manufacturer. In general, prefinishing begins with the flooring receiving another sanding — the underside is lightly sanded, and the top face is sanded with three grits, ranging anywhere from 80 to 220 grit. If the floor is to be stained, the stain is applied with rollers, then brushed in by brushes that rotate in opposite directions. Because the stain must dry quickly and absolutely, it is cured with ultraviolet light.
 At a quality control station, the completed product is inspected for milling by assembling several pieces.
Before the floors can have the durable top coats of finish applied, they are run through the "denibber" — a device with oscillating heads and a vacuum that removes any remaining burrs, dust or grain raise.
Now the flooring is ready for the sealers and top coats (the "walk-on" layers). Like the stain, these are usually applied with a roller and are typically UV-cured, as well. In between the first finish application and subsequent coats, the flooring is lightly abraded to promote adhesion.
The finished product is now graded according to whatever proprietary grades the specific company has. At random, the products will go through a final inspection — close attention is paid to color, gloss, finish bonding and finish thickness, among other factors.
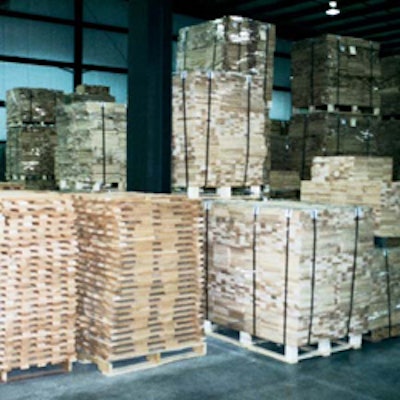
 Packaging into cartons is the final step.
Unlike most unfinished solid flooring, the prefinished flooring is boxed and marked with the square footage. The cartons are weighed to ensure the correct amount is enclosed, and they are then stamped with the run number — the final step in the careful monitoring that follows prefinished, engineered flooring every step of the way.