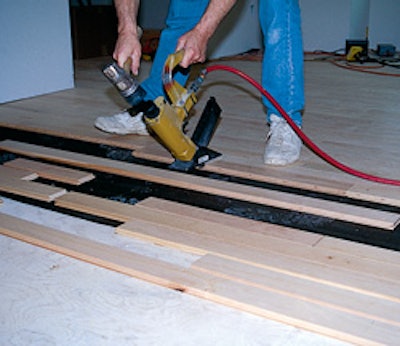

Wood flooring installers know that the nailer is the workhorse of all the tools in their box. Many contractors simply load and go without worrying about doing much to their nailers. While these sturdy tools require a minimal amount of maintenance, they do need routine care to ensure they function properly. The small amount of time you take to care for your nailer could prevent lost time on the job while you send your faulty nailer to the shop or remove and replace boards damaged by misfired fasteners. Whether you're using a pneumatic or manual nailer, follow these easy steps to keep your nailer doing its job—making you money. All nailers differ slightly, so refer to the manufacturer for maintenance specifics.
Necessary tools and supplies:
- Manufacturer's recommended oil
- Clean rag
- Air compressor
Step 1:


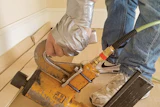
It's important to keep the base of the nailer clean. Wipe excess dust with a clean rag or blow the dust off with an air compressor. This step is especially important if you're installing prefinished floors to prevent scratching the finish.
Step 2:

Also, wipe all dust and debris from the outside of the nailer.
Step 3:

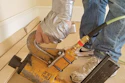
If you're using a pneumatic nailer, add one or two drops of oil to the air intake. Check with the manufacturer of your nailer for the correct type of oil to use, how much you should use and how often. Some manufacturers require adding oil twice a day, depending on the amount of use. Don't add the oil over the wood floor, because errant drops could cause finish contamination.
Step 4:

With a pneumatic nailer, it's also important to make sure your compressor is set at the correct psi recommended by the manufacturer. When not in use, always disconnect the tool from the air hose; this is not only a safety measure, but also helps prevent the parts from wearing prematurely. Release air from the compressor every day to remove moisture that builds up inside. If possible, use a moisture filter on the compressor to prevent water droplets from forming and going into the nailer.
Step 5:

Check that the nailer is working properly. If air is escaping from a pneumatic tool, the O-rings might need to be replaced. Most manufacturers offer an O-ring replacement kit, but if you don't feel comfortable doing it yourself, package up the tool and send it to an authorized service center. Refer to the manufacturer for a periodic service schedule.
Step 6a:

If nails aren't setting correctly, the driving blade could be worn or broken. With a manual nailer, the spring could also be broken. Follow these steps to check the driving blade and spring. First, remove the hitch pin from the pin.
Step 6b:

Pull the pin out to release the plunger, then remove the plunger assembly.
Step 6c:

Slide the rubber blade retainer down to release the driving blade.
Step 6d:

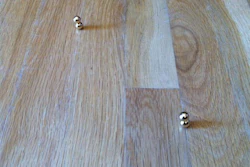
Remove the driving blade, and check for wear or damage. Damaged driving blades should be replaced or the tool will not work properly. While you have the blade out, remove the dust with a rag or air compressor.
Step 6e:

Check the spring for damage, and clean it, as well. If everything looks to be in good condition, reassemble the plunger unit.
Step 7:

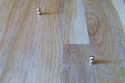
Now that the nailer is clean and functional, load cleats and begin working.