Board Objections
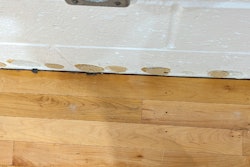
I installed a prefinished floor for a customer and now he’s saying he doesn’t like some of the boards. How can I avoid this?
Rusty Swindoll, technical services manager at the NWFA, answers:
First, before starting any job, make sure that the flooring you’re about to install is actually what the customer has selected. When I had my contracting business, I always met with the homeowner out at the job when the flooring arrived and asked, “Is this what you picked out?” One time the distributor delivered wood for a 3,000-square-foot job and it was the wrong grade. If I had installed it, it would have been a costly mistake.
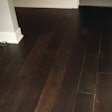
Even if it is the right floor, be careful to notice any boards that may stand out. Typically, manufacturers allow up to 5 percent for off-grade pieces. If you are seeing too many of these pieces, stop and call the supplier. I remember another job where I was installing a hallway with a glue-down engineered floor. I wasn’t paying enough attention and the homeowner came through and noticed a board I shouldn’t have installed because the darker color stood out. All I did was say, “No problem, ma’am, I will replace that board.” There is no sense to explain to customers about the percentages allowed for boards that aren’t perfect.
When you’re showing samples of a floor, it’s better to show a more drastic variation, because if you make it look better than it really is, somebody is going to call back and say their floor isn’t like the sample. Show all the character marks and different shades that are possible. While you are racking is when you should spot any boards that could draw attention—you can replace them before they are fastened or glued to the substrate. Make the customer happy and remember to be more careful in the future about preparing the customer for what the floor will really look like.
Pneumatic Lifespans
How do I extend the life of my pneumatic tools?
Ed Brandt, engineering manager at Duo-Fast Floor Fastening Systems, answers:
If you follow some simple rules, today’s pneumatic tools will last a long time. Keep the following in mind.For compressors, using the correct size for the job, correct air pressure and routine maintenance will keep your tools working longer. A compressor that cannot provide the correct air pressure or is set too high is bad for the tools. Air pressure set too low will result in fastener jams and blade damage; air pressure set too high (above the pressure needed to drive the fastener flush) will result in the tool’s blade and O-rings degrading prematurely. Routine maintenance of the air compressor, such as cleaning the filter and bleeding the water from the reservoir tank, are important. A dirty filter coupled with water in the compressor creates rust and results in abrasive particles entering the tool and destroying the O-rings.
For oil-lubricated tools, lubricate with a few drops of oil only per the manufacturer’s instructions. Clean, inspect, and check tools. If you find loose screws, tighten them. Look for damaged parts and air leaks, and if you find anything out of order, get it looked at immediately. Schedule tool maintenance. Working conditions are different around the country; your tool distributor knows your tool and working conditions and can put you on the right schedule.
Tools are made to drive fasteners, not for hammering. If you use only fasteners the manufacturer recommends, you’ll have fewer fastener jams and less wear. Stick with these guidelines and your pneumatic tool should last you a long, long time.
Testing Waterborne Sealers
I sanded the floor and applied my water-based sealer. How do I know when it is ready to be coated over?
Galen Fitzel, sander specialist at 3M, answers:
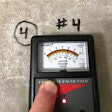
Finish manufacturers offer guidelines for how long it generally takes their sealers and finishes to be dry enough to coat over, but job-site conditions can affect the standard time frames. The best way to check when a water-based finish is ready for another coat is to use a non-invasive moisture meter. Take a reading of the floor’s moisture content (MC) right before the floor is coated—that will give you a baseline MC to measure against as the finish dries. The MC should be same as the original MC—at most no more than one point higher—before you apply another coat. Digital readouts give you an exact number, so there is no room for interpretation.
Let’s say it’s an April shower day. If the MC of the floor was 8% before coating and you’ve waited your usual amount of time before applying another coat but the floor reads 12%, you know that the finish isn’t ready for another coat. Most of us have more time than money—we always find time to go back and fix a job we shouldn’t have rushed.
Log all your MC readings, including the subfloor, install, sand and finish. If there is ever a problem and an inspector looks at the floor, you’ll want to prove you tested and recorded the MC on the job. And, always follow the manufacturer’s recommendations.


