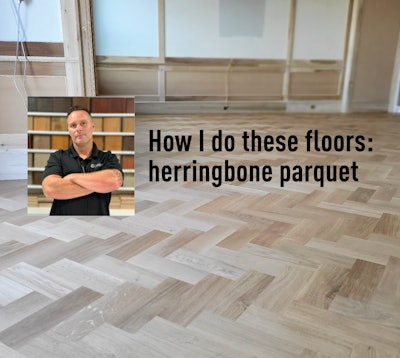
Herringbone is becoming more and more popular in the bigger cities we work in, including San Francisco. If you haven’t done a herringbone floor before, it can be a little intimidating, but really it’s just a precision puzzle. If you get the subfloor flat and are careful about snapping the correct lines and staying on those lines, it’s pretty straightforward. Here’s how we install, sand and finish herringbone floors.
Step #1


After my subfloor prep is complete (see the sidebar at the bottom of this article), my next step is to doublecheck the milling. (In these pics, I’m showing this on the already-installed floor, but I do this before I start a job and periodically as I’m installing.) If your milling is off, you will start to veer off your lines. On this particular job we had ordered chevron for the customer, but they changed their minds and ended up wanting herringbone instead, so we had to mill the chevron into herringbone, which is why this floor ended up being a very small herringbone—5 inches wide and 15 inches long. With herringbone, your length must be a multiple of the width, or your pattern won’t go together. It’s important to check the length and width, as well as the squareness of the board ends.
Step #2


To figure out my lines, I need to find my control line, which is the dead center of my herringbone pattern between the left and right piece. To get that calculation I use a speed square on one of the boards to draw a 45-degree diagonal line (#2 in the photo below). Then I measure the distance between line #2 and the point (line #3 in this photo). On this floor that distance is 3½ inches. I divide that by 2 to calculate the distance (13/4 inch) to the center of the pattern, which is where my control line will be (line #1).

Step #3

Now I want to look at my room and square it out, just like I do on any other hardwood floor, whether it’s a straight-lay or diagonal or herringbone. I snap my control line (my red line), then go ahead and measure over 1¾ inch on each side of that line to create my running lines (in blue). (For these pics I snapped the lines on top of the installed floor, not the subfloor, so you can see how the snapped lines align with my pattern.) The blue lines are the points of all the 90-degree angles on both left and right sides, which will tell me if I’m staying square as I lay the floor.
Step #4


Next I want to make sure I’m staying on a 45-degree angle, so I run a speed square off line #1 to snap diagonal lines (the lines marked #4 and #5 in red above) onto the subfloor. Once I have that, I cut a piece of plywood that’s totally square and anchor that to my subfloor on the lines. That becomes my starting point—it’s my backer board where I start installing my right and left sides. (Here, I’m showing it on top of the installed floor, below.)

Step #5


Using my backer board, I’ll run my right and left boards all the way up a row, checking the whole time that I’m on my running lines. When I get to the end of this row, I turn around and come back down toward where I started.
Once I get my running lines snapped, I capture my measurement between the running lines and the next row and basically transfer those lines over for each row, however large the room is. This way I know where my points need to be. I’m anchoring off the row I was just in, but I need to know where my floating side needs to be in order to make sure I’m square on the row after that.
Herringbones are usually grooved on three sides, on each butt end and on one side. It’s important to use spline to lock it in place any time the boards aren’t connected by a tongue and groove.
We glue our herringbone floors—we know there won’t be movement in the floor as we’re laying it, and it’s going to keep all of every single board tight to the subfloor. That’s particularly important to us here in the Bay Area, where we have many microclimates and fluctuations in temperature and humidity. You can see in these pics that we clean up the glue as we go—any glue that might set up and become an obstruction on the floor will just become a headache later on. We also spot-fill as we go, because the less there is for the client to notice, even this early in the job, the less likely they’ll be on their hands and knees looking at the floor for something to fix.
Step #6

On this particular job we did a border, which made it easier because we didn’t have little pieces we had to cut on the edge of the wall. It was a 10-inch border of two 5-inch boards; here you can see I’m measuring out from the wall and snapping my lines for where the border will be. Then we used a track saw to cut the straight lines everywhere for the border.


Step #7


Then we backfilled in the border; we routered in a groove on the herringbone field to make sure everything was interlocking. On this job, you can see the customer wanted mitered corners on the border.

Step #8

The machines we have today make it much easier to get a completely flat floor and are particularly useful for multi-directional floors like herringbones. Because this was an engineered floor, I began sanding with 60-grit on the big machine (at a 45-degree angle) and edger, then 80-grit with both. Then I used 120 on the multi-head gear-driven system (top right). Sanding with a system like that really cuts down the high spots and brings everything flush with the low spots for a flat floor. Then I hand-scraped the corners and palm-sanded the inch that was left along the edges.

Step #9

When coating a herringbone floor, I’ll generally go with the direction of the grain left to right. After that dries and I abrade, then I’ll go the opposite angle right to left. With each coat, I’m going with the direction of half the grain. Like with any job, especially a big space like this one, it’s important to create a plan about where you’re going to start and stop your finish. With the room placement on this job, in order to work our way out of the house, we had to stop coating in the middle of the floor, go to the opposite side and bring the finish to the same line, so we used a coating pad to coat to the edge of each board for a natural seam in the floor (above right). If we didn’t do that, we’d get what we call “burn marks,” which are little spots where the finish soaked in with the first application and gets darker when it’s coated over again, making what looks like a shadow. If you have to try to get them out later, they are a huge pain in the you-know-what. Everybody in our area wants the floor to look as raw as possible, and that was the case on this job, so we coated with Bona Natural Seal waterborne finish, abrading with a maroon pad between the first and second coats and a maroon pad with 240 abrasive between the second and third coats.