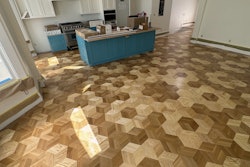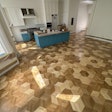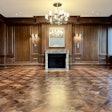
Herringbone floors are stunning and elegant, but installing them piece by piece can be slow, tedious and prone to frustrating misalignments. Fortunately, there’s a better way: panelizing. By pre-assembling sections of herringbone with tape, you streamline the entire process. This allows you to install quickly and precisely, making it possible to charge a premium for your work while keeping labor efficient. With panelization, you win, and your clients win.
The panelization advantage
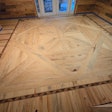
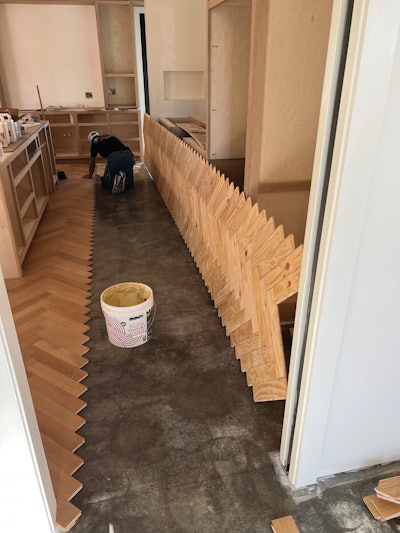
Panelizing means building pre-taped panels that can be dry-fitted, adjusted and installed as large sections. Instead of aligning individual boards piece by piece, you align entire panels with the room’s center line and shift them into place with ease. This method lets you spot and correct milling issues during the dry fit, avoiding alignment issues that could otherwise derail the installation.
It’s also ideal for entryways or accent areas, where you can offer value-boosting upgrades without adding much extra time or complexity. The result is a polished, high-end look that impresses clients while keeping you on schedule.
Laser layout for perfect balance
Keeping herringbone floors symmetrical can be tricky, but with panelization, a laser guide simplifies the process. Shoot the laser along the top edge of your starter panel to balance the layout front-to-back and side-to-side. This quick alignment ensures every section stays perfectly squared, eliminating the need for tedious adjustments later on.
RELATED: How I Do These Floors: Herringbone Parquet
Training apprentices the smart way
Panelizing is also a perfect way to train apprentices. Instead of overwhelming them with complex individual layouts, you can start them with dry-fitting and taping panels. This hands-on practice helps them understand how the pattern comes together, building real-world skills without the usual frustrations. You or a journeyman can approve their work or make adjustments as needed, ensuring progress while giving them practical experience.
Templating complex cuts made easy
Handling door jambs, toe kicks and appliance cutouts doesn’t have to be a headache. With paper templates and foam insulation boards, panelization makes these cuts quick and easy:
1. Dry-fit the panels on top of a foam insulation board.
2. Use paper templates to trace irregular shapes and cutouts onto the panel.
3. Track saw all the straight cuts right on the foam board for clean, precise lines.
4. Lift the panel edges and use a jigsaw to quickly cut out complicated shapes with minimal hassle.
This process eliminates guesswork, ensuring perfect cuts without the need for constant measuring. It’s simple enough for apprentices to handle, speeding up the installation while keeping everything accurate.
Pro tips for panelized installation
1) Use 2-inch tape: Wider tape offers better elasticity, keeping panels tight and aligned during handling.
2) Stretch the tape: Adding tension ensures the boards stay snug and structurally sound.
3) Tape strategically: Apply tape front-to-back and side-to-side to minimize usage, make handling easy, and maintain tension during panel movement.
4) Lean and drop: Lean larger panels against the wall or have an assistant hold them upright while spreading adhesive, then drop them into place for a quick, clean install.
5) Trace before you glue: Once aligned, trace the panel’s perimeter, apply adhesive where needed, and drop it back down for a precise, mess-free fit.
Herringbone installation reinvented
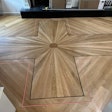
With panelization, you can install 20 to 30 feet—or even 100-square-foot sections—at a time with fewer errors and less stress. It not only speeds up installation but also makes it easy to sell premium features like herringbone entryways and accent areas. Clients get the high-end look they want, and you complete the project efficiently and profitably.
Why struggle with individual pieces when you can reinvent the process? Panelize it, install it and enjoy flawless results—along with a boost to your bottom line. If you want to reach out, you can check us out at sanangelocraftsman.com!
 Panelizing sections of herringbone makes it easy to template out areas for cuts around jambs, toe kicks and other cutouts.
 Cuts can be done on top of the foam board: a track saw for straight cuts and a jigsaw for complicated shapes.
 After the cuts are made, the section of herringbone can be dropped right into the area.


