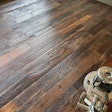
Homeowners today demand not only a flawless sand-and-finish job, they also want a unique floor that will be part of an overall design concept. Sometimes this look can be achieved through a border or medallion. Sometimes exotic species will create the desired look. Other times, an alternative finish or stain, such as wax, oil or aniline dyes, may be just what the customer is looking for. Expanding your knowledge and expertise with stains and finishes can provide you with a service that will make you stand out from the rest of the flooring installers. Just as you wouldn't limit yourself to a solid, ¾-inch red oak floor on every installation, don't limit yourself to the usual finish in every room of the house. Though these finishes represent only about 2 percent of the market, they are useful options to add to your palette.
Wax
Used on floors for centuries, wax is one of the oldest finishes known to man. Though it was popular for many years, it's now considered a specialty finish. With the resurgence of antique-looking floors, contractors are going back to wax to create this look. Wax may also be an option for a natural look on some exotic species. This all-natural, plant-derived product gives the wood a softer appearance and feel than synthetic finishes, and allows the wood to breathe and age naturally. Most commonly applied over an oil sealer, this finish doesn't create the odors typical of synthetic finishes—another selling point for eco-minded consumers.
Wax comes in either a liquid or paste form and is relatively easy to apply. Paste wax is buffed in with a rag, while liquid wax is applied with a lambswool applicator. After it's applied, wait 30 minutes for the wax to harden, then buff it in with steel wool. As it's buffed, the wax softens and penetrates into the wood, so make sure you buff it long enough. Apply wax sparingly—too much wax on a floor attracts dirt and causes it to scuff. Wax also has a quick dry time. Once the floor has been properly buffed, it's ready for foot traffic in just a few hours. Wax is also the most forgiving of floor finishes. If you make a mistake, you can remove it with mineral spirits and start over—without having to abrade the floor.
RELATED: Step by Step: Applying a Wax Finish on a Wood Floor
Wax is also ideal for homeowners who want to maintain the floor themselves, rather than having a crew shut the house down for a typical refinishing job. Even though its durability can't compare to a polyurethane finish, if maintained properly, the floor never needs to be resanded. It is one of the easiest finishes to repair. A simple buffing and an application of more wax can eliminate traffic patterns and scuff marks on the floor.
Wax finish does have its limitations and is not ideal for every situation. Wax is relatively slippery and should not be used in commercial applications. It's also susceptible to water spots, so it may not be ideal in a kitchen. Because it tends to crystallize and yellow, wax is also not recommended on a white stained or maple floor.
Oil
Another way to achieve an old-world, low luster look is to use natural penetrating oils such as tung, linseed and lemon oil. Similar to wax, these finishes have been used for years to seal and protect wood. While they are a popular choice to finish furniture, they also have specialized applications for hardwood floors. These all-natural finishes give the eco-minded consumer another alternative to synthetic finishes. The odors from these products are minimal, and lemon oil actually has a pleasant odor. Because oils show the grain of the wood and produce a matte finish, they are another option for the consumer who wants to avoid the plastic look of some synthetic finishes. Oil finishes may also be the answer to finishing some exotic species, such as teak, that can be temperamental with urethane finishes.
These user-friendly finishes are fast and easy to apply. Simply wipe the oil on with a rag, wait for it to dry and buff out the final coat. You want to apply enough oil to penetrate through the wood, but too many coats of oil can gather dirt and be more susceptible to scratch and scuff marks. And, unlike wax, penetrating oil takes longer to dry, so if a heavy coat of oil is applied, it could take several days before the floor is ready for heavy foot traffic.
Also similar to wax, penetrating oils are finishes that homeowners can maintain themselves. Because the wear surface is just sealed wood rather than a coat of finish, an application of more oil can eliminate wear patterns and return the original luster to the floor. The durability of oil-finished floors can't compare to modern finishes, but with proper maintenance, they can withstand normal wear. They won't scratch or peel, and lemon oil even repels water. Penetrating oils don't have the slippage concerns of wax, so they can be used in commercial applications.
RELATED: Step by Step: Applying Oil Finish on Wood Floors
Shellac
Shellac is another floor finish that was commonly used in the 19th and 20th centuries, but fell from common use when synthetic finishes were invented. Produced from the resin secreted by a lac bug found in India and Thailand, it is the only known commercial resin that comes from an insect. The hardened lac resin is scraped from trees, then processed for use in commercial applications. The shellac is dissolved in alcohol and measured in "pound cuts," which is the number of pounds dissolved in a gallon of alcohol. The higher the pound cut, the higher the resin content.
Because this product is a natural, renewable resource, it's now being marketed as an environmentally friendly, natural-looking alternative to synthetic finish. It also is immune to VOC standards, since its main solvent is denatured alcohol. Shellac is also non-toxic (it's FDA-approved for use in candy, fruit and pharmaceuticals). Other selling points of shellac are that it's quick-drying and easy to maintain and remove.
To avoid lap marks, shellac should be applied quickly with a lambswool applicator or brush. Lap marks can also be avoided by thinning the shellac with denatured alcohol down to a 2-pound cut rather than its standard 3-pound cut. This method allows you to get three or four coats of finish on the floor in five hours.
Shellac is not as durable as most typical topcoat finishes, but it's often used under wax finish to increase its resistance to scratches. It's easy to touch up, however, and wear patterns can be blended in with fine steel wool and an application of more shellac. Shellac is not compatible with most topcoat finishes, so usually only wax is applied over it.
Lacquer
Most commonly used as a sealer, lacquers are favored for their low cost and quick dry time—an undercoat of lacquer seals the wood in just 15 minutes. This means that a floor can be sealed and finished in the same day. Some contractors choose lacquer as an alternative to waterborne finishes because it doesn't tend to produce much grain raise.
Lacquers can also be used to make custom stains. Combined with universal tinting bases and often used in conjunction with aniline dyes or bleach, lacquer stains can create a variety of custom colors. Because lacquer doesn't yellow like oil-based stains, it also can be used to produce white floors or a whitewash effect. Contractors who favor lacquer stains say it allows them to control the depth of color. A traditional stain or oil is often applied over the lacquer stain.
While many contractors use lacquer every day and get great results, others experience problems. Because lacquer isn't completely compatible with oil based or waterborne finishes, long-term durability problems may arise, and most manufacturers won't stand behind their product if it's used with lacquer. This means that often a contractor is on his own if a job goes bad or there's a complaint. In addition, lacquer is extremely flammable, which increases the risk of flash fires. All pilot lights and gas valves should be turned off when using lacquer.
RELATED: Wood Floor Finish 101: The Low-Down on Today’s Finishes
Aniline Dye
If a wood floor is adorned with vivid, custom color, chances are it was achieved with aniline dyes. From deep black and burgundy to bright green and blue, aniline dyes expand the contractor's color palette to hundreds of intense, deep colors that can't be created with pigmented stains. Aniline dyes are popular for creating a distressed, antique look or for producing unique colors in medallions and borders. The dye doesn't just sit on the surface—it penetrates deep into the wood, permanently staining the wood and allowing the natural grain to show through.
Aniline dyes are made from aniline oils or coal tar derivatives. Available in a powder form, they're offered in different grades that are soluble in water, alcohol or oil. They can be used alone, or added to an existing stain to enhance the color. Be aware that when you add dyes to a stain, chances are the stain manufacturer won't guarantee the results.
The drawback to aniline dyes is that they are difficult to work with, and it takes years of experience to master using them correctly. They dry extremely fast, and lap marks and blotchy spots are difficult to avoid.
Even small sanding imperfections aren't acceptable, because the floor needs a smooth, even surface to accept the dye evenly. Map out a plan of attack for dying the floor and apply it in 2-foot-row segments at a time. Don't try to apply too much at a time. Some contractors prefer to dilute the dye solution to a 50/50 ratio and apply it twice, with an hour of dry time between each application. If you're using a water-soluble dye, be sure to check the floor with a moisture meter before sealing. After the floor is completely dry, a stain or sealer may be applied on top.
Also be aware of where the dyed surface is going to be in the home. Aniline dyes are not completely colorfast, and they will fade in direct sunlight. The stronger the aniline dye solution, the more likely it is that the floors will fade over time.
Bleaching
When white and pastel floors were in vogue in the '80s, bleaching was a very popular technique for lightening the grain of wood floors. With all of the new, lighter species of flooring on the market and the bad reputation that bleaching has gained since then, it has become less common. There are still some applications, when done correctly, where bleaching is used to achieve a desired look, such as a distressed, driftwood-colored floor. Contrary to popular belief, bleaching does not turn a floor white—it lightens the floor's natural color, evening out its tones. It's often used to take out the redness of red oak. It's not for use on all species—it may produce a greenish cast on white oak floors.
Bleaching damages the fiber of the wood, so it shouldn't be over-applied. Only one application is all that is recommended, though some contractors use two applications to achieve a consistent tone. Apply it with a sponge and use only bleach made for wood flooring, preferably a two-part bleach.
Be sure to read the instructions and neutralize the bleach if necessary. The water used in bleaching raises the grain of the wood, so buff it out with a screen or double-sided disc, typically 80-grit, before applying the sealer or stain. Some finishes are not compatible with bleach, and others may cause the floor to yellow or amber, so choose the topcoat wisely. A non-ambering surface finish is recommended.
Whatever alternative finish or stain method you choose, practice often on a test panel to perfect your technique. Not only do these finishes take years of experience to master, some may take extra time on the job site. There's also added risk involved. If the job fails, the manufacturer won't back you up if you didn't follow their recommendations. Finally, charge accordingly for the risks involved and the premium services you have to offer.


