Natural oil finishes, when applied properly, will last a very long time with very little maintenance … so long as the proper steps are followed. Here are some tips that can help you be successful when using oil finishes.
Don’t over-burnish: When sanding before applying oil finish, it’s important not to over-burnish the surface and only sand up to 100-120 grit. I find that mesh abrasives help leave a nice smooth and open surface for oil finishes. Water-popping the wood can also help open the grain and allow more oil to penetrate.
Remove fine dust: Remove as much fine dust as possible before coating. A Tampico brush followed by a pass or two with a microfiber mop will dramatically help in the removal of fine dust from the floors. Too much dust left behind after water-popping will start to create a slurry as it mixes with the oil. That slurry can start leaving streaks/marks in the raised grain. Then you’ll have to go back and sand these spots out and repeat the prep process before applying more oil.
Another issue from leaving dust behind is that you will lose product. As you start to work the oil into the floor, the dust and oil will continue to create a slurry that will ultimately get too thick and need to be tossed, requiring you to use more oil than expected.
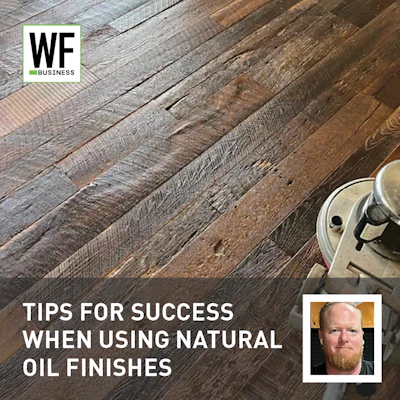
 Make sure you understand the differences between applying natural oil finishes and typical surface finishes.Photo courtesy of Ian Cheadle
Use a wood cleaner: After the floor has been final-sanded and all the fine dust has been removed, using a cleaner on the floors can be a huge benefit—and one that you can charge for! Using a wood cleaner from the manufacturer of the oil finish you’re going to use (such as WOCA Intensive Wood Cleaner, Rubio Raw Wood Cleaner, etc.) to clean and water-pop the floors neutralizes any oils left on the surface and creates a much higher-end result in the finished surface.
RELATED: Wood Floor Finish 101: The Low-Down on Today’s Finishes
Fully saturate the wood: Application of natural oil finishes couldn’t be easier, but whether you apply the products with a trowel, roller or buffer, you want to focus on fully saturating the wood fibers to the best of your ability. Then, after you really work the product in, it’s extremely important to remove excess material from the surface. Depending on the manufacturer and whether you’re using a single-component or two-component product, you should have plenty of time to work the oil into the floor (depending on the temperature and humidity, some products may have a smaller window to work with).
Wood species, dryer/drying agents, solids and viscosity all play key roles in how much oil the floors will accept. Oils with a thinner viscosity will seep deeper into the wood’s cell fibers, and a second application of oil should be applied. Products with a higher amount of drying agents may need a second application, because once the drying agents gas off, the oil left behind might not be enough to fully protect the wood from the inside out. If you are unsure as to whether you may need to charge for a second application, a good idea would be to charge for it and then you can discount the final total, or hold onto that amount and offer the first maintenance oiling or cleaning for free—just make sure you communicate clearly with the customer about this.
Proper maintenance is key: So long as the floors receive enough oil to fully saturate the wood cells and fibers, a natural oil finished floor will last and last, but proper maintenance is key! With general cleaning and application of maintenance oils, you may never have to sand that floor again. When it comes to maintaining an oil-coated floor, use the recommended cleaner for the finish and a mop/spray mop. Daily cleaning can be done with a dust mop and weekly cleaning with a vacuum cleaner (with brushes turned off). In general, every two weeks the floors should be cleaned with a spray mop and the recommended cleaner. Quarterly cleaning should be done with a refresher product, and re-oiling with a maintenance oil can be done whenever and wherever the floors start to show wear (it’s possible to only re-oil the worn areas).
You can do spot-repairs: Board replacement or sanding out scratches for spot repairs are easy for most floors with natural oil finishes. Use the same steps as you would to sand the floor (starting at the finest grit that will work to flatten the new board). Repeat the same finishing grits, cleaning and water-pop steps before oiling the repair.
RELATED: Should You Recoat that Wood Floor or Run?
Now take a quiz on what you've read: