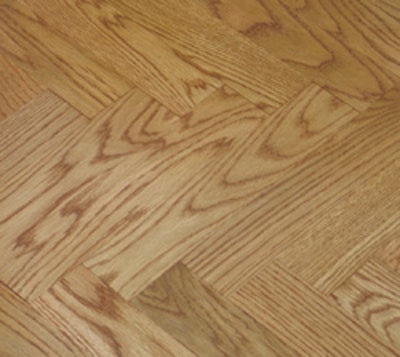
 A wood floor that has been sanded carefully and stained correctly has an even appearance, with no obvious sanding marks or streaks
Staining a floor seems like a basic skill, but as many wood flooring contractors will tell you, plenty can go wrong. One contractor (who shall remain nameless) recalls the first time he was sent to a job site to water-pop a floor—he did, using a big towel that wasn't consistently wet. When he wiped off the stain, the floor had enormous streaks in it. He ended up having to resand the entire floor.
The most common problem with staining a floor is the fact that it highlights the sanding job. If the sanding was sloppy, the stain reveals every mistake. The darker the stain, the more glaring the sanding problems are. So, a floor that's going to be stained is not the place to train a new worker on how to use the edger or big machine.
The next most common problem with staining is the floor turning out to be a different color from the one the customer envisioned. All too frequently, customers choose stain from the small samples provided by the stain manufacturers. It's much wiser to stain a sample area of the actual floor or at least a test panel and have the customer sign off on the color.
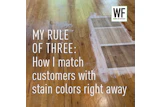
RELATED: Get a Handle on Wood Floor Staining Strategies
A much more serious hazard while staining is the risk of spontaneous combustion. Nearly every contractor has heard horror stories of a van, shop or customer's home starting on fire due to rags that were soaked with an oil stain left in a pile.
Check out the following steps to make sure you know how to prevent staining problems—from trivial to disastrous. These are general guidelines; always follow the stain manufacturer's specific directions.
Necessary tools and supplies:
- vacuum
- broom
- moisture meter
- rubber gloves
- stain in desired color
- rags
- disposal canister
Step 1:

Just as with a good finish job, the first step to a quality staining job is making sure the floor is sanded well. The next important step is cleaning the job thoroughly. Start by sweeping with a push broom.
Step 2:

Next, use a professional-quality vacuum with a brush head or a felt-tipped head to clean the floor.
Just as you should before applying finish, check the moisture content of the floor before you apply stain. If you're going to water-pop the floor, this reading will be your baseline—after water-popping, you shouldn't stain the floor until it returns to this baseline moisture level.
Step 3:

If you aren't water-popping the floor, skip ahead to the next step. If you are water-popping, which opens the grain and allows the floor to take the stain much darker, plan how you're going to get in and out of the room—you don't want to walk across the floor once you've popped it, crushing the grain back down. Here, we are using a wet rag to water-pop, but many contractors find that a spray bottle or a new pesticide sprayer applies the water more evenly.
Step 4:

Once the floor has dried, apply the stain evenly. Here, we're using rags, but some people prefer lambswool applicators. Still other contractors apply stain by squirting the floor with stain out of a (clean) condiment bottle and spreading it with a white pad on the buffer. (If you're using a waterbased stain, buffing usually is not recommended.) If you water-popped, walk on the area you already stained as you apply the stain so you don't crush the grain on the unstained floor
Step 5:

Next, wipe off the excess stain with a rag or with a clean white pad on the buffer (for oil-based stains only). Many contractors have one person applying stain as another follows behind, wiping off the excess stain.
Despite what many contractors think, leaving the stain on for an extended period of time will not make the floor darker.
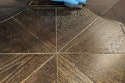
Step 6:

Here you can see the difference between the part of the floor that was not water-popped (on the left) and the water-popped part of the floor (on the right). The difference in stain color is dramatic.
Before finishing the floor, carefully read the stain manufacturer's directions for recommended dry times, and take into account how the job-site conditions may affect the dry time.
Step 7:

Stain rags from oil-based stain are dangerous. Be sure to dispose of rags in a proper disposal container. If you don't have a container like the one shown, you also can spread the rags out to dry on a driveway or other paved area, hang them on a line or stuff them into a finish can filled with water.
Common Staining Problems

Sanding Marks: Here, you can see that there are still obvious marks left by the big machine—the contractor either hardplated the floor badly or didn't hardplate the floor at all. A total resand is required to get an acceptable appearance.

Inconsistent Grain Pop: This is a typical problem when contractors use rags to water-pop the floor—the rag was not consistently wet, so parts of the grain popped, and others didn't. These areas show up as streaks across the floor.

Crushed Grain: Here's a problem that can happen after water-popping—something was dragged across the floor before the stain was applied, knocking down the grain. Now this area shows up as a light streak on the floor. Contractors usually stay on the job site or tape it off between water-popping and staining to prevent people from walking on the floor before it's stained.