
Just mentioning "radiant heat" is enough to make some wood flooring contractors turn and run.
They've heard the horror stories about jobs over radiant heat, or maybe they've been burned, so to speak, on their own attempts to install wood flooring over radiant heat. While radiant heat is not in the realm of a novice wood flooring contractor, wood floors are installed over radiant heat with success every day. With the right experience, moisture testing, understanding of the radiant heat system and knowledge about the wood flooring being used, contractors can make wood flooring over radiant heat work—even work extremely well. They just need to control all the variables that can turn a dream floor into a disaster.
The "M" Word
What is it that makes radiant heat so intimidating and potentially trouble-prone? It can be summed up in one word: moisture. Even without radiant heat, moisture is probably the leading cause of wood flooring callbacks. Add radiant heat, and the potential for moisture problems is greatly increased, because radiant heat dramatically exacerbates moisture fluctuations in a wood floor.
To understand that, it helps to know a little bit about how radiant heat systems work. The concept is familiar: The heat we feel from the sun or from a crackling fireplace is radiant heat. Radiant energy travels through a space without heating the space itself (unlike a typical forced-air heating system, which actually warms the air). When radiant heat comes across a cooler surface (like a human being), it attempts to equalize the temperature difference, giving off its heat.
Most radiant heat systems used in the United States today are hydronic, meaning the subfloor has plastic tubes through which hot water flows. The water may be heated by anything from natural gas to electricity to solar energy. The tubes may be embedded in a slab, inside a cementitious material between sleepers, stapled to the underside of a wood subfloor, run inside the grooves of a prefab subfloor panel, or installed using any number of other techniques (see the "Many Options" sidebar on page 67). The technique used is the main factor in how hot the water has to be to create the required heat (for example, a concrete slab conducts heat well and therefore needs a lower water temperature than a system with tubes suspended in the empty space between joists). There are also electrical systems available that involve large electrically heated mats, although these are much less common.
A radiant heat system heats all the materials around it, in the process drying everything, as well. It drives moisture from the joists, the slab, the subfloor—and the flooring.
Proceed With Caution
Contractors who have vast experience with radiant heat caution that it is not the type of job for a novice wood flooring installer. There are too many variables: the knowledge of the general contractor, radiant heat installer, plumber and electrician; the region's and home's anticipated moisture swings; the type of radiant heat system; other HVAC equipment that may be installed; and the type of wood flooring, to name a few. One contractor even compares radiant heat jobs to defusing a bomb—safe if you know exactly what you are doing, explosive if you don't. Wood flooring contractors who typically get away with not playing by the moisture rules will find their luck has run out when they attempt to do a radiant-heated floor.
Before taking on a radiant heat job, you should feel comfortable with everyone involved. The GC should be open to learning everything you can teach him about wood flooring and moisture, and, as best you can tell, you should feel that the radiant heat installer, HVAC contractor, plumber and electrician are all competent and know what they're doing, not experimenting with their first radiant heat job. You'll also need to know exactly what kind of HVAC systems will be installed. By code, radiant-heated homes must have some kind of ventilation system, and they are often supplemented with a typical forced-air system that includes air conditioning. There should also be systems in place to help stabilize humidity year-round. All of this, along with knowledge of your area, will help you predict what kind of moisture swings the floor will experience. If you think the swings will be substantial and that humidity control won't be a priority, it's probably a good idea to walk away.
If you feel the job site will be manageable, it's still critical to educate everyone involved, especially the homeowners, about wood flooring expansion and contraction, and why they need to control the humidity levels in their home.
Choose Wisely
There are no guarantees, but there are product choices you can make to increase your chances of an acceptable wood floor over radiant heat. Some good options:
• Quartersawn floors: They tend to expand in height, as opposed to plainsawn boards, which expand mainly in width.
• Narrower widths: They shrink and swell less than wider boards.
• Engineered floors: They are inherently more stable, and the more plies, the more stable the product.
• Reclaimed woods: They have a tighter pattern of growth rings, making them more stable.
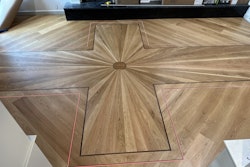
• Parquet: As a whole, parquet floors have less expansion and contraction.
• Dark floors: Their color makes gaps between boards less obvious.
• Floors with obvious grain patterns: They also downplay the appearance of gaps between boards.
• Distressed floors: They help minimize the appearance of gaps, as well.
• Beveled edges: They also make gaps less obvious.
• Dimensionally stable species: Job-site experience is your best gauge here. Tangential shrinkage values (see the NWFA's Technical Manual A200: Wood Species Used in Wood Flooring) give an indication of stability as found in the lab, but many wood flooring contractors have found the species perform differently on real job sites. Walnut, cherry and oak are examples of relatively stable species; beech, Australian cypress and many bamboo products are examples of those that are not.
• Products for radiant heat: Some wood flooring manufacturers offer products that are specifically warranted and/or designed to go over radiant heat.
Engineered floors (including floating floors) are more stable, but keep in mind that they are not bulletproof. No matter which type of product you choose, make sure it's from a reputable manufacturer. A radiant-heated floor is no place to gamble with an unknown product. Exotics can be particularly susceptible to problems resulting from bad drying practices, making a reliable manufacturer even more crucial.
A strange phenomenon that can happen with radiant heated floors is color change directly over the tubes. This typically happens with oily woods, including many exotics, such as rosewood or teak. Over the years, the difference in heat exposure directly over the tubes compared with the rest of the floor causes a color change in the warmer areas, which usually turn darker, revealing the exact pattern of the tubes. This is a change that cannot be sanded out of the floor.
A Spectrum of Subfloors
Your subfloor will depend on the radiant heat system. If tubes are stapled or suspended under a typical wood flooring joist, a standard plywood subfloor will be in place. For solid products directly over a slab, a floating subfloor of two layers of 1/2 -inch plywood works well (glue-down products can be glued down directly to the slab as always).
Systems with screeds filled with gypsum should be covered with 3/4 -inch plywood, since screeds alone usually won't allow a sufficient nailing pattern, and the gypsum tends to settle after being poured, creating lower areas between the screeds. A newer system is radiant heat subfloor panels that have grooves for the tubing. Flooring can be nailed directly to the panels, although the flooring direction has to run perpendicular to the tubing to prevent the possibility of a row of fasteners falling directly over the tubing. Whatever the system, you'll need to know ahead of time so the GC can plan to accommodate any height difference caused by additional layers of subfloor and the wood floor, and so that, if necessary, the tubes are run perpendicular to the direction of the future wood floor.
All Systems Go
Before the wood flooring arrives on the job site, the radiant heat system should have been running. How long it needs to run depends on when you feel the moisture conditions are acceptable to bring the wood flooring in. Some contractors will consider bringing wood in after two weeks, others require a minimum of 30 days. Turning the system on ahead of time accomplishes three things: it makes sure the system works, it ensures there are no leaks, and, most importantly, it helps drive moisture out. Other subs may complain, but even if it is a heat wave in the middle of summer, it's crucial that the system be turned on (if there is air conditioning, it can be run, or fans can be used, to make the job site tolerable for the other subs). If the system isn't turned on and the subfloor sufficiently dried before wood flooring installation, it's a virtual certainty that when winter arrives and the system is turned on for the first time, the wood floor will cup and buckle as the moisture is driven out of the subfloor and into the wood floor. Allowing long dry times for the subfloor tends to be a much greater concern with slab and gypsum subfloors, which hold lots of moisture, than with wood subfloors, which may need little or no acclimation depending on their moisture content (MC).
Don't trust a contractor who says that the system has been running for "X" number of days. Moisture testing, not a timeline, is the best indicator of the job site being ready for the wood floor. Moisture testing on a radiant heated slab can be tricky, because areas directly over tubes dry out faster. Take more measurements than usual, and be sure to test some areas where there aren't tubes, such as close to wall lines or cabinets. Because the subfloor will exist long-term at extremely low moisture conditions, most contractors try to get it as dry as possible before bringing the wood flooring in.
A Tricky Target
As with any job, before the flooring arrives, you should have a target MC for the flooring in mind, but this is even more critical, and more tricky, with a radiant heat job, since the radiant heat will drive the flooring to an exceptionally low MC. The acceptable MC for installation depends on your best judgment, taking into account the typical humidity in the region and the humidity controls that will be running in the house. If the home will stay at extremely dry levels yearround, for example, a contractor will need to acclimate the flooring to as dry as possible before installation. If, on the other hand, you anticipate some variation in RH, shooting for a year-round mid-point should be the goal. If the flooring needs to be acclimated to a lower MC, be sure the bundles are broken and the flooring is stickered low to the floor, since the warmest, driest heat will be closest to the floor. Some contractors further acclimate the floor by racking it out and letting it sit on the job site for days or even a week (the floor can be covered with something breatheable to allow for light foot traffic while preventing job-site debris from getting between the boards).
On a typical job, 4 percentage points is the acceptable difference in MC between the subfloor and the wood flooring. On a radiant heat job, this should be considered the absolute maximum; less is even better. It may sound obvious, but make sure you have a good-quality moisture meter appropriate for wood floors and are confident you're using it correctly for the both the subfloor and the specific species used. A mistake with a MC reading could be costly.
Holding Power
How the flooring is installed will depend on the type of radiant heat system used. Many contractors recommend, when possible, both nailing and gluing the floor to increase holding power. Some radiant heat systems may require caution about penetrating the tubes with fasteners. If shorter fasteners are used, keep in mind that the nailing schedule will have to increase to compensate for the lack of holding power from using shorter fasteners.
No matter how the floor is installed, at the time of installation, the surface of the wood flooring should not exceed 85 degrees Fahrenheit. Surface thermometers are handy to have for this purpose and can be bought for about $30 and up at electronics stores or online.
Cooler Coating
Until now, it's been crucial that the radiant heat system has been running. Once it's time to finish, however, the radiant heat should have been off long enough (typically at least six hours or more) for the floor surface to reach a normal temperature. If not, the entire floor will essentially be one big "hot spot," just like you would find on any job where sunlight is directly hitting the wood floor. That causes the finish to flash off too fast, which can leave applicator marks and cause bubbles. Once the finish is dry, the radiant heat can be turned back on.
Stabilizing for Success
Just as important as what you do on the job site is what happens after you leave. Even the most stable product with the best installation, sanding and finishing job can have problems if the homeowners don't maintain the environment of the home. Stabilizing humidity—whether that means adding moisture in winter, dehumidifying in summer or whatever else—is critical to the success of the floor. And the homeowners need to understand that even with humidity controls, it's natural for the floor to shrink and swell.
It's also important that after being turned off for the season, the radiant heat system is turned back on gradually. By its nature, radiant heat tends to warm up more slowly, and it may be several hours before the people inside feel comfortable. That can make it tempting to crank up the temperature, causing too drastic a change for the floors. Several things can help avoid this. First, the best radiant heat designs include an outdoor thermostat that automatically and gradually turns the radiant heat up or down in response to outdoor temperature changes. Second, the homeowners should be educated about how the heat works and why it shouldn't be turned up too much at once. Third, controls can be included in the system that prevent anyone from turning up the system too much at one time.
As increasing numbers of consumers are turned on to the environmental, economic and health benefits of radiant heat, these floors are becoming more prevalent. If you're armed with the right knowledge, products and job-site controls, it doesn't have to be something you're afraid of, but rather yet another opportunity to install a beautiful wood floor.
Sources for this article included: Marty Avalos, Marty's Hardwood Floors; Don Bollinger, The Oak Floors of Greenbank; Howard Brickman, Brickman Consulting; Chuck Crispin, Birger Juell Ltd.; Larry Drake, Radiant Panel Association; and Dan Perfitt, Launstein Hardwood Floors.
Many Options
There are many ways that radiant heat can be installed. The type of radiant heat system used will determine what subfloor is used, how hot the water in the tubes must be (the lower the temperature necessary, the better it is for the wood flooring), and how the wood floor is fastened. Here's a look at some typical installations wood flooring contractors will encounter. (Illustrations courtesy of the Radiant Panel Association, www.radiantpanelassociation.org, 800/660-7187.)
Thin Slab

Tubing or electric heating elements are attached to the wood subfloor, which is covered with concrete, lightweight concrete, dry pack or gypsum underlayment.
Subfloor Plates

Aluminum plates containing channels that accept tubing are installed over the subfloor.
Engineered Subfloor

An engineered board with a layer of aluminum and channels to accept tubing takes the place of the structural subfloor.
Concrete Slab

Tubing or electric heating elements are embedded in the concrete slab.
Hanging in Joist Space

Tubing is suspended beneath the subfloor in the joist space.
Subfloor Board

Premanufactured boards with a layer of aluminum and a channel to accept tubing are screwed or nailed to the subfloor.
Staple-Up

Tubing is attached to the underside of the existing subfloor; aluminum plates can be used to spread the heat.
R-Value
When dealing with radiant heat, it helps to understand R-value. R-value is a measure of how much a material impedes heat flow. A low R-value means a material impedes heat flow less than a material with a high R-value. For many construction materials, like doors and windows, a high Rvalue is desirable (and the higher, the better). However, where radiant heat and flooring is concerned, the lower the R-value, the better. Wood has a relatively low R-value, making it a good material to go over radiant heat. And, the thinner the wood floor, the better the R-value, helping make the system even more efficient.
Consider This
Before you take on a radiant heat job, here are a few things to think about:
• Are you diligent about managing moisture on your typical job sites?
• Is the GC interested in learning what's necessary for the wood floor? Has he successfully done radiant heat jobs before?
• Do the GC, plumber, electrician and radiant heat contractor seem cooperative and knowledgeable?
• Is this a retrofit in an existing home? Older homes without insulation may require the heat to be too high for a wood floor?
• Will the GC agree to turn on the radiant heat as long as necessary before the wood floor is installed?
• Will the home have sufficient humidity controls?
• Will there be an outdoor thermostat that turns the heat up and down gradually?
• Will there be controls on the system that prevent it being turned too high at once?
• Does the consumer want a wood floor that's likely to be compatible with radiant heat?
• Have you used the wood flooring manufacturer's products before?
• Is the wood flooring warranted for use over radiant heat?
Get More Information
Check out the following sources for more information on radiant heat:
• The Radiant Panel Association has extensive information available at www.radiantpanelassociation.org.
• The Hardwood Council has tips on installing wood flooring over radiant heat at www.hardwoodcouncil.org (click on "Technical Tips," then "How-To's," then "Installing Hardwood Floors Over Radiant Heat").
• The NWFA offers information on radiant heat in its Technical Manual A100: Water and Wood, as well as in its Installation Guidelines.


