
In the '70s, a factory-finished floor was simply apiece of unfinished flooring that also went through a wax line. In the early '80s, the finish graduated to urethane, but the floors still left much to be desired. Today, factory-finishing is a state-of-the-art process that focuses on precision and results in an incredibly wear-resistant floor. The improved quality of the products has been a key factor in their increasing market share.
The popularity of prefinished flooring has led to a proliferation of companies offering factory-finished products, even though creating a prefinishing line isn't a quick, easy task. A modern prefinishing line is a costly venture that requires highly skilled personnel to run it successfully. Most relatively large wood flooring manufacturers have their own prefinish lines, but many smaller companies offering factory-finished products contract the finishing out to a handful of companies that specialize in prefinishing. Larger manufacturers also sometimes contract out part of their production to these prefinishing specialists.


No two prefinishing lines are exactly the same, but the basic processes are similar. Any prefinishing expert is quick to point out that a quality piece of prefinished flooring starts with precise milling. Flooring is designated as "prefinished" long before it reaches the actual finishing line; because it isn't sanded on the job site, tolerances for milling and moisture content are much more stringent for flooring that will be prefinished. Unfinished flooring manufacturers may find it necessary to purchase new, more technologically advanced equipment capable of meeting tighter tolerances before running flooring for prefinishing. To help avoid overwood, most prefinished flooring is milled with some degree of bevels; "microbevels" are common in the market today.
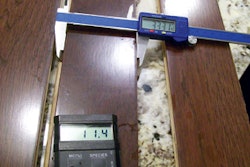
Before the flooring enters the prefinish line, the wood is carefully measured for standards such as overall thickness and distance from tongue to groove, and the moisture content is checked again. At the prefinishing line, the first step is sanding. At this stage, sanding is not a corrective action, but rather helps prepare the board surface for staining and finishing, and removes minor flaws such as molding chatter marks. First, the bottom of each piece is sanded minimally—usually about 10 thousandths of an inch—which helps calibrate the piece for precise milling. Then, a series of sanding belts with increasingly higher grits prepares the surface for staining and finishing. Different grits may be used for different species, but anywhere from five thousandths to 30 thousandths of a inch may be removed. Powerful dust collection systems are necessary here and throughout the line for the most flawless finish possible.
Next is the stain/tiecoat station, where stain is brushed on and the first UV coating, or "tiecoat," is rolled on. The flooring is then sent through a gas oven, which flashes off the solvents. That first coating layer is crucial, as it forms the bond between the wood and the subsequent finish coats. Different types of tiecoats may be used for different species.
After the first layer, the flooring is sent through a"denibbing" station, where rollers of wire brushes remove the raised grain and prepare the flooring for the next coating. Depending on the species of floor and the desired final look, the following step may be the filler station, where a clear UV filler may be applied. The more thoroughly the filler is applied, the smoother the final look of the finish. Species with substantial open grain, such as oak, are typical candidates for the filling station.
A UV oven cures the filler, the flooring may be denibbed again, and then it's time for the sealer coats and finish coats, all applied with roller coaters. The number of finish coats used depends on the manufacturer, but each coat is followed by a trip through a UV curing oven. After the sealer coats, the flooring typically goes through the denibber again, readying it for the topcoats. As with the sealer coats, each topcoat is followed by the UV curing process and may also be followed by denibbers. Of course, the final coat is not denibbed, as it determines the final sheen level of the floor.
Almost all manufacturers today use aluminum oxide in their coatings. Typically, there is a small amount of it in each layer of sealer and finish, but depending on the manufacturer, the majority of it is concentrated in one layer or certain layers. Where the aluminum oxide is plays a large role in the ease or difficulty with which the floor can be recoated, experts say. While some people claim that aluminum oxide imparts a cloudy look to the finish, that can be avoided if the right application techniques are used, the experts add.
The intended end use and price point help determine both the number of coats and the thickness of the finish coats on the flooring, and ultimately, help determine the floor's warranty. Most floors have four to seven coats of finish, and finish mil thicknesses vary widely.
After the last finish coat and UV curing, the flooring goes through a chilling station so it can be safely handled by the graders. They check the flooring for all sorts of defects, from milling problems to finish defects. Depending on the manufacturer and the line, problem boards may be rerun through the line or sorted into lower-grade flooring. Or, defects may be cut out and the pieces re-endmatched for the highest yield of top quality flooring. Then, the flooring is packaged and ready for shipment. Typically, the process takes only from eight to 10 minutes to complete, resulting in boards immediately ready to be laid as a wood floor.
Sources for this article included Jeff Beach, president/owner at Premiere Finishing & Coating in Reidsville, N.C.; Bobby and Lisa Porter, owners, and Jarrod Johnson, sales, at Berry Wood Products in Berry, Ala.; Don Conner, technical and product development director at Mullican Flooring in Johnson City, Tenn.; and Guy St-Georges, plant manager at St. Tite, Quebec-based UV Crystal Inc.