 The right tools and techniques for subfloor preparation get a wood flooring job off to a good start.
Every good wood flooring job starts with good subfloor preparation. If it doesn't, the installer takes a gamble. If he's lucky, nothing bad will happen, and he'll probably continue his gambling ways. If he's unlucky, he could end up with a loose floor, a noisy floor, a cupped floor, a floor with gaps, and much, much more. Usually it only takes one failed job to put an end to the habitual gambling—or possibly even the contractor's business.
On the following job site, we detail steps for a subfloor that depends on more than luck to be successful. This is a remodel on-grade in a house with typical joist construction. For information on subfloor preparation when installing wood floors over concrete slabs, check out "Be Prepared" from the February/March 2003 issue of Hardwood Floors.
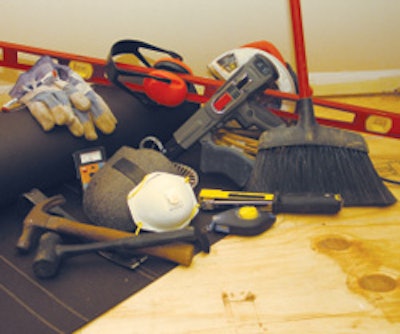
Necessary tools and supplies:
- circular saw
- respirator
- eye glasses or goggles
- hearing protection
- gloves
- knee pads
- crowbar
- hammer
- broom or vacuum
- plywood or OSB
- chalk line and chalk
- nail gun/nails or screw gun/screws
- 6-foot or longer straightedge
- moisture meter
- 15-pound asphalt felt paper
- staple gun or hammer stapler
Step 1:

On this remodel job, the first step is to figure out what lies beneath that carpeting. Removing an HVAC vent reveals a 1/2 inch of particleboard, and below that is a 1/2 inch of plywood. A top layer of particleboard is unacceptable for any type of wood flooring installation except for a floating floor.
Step 2:

Next, the joists need to be checked for spacing and direction. The back corner in the laundry room reveals that these joists are 16 inches on center and run perpendicular to the direction of the 3/4 inch-thick, 3 1/4 -inch-wide plank the customer would like installed—an ideal situation. Joists greater than 19.2 inches on center or running parallel to the flooring would require either an additional 1/2 inch of subflooring beyond what the job normally would require or bracing between the joists.
Step 3:

With the carpeting, pad, tack strips and baseboard removed, there are two choices for dealing with the particleboard: It can be covered with at least 5/8 inch of an acceptable subfloor (plywood or OSB), or it needs to be removed and at least 1/2 inch of plywood added. Because adding a layer on top of the particleboard would create too great of a height difference with adjoining floors, the particleboard needs to be removed. It's too crumbly to pry up in sheets, so the circular saw is set to a 1/2 inch depth and run next to the fasteners.
Step 4:

Cutting the particleboard creates nasty airborne dust, so the working area is sealed off from the rest of the house, and the contractor wears a respirator, along with knee pads, eye protection and gloves.
With the cuts made, panels of the particleboard can be removed, and the strips with nails can be pried up.
Step 5:

Before installing the next layer of subfloor, the floor is cleaned of all debris.
Step 6:

The existing subfloor is now checked to see that the nailing schedule is adequate and that any protruding nails are set. It's also checked to make sure there aren't any squeaks.
Step 7:

The new subfloor material should have a performance stamp or mark from a certification agency.
Step 8:

The new 1/2 -inch layer of plywood is installed perpendicular to the layer below.
Step 9:

With the plywood in place, chalk lines are snapped to mark the joists (which were marked on the bottom of the walls).
Step 10:

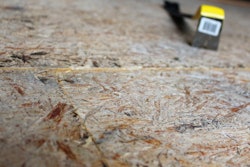
The plywood is fastened down, either with a nail gun or, as shown here, a screw gun. Fasteners should be spaced every 6 inches along the panel ends and every 12 inches along intermediate supports. There should be spacing, typically about 1/8 inch, between the panels.
Step 11:

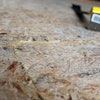
One of the most important parts of subfloor preparation is checking throughout the floor for flatness. Here, an aluminum level is used to check for high and low spots, not for the floor being "level," which doesn't matter. For this nail-down installation, the NWFA's Installation Guidelines dictate that the floor must be flat to within 1/4 inch over 10 feet or 3/16 inch over 6 feet.
Step 12:

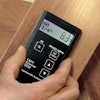
Here's another crucial step in subfloor preparation: checking for moisture. Moisture readings should be taken at various places throughout the floor. Some contractors record the moisture content and the date directly on the floor. It should also be recorded in the job's log in case of future problems.
Before the solid flooring can be installed, there should be a maximum of 4 percentage points' difference in moisture content between the subfloor and the wood flooring.
Step 13:

Before the moisture barrier is put down, all subfloor fasteners are checked, and any protruding fasteners are set.
Step 14:

Now the moisture barrier—15-pound asphalt felt paper—is laid. Edges should overlap several inches and should be overlapped in the right direction so they won't snag the flooring as it's racked. The paper is then stapled down so it won't move when chalk lines are snapped.
Step 15:

As a final step, the joists are again marked so that the flooring installer can make a point to nail into the joists. Now, the floor is ready for working lines to be snapped and the flooring to be laid.
On New Construction...
... be sure to take the time to clean the subfloor thoroughly before the moisture barrier and flooring are installed. Raised areas caused by dried globs of drywall compound or caulk will transfer directly to the hardwood flooring installed over them. |