Subfloor prep can mean a lot of different things to a lot of different flooring contractors. To some folks it might mean a broom and a dust pan. To others it may mean a concrete grinder and water hose.
When doing a job over a plywood/OSB subfloor, these are my steps. I’m using a recent job where I teamed up with Derek and Amanda of Habitat Hardwood in Panama City Beach, Fla., on a new home as our example.
1) Moisture testing: The moisture of the subfloor and humidity levels in the home were all well within acceptable range since the crawl space had been insulated and the HVAC was up and running.
2) Deep-clean: My next step is always a deep-cleaning vacuum session. I do this for every floor, every time.
3) Check for fasteners: We always spend a few minutes counter-sinking any nails or screws poking up.
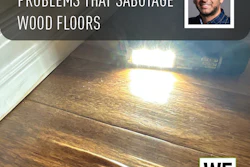
4) Sanding high spots: The ¾-inch subfloor product in this home allegedly had a no-sand guarantee for 500 days after installation. Under perfect working conditions that may be true, but in this case, there was seam swelling, along with a layer of grime, from the elements during the last few months of construction. Sanding was definitely required to knock down some of the high spots at the seams and to remove the dirt and the factory-applied moisture repellent. It was a fairly simple process that didn’t take a lot of extra time but made our installation a lot easier and cleaner than if we just rolled out tar paper and started nailing. For sanding the high spots, we set up two sanding and vacuum rigs in the same way you might for a regular sand-and-finish job. The first one, for the field/main area, was Derek’s planetary sander equipped with our favorite red 36-grit ceramic sandpaper and a larger vacuum. The second was the edger with a smaller, more mobile vacuum connected to hit all of the seams ahead of the planetary machine and the perimeter of the rooms. For this machine we used the exact same sandpaper we had already run on the planetary machine because we could stretch a few more “wood miles” out of it.
5) More vacuuming: Once we were done sanding, we did another thorough vacuum session on the entire surface.
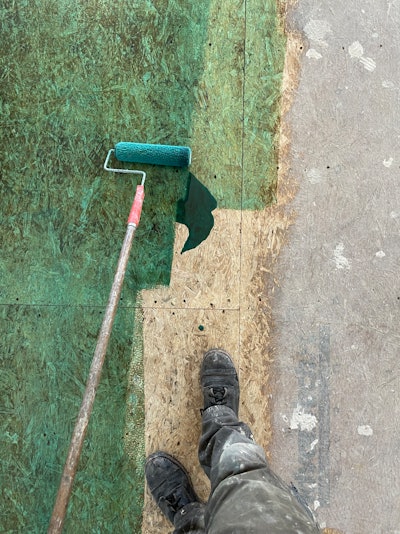
6) Vapor retarder: Next we applied our favorite vapor retarder with rollers and brushes. After about an hour of dry time with a couple small air movers running, we were ready to install our new white oak.
Each job is different, so these exact steps may not be in the cards for every single install, but for this particular one it fit the bill. When it comes to subfloor prep, going above and beyond can make a dramatic difference that will make the clients happy and help preserve the finished floor for many years to come.