Concrete prep took me longer to embrace than any other part of a flooring job, and looking back, I know exactly why: I wasn’t comfortable with it, and I didn’t have the right equipment. But if you’re working in the shore area of New Jersey, you don’t have the luxury of avoiding it. You have to be ready for every type of subfloor. At first we just took moisture readings and tried to grind down the high spots with a hand-grinder, then fill in low spots with patch and buff it. And I’ll be honest—if you went back to some of those jobs today, you’d probably find hollow spots under the wood floor. Then we had a job where an engineered floor started to delaminate over a hump in the floor. There’s nothing worse than a job failure—for us, for the customer and for the wood flooring manufacturer.
We knew we had to get better, so the first thing we did was go to the concrete school at Ardex to learn the background of all the products available and the correct methods to mix them, pour them and apply them. We also subcontracted with a union guy whose only job is to do self-leveling. Over the years, he’s taught us so much about the proper techniques on real job sites, and we still hire him to help us on some big jobs. We also still frequently call the reps for the different products and get their advice about which are the correct products to use for specific situations. Here are some of the things we’ve learned.


1) Create a grid that maps the slab
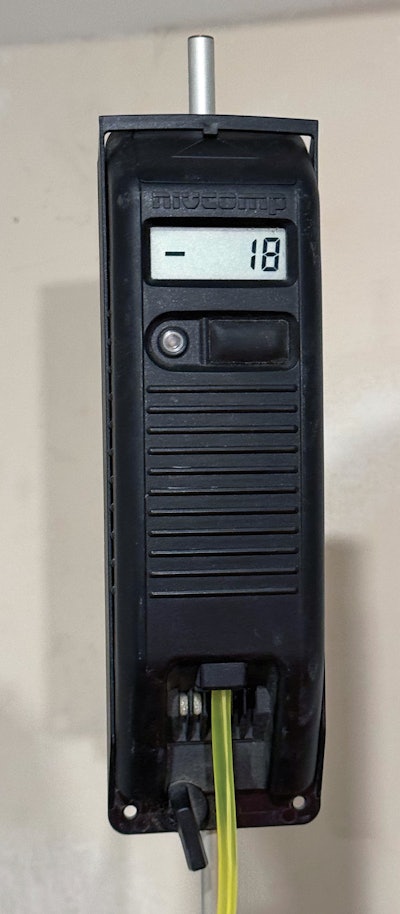
At first, when we were measuring slabs, we were using lasers and measuring tapes. It was time-consuming and not very accurate. Then I found out about the Nivcomp digital level tool. Game-changer. With the Nivcomp (shown at right), you set the black box at the highest point on the slab, which becomes “0”. Then you walk around with the handheld device, and it gives precise readouts of how many millimeters each spot is lower than the original “0” spot. We create a map of the floor with those measurements, like you see below. We actually use this tool for both slab and plywood subfloor jobs, and it’s made a huge difference. Creating the grid you see here took two guys about an hour.

That grid allows us to accurately determine how much self-leveler we need for each job. Just like when you’re coating, there’s nothing worse than being almost done with pouring your self-leveler and realizing you’re a little short. If a floor is particularly bad, I add 15% waste to my measurements to be safe, but if the floor isn’t as bad, I add 10%.
Having these dimensions provides me with something to present to the builder or the homeowner and say, “Check out what’s happening here.” Data is crucial for converting non-believers into believers—you can’t refute it or claim that the additional effort to repair the foundation isn’t needed.

2) Grind for the right CSP
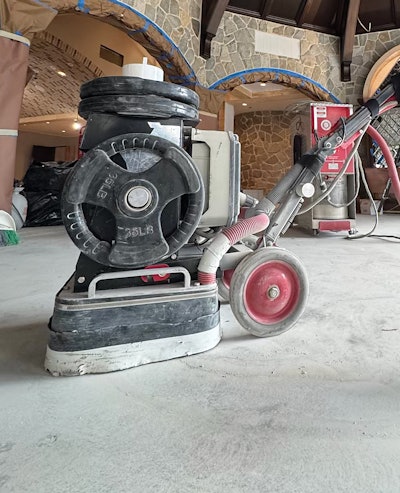
You have to remove contaminants from the slab and make sure it has the right CSP (concrete surface profile), which is a measurement of how rough the slab’s surface is. That way your primer will adhere to the slab. At first we were grinding the slab with a buffer with a metal grinding wheel on it, but we quickly invested in a machine built specifically for grinding concrete, the Rhino RM350. It is an expensive piece of equipment, but it was worth the investment.

Any time you are dealing with concrete, whether you are grinding or sweeping, you should be using a HEPA vacuum, because silica dust over time can cause cancer, lung disease and kidney disease, and you need to take the proper precautions required by OSHA. (On a less serious note, it will also damage any electronics on the job.)
When we bought the Rhino, we had to buy the entire system including the HEPA vacuum, and I think the total investment (about five years ago) was something like $20,000. The metal tooling that contacts the slab is expensive, and it doesn’t last, so I make sure paying for that is included every time we estimate a job.
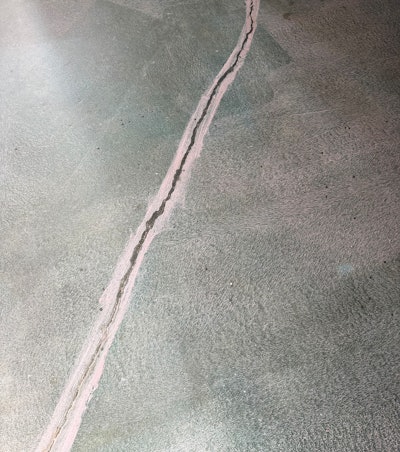

3) ‘Honor the crack’
The first thing we learned in Ardex school was to “honor the crack.” It’s a rare slab that doesn’t have any cracks, and they must be filled with a product like polyurea or a polyurethane injection. Whatever product you use, it has to be flexible enough to expand and contract as the crack changes. You put the product in the cracks, then fill it with a specific sand while it’s still wet.

4) Prime the concrete
If you use a patch material, you know that it will stick to almost anything. Self-leveler is not the same. It has a lot of sheer strength, and it won’t stick to the slab unless the slab is primed properly. When we first started doing this, we had a failure where we didn’t prime correctly and the self-leveler cracked. The good thing is that the failure is almost instantaneous—you don’t have to wait days or weeks to see that it failed.
For primers, there are single-component products and two-component epoxies. Which primer you use is dictated by two things:
1) How much moisture is in the slab? This will tell you how much moisture you need to block. We use Wagner in-situ probes that measure the RH and the temperature of the slab. We use three for the first 1,000 square feet and then one for every 1,000 square feet after that.
2) How thick will your self-leveler be? All of the different single-component primers and two-part epoxies have limits of different thicknesses of the self-leveler, so you have to marry up your moisture protection needs with—precisely—how thick it will be poured.
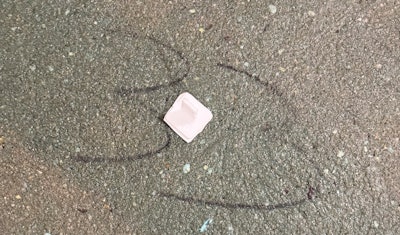

5) Place the pins
You can’t just pour your self-leveler and expect it to magically do what you need it to. That’s why we place these white pins you see around the floor. The number you see marked underneath them corresponds with the number on our grid we created. We quickly go through the floor with the Nivcomp again—not as detailed as our first survey—and make sure our pins are accurate. Then we cut the pin to the height we need the leveler to be in that spot.
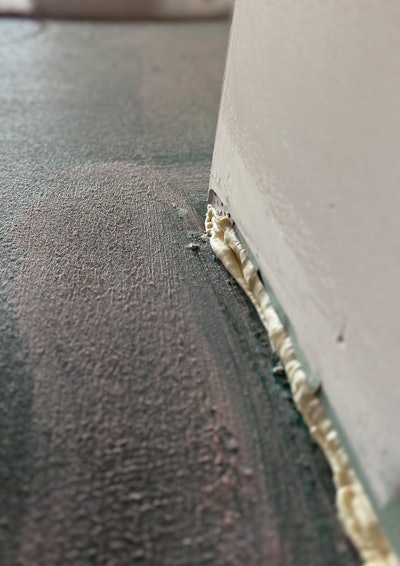

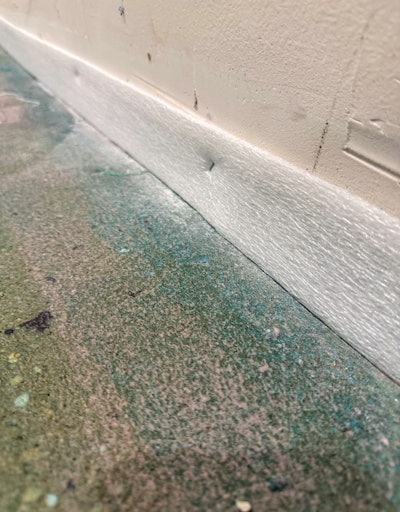

6) Control your perimeter
There have been cases where self-leveler has escaped and gone down to an apartment one level below, and that is not good at all! You need to keep the self-leveler where you want it. Depending on the job, we use spray foam (above), a perimeter isolation strip (at right) or both to contain the self-leveler. The point of the isolation strip is two-fold: It contains the self-leveler but also gives some expansion space so it doesn’t end up cracking. If we’re only doing a ¼ inch or ⅜ inch of a pour we might not use the perimeter strip, but once we are doing at least ½ inch, we typically use it.
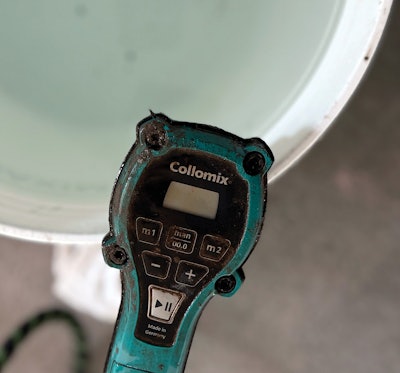

See the Collomix water meter in action on one of our jobs here:
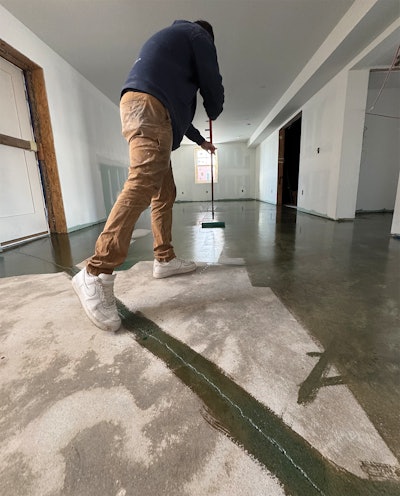
7) Mix and spread the self-leveler correctly
Mixing self-leveler is like mixing a cake: You need a precise ratio of water to your self-leveling product. It has to be dead on, or it won’t work. That’s why we use the Collomix device (above) on the hose: You tell it the exact amount of water you want to use per bag, and it gives you the exact amount of water every time. That is a tool that was worth the investment (about $300)! You also have to wait a specific amount of time after mixing.

In the beginning, we were mixing by hand and figuring out the amount of water we needed by using small buckets, and we were doing two bags at a time. Once we invested in the Portamix Hippo you see below (about $3,800), we could mix five bags at once.


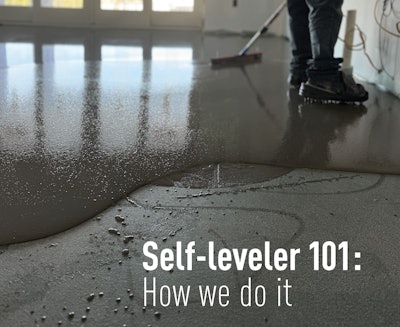
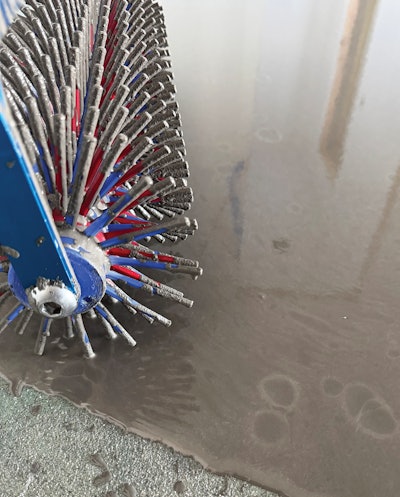
To distribute the material, we utilize a gauge rake (shown on right) that can be set to the specific thickness we are pouring, along with a smoother (shown on the photo on the opener of this article). We also use a spiked roller (below top photo), which breaks surface tension and allows trapped air to escape, and we wear spiked shoes (below bottom photo).


Here's a short video showing us working with the self-leveler on one of our jobs:
Final thoughts
Just like when you’re learning to sand a floor and realize that every single floor is different and might need tweaks to your process, it is the same with subfloor prep—every job is different. You might learn something at school but then realize it seems very different on a real job. There are many variables to consider and so many different products to learn about, and your experience starts to build as you do it. No matter how long I do this, though, I come across things I haven’t seen before and need help knowing what to do, so I never hesitate to call my reps and ask for their expert advice.

Now that we have the specialty training and equipment for this, other flooring companies are hiring us to do this for them, and we are starting to do some gypcrete work, so having this knowledge is opening up another source of income for our company.
NOW TAKE A SHORT QUIZ ABOUT THIS ARTICLE:
A word about asbestos

Sometimes unique challenges arise. On this job you can see what looks like black tar adhesive on the floor, and that old cutback adhesive contained asbestos. Removing asbestos like that is extremely difficult and expensive even for an abatement company, so the solution is to encapsulate it. This project was on the 35th floor of a building in New York City, and bringing our usual self-leveling equipment into a job like that is nearly impossible. Fortunately we were able to use a product that is perfect for these kinds of situations. It’s the most expensive self-leveling product available, but it doesn’t require a primer. It comes with a 35-pound bag of the product, a rapid-setting compound additive (with no water required) and a bucket for mixing.
On jobs like this, I just assume that existing old adhesive has asbestos—never take a chance on disturbing it, or you could face huge liability.—A.B.