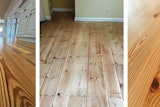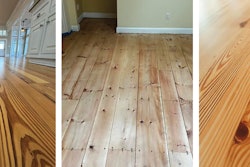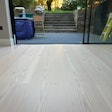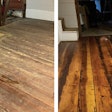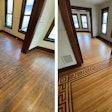
At one time, glossy finishes were all the rage, but now super-low-sheen finishes are where it's at, and along with this trend has come increased interest in oil finishes (not to be confused with oil-modified polyurethane finishes). These finishes replicate the more natural look of many historical floors, making oil finishes especially suitable for today's popular hand-scraped and distressed floors. That isn't the only factor causing interest in these finishes. Some oil finishes are very low-VOC or even no-VOC, catching the attention of consumers searching for environmental products.
That said, these finishes are not for everyone. Requirements vary depending on the traffic and the finish, but oil-finished floors do require (in addition to routine maintenance) re-oiling, typically every two to three years for a residential job.
Application for these finishes varies. Following are steps for a hardening oil finish. (Make sure you always follow the manufacturer's directions for the specific oil finish you're using.)
SUPPLY LIST
- Buffer
- Vacuum
- Recommended wood floor cleaner
- Mop
- Water
- Bucket
- Moisture meter
- Oil finish
- Paint roller (3/8 -inch nap)
- Red or tan pad
- Squeegee, or cloth and white pad
- White pad
Step 1

For your final sanding, don't pick a grit that's too fine, which would close off the grain; you want the oil to be able to soak down into the grain. In fact, some contractors find that when using a penetrating oil finish, they can stop at a lower grit than they normally do with surface-type finishes. As always, make sure the floor is cleaned well after sanding.
Step 2

Mop the floor with the recommended wood floor cleaner and allow the floor to dry completely (typically one to three hours). Use a high-quality mop and have a bucket of clean water available to clean the mop as you go. For exotics such as Brazilian cherry, you may want to repeat this step.
Step 3

It's best to check the floor with a moisture meter to confirm the floor is dry before proceeding.
If you wanted to stain the floor, you could do that instead of steps 2 and 3. However, some oil finishes have colored oils available, making staining unnecessary.
Step 4

This product is applied liberally with a paint roller with a 3/8 -inch nap. You don't need to worry about being careful with the application as you do with many finishes. Work in sections of 250 square feet or less. Once it's on, allow the oil to sit for 15 minutes, giving it time to penetrate and saturate the floor.
Step 5

Next the floor is buffed with a colorfast pad such as a red or tan pad. Those pads are coarse enough to knock down the grain while also driving in the finish.
Step 6

Now the excess oil is removed. On a flat floor, a squeegee can be used on most of the floor, with rags where necessary around the floor edges. On a distressed floor, rags are used over the entire floor. Make sure you have a way to safely dispose of the oil-soaked rags.
A cloth under a buffer with a white pad (inset photo) could also be used to remove the excess oil.
Step 7

Then a white pad is used to polish the floor until the finish has an even sheen. Now the oil needs to harden, which typically takes about six hours. Many contractors wait overnight before applying the next coat.
Step 8

The next day, a thin coat of either the same oil or a paste version is applied. This step evens out the floor and provides some extra buildup. If the same oil is applied, a small amount can be poured into the center of a white buffing pad and buffed in.
If the paste is used (shown), a line of it can be squeezed out about 2 feet from the wall line and buffed in with a white pad. As it's buffed, it will liquefy and spread. Look at the floor from different angles to find dry spots.
Step 9

For a slightly lower sheen, the floor may be buffed once more using a white pad with a polishing cloth underneath.
Step 10

The floor is ready for traffic in six to seven hours.
RELATED: Wood Floor Finish 101: The Low-Down on Today’s Finishes
Oil Basics
The many types of oil finishes on today's market can cause confusion, especially as they become more popular. Here are a few facts:
• The "oil" used as a base varies greatly. Some manufacturers use petroleum-based oil, while others use tung oil, linseed oil or vegetable-based oils. In Europe, petroleum-based products are referred to as "synthetic."
• Oils penetrate down into the wood instead of creating a film over the top like a polyurethane or waterborne finish does.
• Some oil finishes, in addition to penetrating into the wood, also have ingredients such as waxes or certain oils that harden as they dry.
• Oil finishes tend to bring out the grain of the wood and give it depth.


