
You meticulously inspected and moisture-tested the subfloor. Then you accurately measured out your working lines and installed the flooring for the best aesthetic appearance.
Taking no shortcuts,you methodically sanded the floor, taking care with the big machine, edger, buffer and scraper to make the floor as flat as possible. Now it's ready for the last step: the finish. It's a make-or-break moment — how you apply the finish can make the floor look awful, despite the rest of your hard work, or it can make the completed floor look spectacular.
OPTIONS
The first step in a successful finish application is choosing a finish you like to work with. While you are experimenting with the different options, use your own floors or panels in your shop — don't make your customers' floors the guinea pigs.There are plenty of finish options on the market,almost all of which offer sheen options from satin to high-gloss:
Oil-modified urethane: Oil-modified finishes have a petroleum base. These finishes give floors a somewhat amber patina.
Waterborne urethane: As their name implies,these finishes are water-based, and they dry clear,without the amber look, although some companies make an additive product that will give the finish that effect. There are both one- and two component waterborne finishes. While single component finishes are ready to use right out of the container, two-component waterborne finishes need to have a catalyst, or a "cross linker"mixed into them on the job site. (Cross linkers should be for professional use only).
Moisture-cure urethane: Moisture-cure urethanes cure by absorbing minute quantities of moisture from the air, which causes them to dry and harden. Relative humidity is critical to the curing process. Moisture-cure urethanes dry with a patina from clear to a dark amber. These finishes may be difficult for the layperson to apply properly, and are best left to wood flooring professionals.
Conversion varnish: Because of their national origin, conversion varnish finishes are often referred to as Swedish finishes. (Some water-based urethane manufacturers also call their products "Swedish" because of their origin.)These finishes range from clear to slight amber in appearance. Conversion varnish finishes may be difficult for the layperson to apply properly and should be applied only by a skilled wood flooring professional.
JOB-SITE PREP
It cannot be stressed enough to always follow the manufacturers’ recommendations for the finishes that you are using. Some finish companies even offer technical classes on correctly using their products. One way or another, keep abreast of the latest recommendations— finish formulations and application techniques sometimes change.
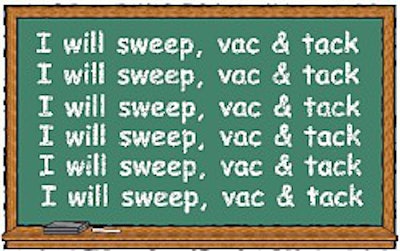
No matter which finish you’re using,you need to start out with a clean jobsite. Sweep, vacuum and tack the floor with a clean rag before you begin. If the climate permits it and the manufacturer recommends it, turn off HVAC systems so that dust and other particles won’t be blown out of openings into the area in which you’re working. If turning off the HVAC system means that you (and the finish) would freeze or swelter from the heat, there are filters you can use to cover HVAC openings while the system is operating. Either way, the point is to keep particles, small or big, out of the finish.
One of the easiest ways to track in dirt is on your feet. Be mindful of wiping off your shoes before stepping onto the floor. Many meticulous floor finishers even keep a pair of shoes they wear only while applying finish.
There are some key safety issues while applying finish, as well. Respirators (not just a dust mask) should be worn while applying most finishes. Directions for most conversion varnishes and moisture cure urethanes specifically require wearing a NIOSH/OSHA-approved respirator. Also remember to turn off any open flames or pilot lights, an especially crucial point when working with conversion varnishes, which have a low flash point (the temperature at which a substance will ignite when introduced toa flame).
One final check before you begin application is to take moisture meter readings at several points in the area where you'll be working to make sure the floor is at an acceptable moisture content. Also, make sure windows or any other sources of direct sunlight are covered so that the finish will cure evenly across the floor.
GET TO WORK
To begin with, some manufacturers recommend that you use a sealer as your first finish coat. Sealers are products designed to reduce the absorption of succeeding finish coats,allowing the finish coats to build up. If you do use a sealer, make sure it is one formulated to work with the finish you plan to use. Most finish manufacturers recommend a "systems" approach, that is, using a sealer, stain (if necessary)and topcoat finish formulated to be compatible.
As you apply finishes or sealers,follow the recommended coverage rates. Finish that is too thick or too thin can negatively affect the finish's appearance and performance. The applicators and application methods you should use vary among the different finish types:
Oil-modified: Pour the finish into anon-metal tray or bucket and use a natural-bristle brush, lambswool applicator, applicator bar or roller to apply the finish. Begin the application along one edge of the room with the direction of the flooring. Cut in at the wall. Remove excess finish from the applicator and apply liberally with smooth, even strokes along the grain. Avoid overworking the finish, which can produce both bubbles and splatter. Work in a path narrow enough to keep a wet edge, and lap strokes back into the area just covered. If you are using a lambswool applicator, remove excess finish from the applicator and then apply across the strip direction or pattern direction in short strokes. Straighten the cross strokes with a single sliding stroke along the strip direction, feathering into the previously applied wet area. Again, always maintain a wet edge. Missed spots or skips can be retouched if the finish has not begun to skin over.
Waterborne: The most commonly used applicators for water-based sealers are nylon brushes, paint pads,and weighted or non-weighted bars (Tbars). The most common means of applying waterborne finishes is with a T-bar, using the "snowplow" method.Pour a small stream of finish along the starting wall. Using a clean, predampened applicator draw the applicator forward, with the grain of the wood, moving the sealer toward the opposite wall. Do not put pressure on the applicator; merely pull it across the floor. Keep the head of the applicator at a "snowplow" angle,directing excess finish toward an unfinished area. At the end of each stroke, turn the applicator toward you and pad out the applicator parallel to the wet edge. Remember to feather out all turns, taking care to avoid drips.
Moisture cure: A clean, soft, fine brush or lambswool applicator should be used to uniformly apply the finish,which should only be applied in areas with adequate ventilation. Best results are obtained if the material, room temperature and floor are above 65degrees Fahrenheit and the relative humidity is over 50 percent. The finish may be difficult to apply if the humidity is over 75 percent.
Conversion varnish: Stir the finish well and pour it into a clean plastic container. Using a natural brush,lambswool applicator or applicator bar, follow the grain of the wood from wall to wall, being sure not to overwork or apply too thinly, which will cause the finish to set up too quickly and not allow full flow.
Most finish manufacturers recommend abrading the finish between coats — use whichever screen or pad they recommend. However, the finish must be thoroughly dry before it is abraded. Depending on the finish, this may be a matter of hours or even days. Take note that when abrading a water-based finish, you must always use fiber pads or screens, never steel wool, which will leave behind small rust spots when the next coat of finish is applied. After abrading an oil-modified floor, vacuum and tack the floor with mineral spirits. If the floor has a water-based finish, use a cloth lightly dampened with water to tack the floor.
The number of coats used depends in part on your preference, the manufacturers' recommendations and the wear the floor will receive. Educate customers honestly about how soon they can put their furniture and area rugs back on the floor. (Depending on the finish, it could be weeks). The final step in your finishing job is instructing customers on proper maintenance, so that the floor you've worked so hard to perfect will look fabulous for years to come.
WHAT ARE VOCs?
Among many other consumer products, hardwood floor finishes contain Volatile Organic Compounds.VOCs that are released into the air react with oxides of nitrogen and sunlight to form ground-level ozone.
In August 1998, the U.S. Environmental Protection Agency approved a national standard for VOC emissions in architectural coatings, including floor finishes, which took effect in 1999. The standard calls for a VOC limit of 450 grams per liter for most wood flooring finishes. (Traditional oil-modified finishes have about 550 grams per liter; water-based finishes contain about 250 grams per liter.) However, conversion varnishes have a VOC limit of 725 grams per liter. (Most are alreadywithin that limit.)
In addition, the rule contains several clauses that will allow the sale of finishes that exceed those limits. There is a grandfather clause that allows manufacturers to sell non-compliant finishes that they have in stock before the standard takes effect, there is a “quart exemption” that allows manufacturers to sell non-compliant finishes in containers of one liter or smaller, and there is also an exceedance fee that allows manufacturers to sell finishes that exceed the limits by paying a fee based on the VOC content.
OTHER FINISHES
Wax is one of the oldest floor finishes and is still commonly used in some regions. It is applied in thin coats, typically following the application of a sealer and/or stain, and then buffed. Periodic rewaxing is necessary when buffing doesn’t restore shine. Because liquids leave spots on wax finishes, wax is not ideal for applications such as kitchens. Wax is, however, one of the easiest finishes to mend. One of the most common problems with wax is people’s tendency to recoat the entire floor without treating damaged areas separately. This leads to unnecessary wax buildup,while leaving the damaged area still looking worn.
Shellac is not recommended for use as a floor finish but is used occasionally as a sealer or to match old finish. Shellac may be coated with wax.
Varnish was commonly used before the introduction of urethane finishes, but it is rarely used today.
Lacquer enjoyed only a short run as a popular floor finish. It is not recommended as a floor finish, but it is occasionally used as a sealer. It has an extremely low flash point (the temperature at which a material will ignite if a spark or flame is introduced) of approximately 45 degrees Fahrenheit.
THE SAFETY ZONE
Be aware of the safety issues involved infinishing a floor:
• For most finishes, eye protection, rubber gloves and respirators are recommended. Be sure to check the regulations for the specific product you are using.• Avoid contact of finish with any exposed skin.• Always avoid breathing finish vapors.• Turn off any open flames or pilot lights before applying finish, especially conversion varnish and moisturecure urethane.• OSHA (Occupational Safety and Health Administration) requires that there be Material Safety DataSheets (issued by manufacturers) wherever hazardous materials are used or transported. Failure to comply with this and other OSHA safety requirements can cost thousands of dollars in fines.