 Performing daily maintenance on your sanding equipment helps ensure it will run when you need it, eliminating costly downtime.
If spending a few extra minutes on every job would help you earn thousands more, would you do it. Of course; any contractor would be crazy not to. It's surprising, then, how many contractors don't take the extra time to do daily maintenance on their sanding equipment. A few simple cleaning steps each day can dramatically lengthen the life of your machines, saving thousands of dollars in the long run.
While maintenance protects your equipment, it has other benefits. It helps produce better sanding jobs, with less sanding dust, abrasive grit and other debris tracked between cuts or from job to job. And, clean equipment helps project a professional image on the job site. A homeowner feels more confident that a contractor will take care of her home when it's evident that he takes care of his own tools and equipment.
Necessary tools/equipment:
- Air compressor
- Vacuum
- Hand-scraper
- 1/8 -inch drill bit
Step 1:

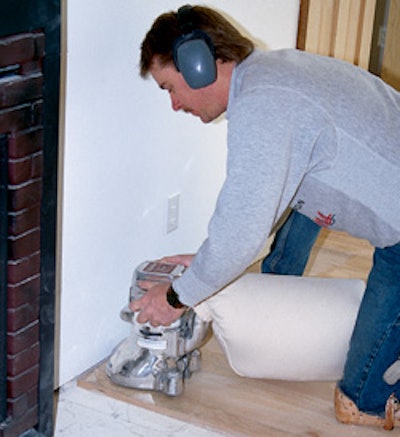
Before you do anything, make sure the machine is unplugged. Then, remove the roller assembly from the big machine and vacuum it, or use your air compressor to blow it off thoroughly. While the roller's out of the way, vacuum the dust chamber, too. Doing this helps prevent premature wear of the rollers and guide wheel and helps maintain proper tracking.
Step 2:

Use your air compressor to blow out the motor. If it's an open motor, it helps prevent sawdust from building up on the armature and the field windings. That helps reduce heat and prevents premature motor bearing failure.
Step 3:

The compressor also can be used to blow out the area by the belts, getting rid of bits of filler, finish and other airborne particles that gather on the belts. If left there, the dirt can cause excessive wear to the drive belts, creating chatter on the floor.
Step 4:

Also blow out the area by the drum, preventing sawdust buildup on the backside of the drum that can cause it to go out of balance, creating sanding imperfections.
Step 5:

Use a hand-scraper to remove dirt, dust, grit and other debris from the wheels. This prevents imperfections in the floor due to machine bounce.
Step 6:

Check the driver pad of your edger for debris and imperfections, such as holes in the pad caused by hitting a nail or staple. Keeping the bolt hole clean by blowing it out with the compressor helps keep the sandpaper tight. If the bolt hole is really clogged, use a 1/8 -inch drill bit to get the dirt out, being careful not to damage the threads.
Step 7:

Clean the wheel casters, which are good hiding places for sawdust and dirt. You can use the compressor for this, too. The caster wheels should spin and rotate freely to help the edger function properly and prevent damaging the floor with wheel marks.
Step 8:

Blow out the brush block assembly and motor brushes to help maintain correct contact between the brushes and the armature. Doing this prevents loss of power, burning of the armature and excessive wear of the motor brushes.
Step 9:

While you don't have to do it every day, periodically—after about every 500 hours of use—check the motor brushes. When they are about half worn, it's time to replace them. Worn motor brushes shorten the life of the armature and cause loss of power during operation.
Step 10:

Blow out the dust pickup fans to keep the edger's vacuum chamber free of dirt, creating better dust pick-up and preventing fan wear.
Step 11:

Blow out the cooling fans. This helps blow dust off the armature and the field windings, helping to prevent excessive heat.
Step 12:

Use the compressor to blow out the buffer's motor. (Again, be sure it's unplugged.) This prevents heat buildup and allows peak motor performance. If your buffer has a totally enclosed motor, don't take it apart to blow it out; just clean it externally.
Step 13:

The bottom of the buffer traps sawdust and abrasive grit. To make sure you don't transfer debris from one cut to the next, take a few seconds to vacuum it out. Eliminating the dirt helps create a floor with fewer imperfections and a smoother finish appearance.
Step 14:

Leaving the buffer standing upright for any length of the time crushes the skirt, making dust containment less effective. When the buffer isn't in use, either lay it down, or use storage pads available from many manufacturers. While in transit, make sure the buffer is secured so it doesn't slide around inside the truck.