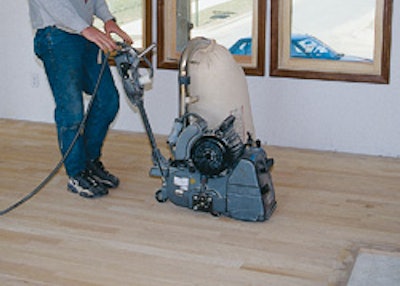
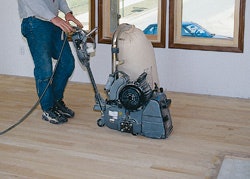
The big machine is one of the most expensive investments a wood flooring contractor makes. Some contractors take a few extra minutes every day to protect that investment by doing maintenance that keeps the machine running well. Others tend to keep machine service techs like me pretty busy.
Here are some steps you can follow to prolong the big machine's life. Many of the steps involve the big machine's worst enemy—dust. Wood flooring job sites are dirty places, especially when you're removing layers of old finish. The dust created in the sanding process can damage just about every part of the machine if it's left to build up over time.
Some of these steps apply to all machines, others may not. Read the owner's manual for instructions specific to your machine. I always tell my customers that if they don't have a manual, I'd be happy to fax or mail a copy to them. These are big-money machines, so a little simple maintenance can go a long way.
SUPPLY LIST
- Hand-scraper
- Lacquer thinner
- Compressor
- Masonite
- Power booster
Step 1
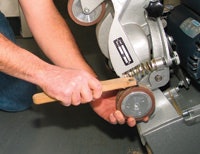
Check your wheels every day. They tend to collect old finish and debris, especially if you do a lot of jobs removing old finish or sanding pine floors. To clean the wheels, prop your machine up and use your hand-scraper to remove all the old finish. You should also check the wheels for flat spots. An easy way to do this is to roll the machine over a flat surface—if you hear a regular thud, there's probably a flat spot.
Step 2
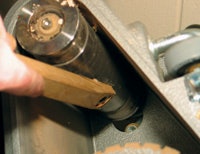
You should also blow out your machine every day. First, use your compressor to blow the dust off the upper roller assembly. When it gets dirty, it affects the pressure on the belt and can even shoot the paper off. If the roller is really dirty, tip the machine up and scrape the roller with your hand-scraper. Then, clean it with lacquer thinner.
Step 3
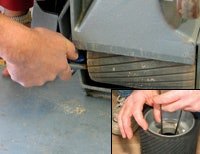
Also blow out the dust chamber and the drum. This is especially important for open-cavity drums. If enough dust collects inside an opencavity drum, it can cause chatter. In the inset photo, I'm demonstrating the entire area in an open-cavity drum that can fill up with dust and dirt.
Step 4
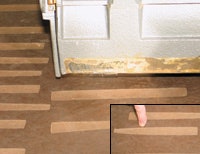
Periodically check that your machine has even drum pressure. A good way to do this is to use a dark sheet of 4-by-8 foot Masonite on a flat surface, such as your garage floor. Drop the drum down on the Masonite to get a full impression. The mark left by the abrasive should be perfectly uniform (like the mark directly in front of the sander). If it isn't (inset), adjust the drum pressure slowly until it's even. Pressure that's too hard on one side can ruin your roller and your drum.
Step 5
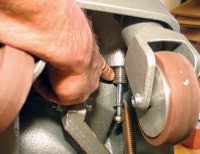
Some big machines have drum pressure screws. These get dirty—I've seen some so bad that you can't even unscrew them—so take the time to unscrew them and blow them off, too.
Step 6
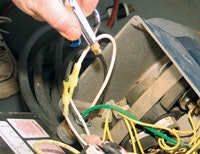
If your big machine has a vented motor, it's a good idea to unscrew the cover once a month and blow that out, too. If the capacitors and the start switch get dirty enough, sometimes the machine won't start.
Step 7
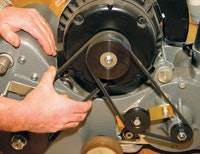
At the end of every day, loosen the belts, and remove or loosen the abrasive. Check the belts for wear: When you squeeze them like I'm doing here, there should be about 1/2 inch of play in them. Also look at where they are riding—if they are flush or below the pulleys, then they need to be replaced.
Step 8
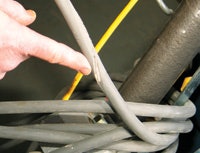
Keep an eye on your cord, inspecting it for nicks and exposed wires. If it's worn through, replace the cord, or cut it off and use a pigtail. Also check the ground on the plug. Some guys cut off the ground when they need to plug into a dryer outlet, for example, and the plug configuration doesn't match. Instead of doing something dangerous like cutting off the ground, you can use an adapter made for this purpose.
Step 9
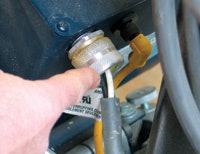
Also check the strain relief on the cord. Make sure it's still holding the cord, otherwise it will pull on the wires, like it is on this machine.
Step 10
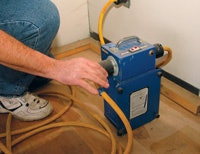
Make sure your machine gets the right voltage on every job. I strongly recommend that you buy a power booster. It tells you if the voltage is too high or too low, and you can dial the booster up or down to get the correct voltage. And, if you get a sudden increase or decrease in power, the booster will take the hit instead of your expensive machine.
RELATED: Your Sanding Machines Don’t Look Like This, Do They?
In the ShopEven if you do daily maintenance, you'll still need to bring your machine in to have it serviced periodically. Following are some things your service pro can help you with. When in doubt, just give him a call. Bearings need to be replaced. I recommend checking them at least once a year, although I've seen them go bad after only four or five months of intense use. Rollers can get worn. If you have trouble getting them off or you do remove them and see that the edges aren't of equal thickness, you should bring the machine in. If your machine is cutting unevenly or not giving you the full length of the cut and you don't know how to dress the drum yourself, bring it in. |


