Problems with Pegs
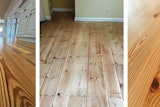
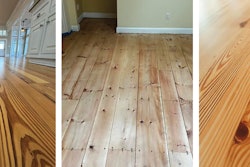
I recently sanded a custom floor of red oak planks with Brazilian cherry pegs. The pegs were placed in each board. After I applied the last coat of finish, I noticed that the floor was not flat, with the pegs protruding slightly from the floor. We followed the recommended sanding sequence procedures. We redid the floor a second time, but the problem got worse.What went wrong?
Ricardo Pairazaman, technical advisor for the NWFA and director of Chester, N.J.-based Woods of the World, answers:
The problem you're facing is dealing with a floor that contains two species of two very different hardnesses. You were right to use the sanding procedure for the species—in this case red oak—that is used in the majority of the floor. However, you have to pay special attention throughout the entire process, checking at every step to make sure the floor is flat.
When sanding a new floor, it's a good practice to start your first cut at a 7- to 10-degree angle to the direction of the floor. This helps eliminate overwood and also helps prevent end grain, knots, and, in this case, protruding pegs of different species, from being a different height from the rest of the floor. Then, with the same abrasive, sand in the direction of the floor to remove the scratches. After you finish sanding, make sure you don't overwork your buffer. Otherwise, you may dish out the softer wood more than the harder wood, which would recreate the problem all over again. Once again, check the flatness of your floor before you apply any finish.
Understanding Stability
One of my customers would like an ipé (Brazilian walnut) floor. I've heard that ipé can be more stable than some of the other exotics, but I've also hear d that it's a very dense wood. I thought that dense woods were less dimensionally stable. Is that true?
Charles Peterson, president at Gales Ferry, Conn.-based International Parquetry Historical Society, answers:
It is true that denser woods will generally shrink and swell more with changes in moisture content. To understand why, you need to understand a little bit about the structure of wood. Denser woods have more cell wall area and less cell lumen area, which is the empty space in the middle of the cell. Free water is stored in the cell lumen; bound water is stored in the cell wall. It takes more energy to remove water from the cell wall than the cell lumen, and for this reason, bound water leaves after free water. Wood will not change dimensionally until the bound water is taken from the cell wall. Wood with more cell wall area holds more bound water, so denser woods will have a bigger dimensional change.
Woods high in extractives are an exception to the rule. "Extractives" generally consist of resins and polyphenols (and other compounds). They contribute to the characteristics of wood, such as its color, smell, density, resistance to decay, insect resistance, hardness, specific gravity and sensitivity to moisture changes. These extractives are also the cause of adhesion problems with some finishes and adhesives.
The molecules of some extractives fill areas in the cell wall and decrease the area available to water molecules. With less area available to bound water, the wood becomes less sensitive to moisture changes. So, even a dense wood, like ipé, can be more dimensionally stable if it is a species with a high extractive content.
Hiding Rusty Holes
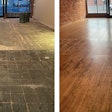
I have a refinish job on a wood floor that was covered with carpeting. In the entryway, there is a row of ugly, rusty nail hole stains across the boards. My client expects that these holes will disappear. What can I do?
Tom Macedo, owner at Fresno, Calif.-based Valley Hardwood Flooring, answers:
Stains like these may be from carpet tacks that have rusted, leaving ugly black, "burn-like" stains deep in the wood. They are usually caused by many wet carpet cleanings, causing those old nails to rust. Filling those holes will just make the rust stains around the holes stand out even more, and digging out the rust stains is out of the question. If you think you can match the existing wood, you could remove and replace the stained boards.
With a little practice, a simpler, faster answer is—at an extra charge of course—to paint over those stains with mixed color acrylic paints using blemish-removing techniques like the ones used with makeup. My artist daughter taught me this technique, which is simple and results in the stains being barely visible or not visible. You'll need to find the right color blend of browns, yellows, pinks, whites and even greens to match the main color tone of the floor (you'll only need small tubes of the acrylic paint). Then, use small brush strokes of the darker tones to match the grain.
Mixing the colors is tedious, but your proficiency will get better (practicing at home with prefinished scraps helps you learn which colors and brushes work the best). You can do the repair before the final coat, but many times the client won't commit to it until they see how ugly the holes look when only filled. In that case, you can just paint over the top of the last coat and blend in a top layer of finish over the area (since the finish is fresh).


