
A few years back I attended a floor technical school. There was only one panel that was made out of maple, the rest were red and white oak panels. Three guys took the task to sand that floor. When they were done, it didn’t look good. It looked okay, and it had a clear finish, which is pretty forgiving. Those guys were in the business of floors for more than 20 years. They thought it looked great. Well, guess what? I had to come over and open my big mouth. I pointed out everything I saw. They quickly realized their technique was poor, and their sanding sequence was mediocre at best.
Sanding a maple floor is not like sanding oak. You are most likely going to refinish one maple floor every few years, so you will not get that many chances to practice. What works on oak doesn’t work on maple. I recently was asked to look at a maple floor to fix. It had every imperfection you can think of:
- Scratches from the big machine (with the direction of the floor)
- Edger marks
- Swirl marks from a buffer
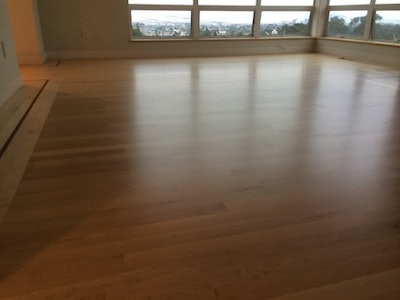
- Finish streaks
- Debris in the finish
- Thickness planer marks on every stair tread (new install)
Maple is light in color, hard and has a closed grain. If you understand these three factors, you will sand a maple floor very successfully. Because maple is so light, scratches will not be so easy to spot like on oak floors. You will need to get on your hands and knees with a light so that your eyes are only a few inches away from the floor. That is the only way you’ll know how your sanding is going (well, you can always wait for the finish coat, which will pop the hell out of everything you did to that poor maple). It is light, so even after you buffed it between coats, you can’t really see where you applied finish and where you didn’t. it is a good idea to have one or two guys just checking you while you’re applying the finish.
Maple is hard and has a closed grain. You can’t put 36-grit scratches in it and expect to be able to remove them. Start your sanding at 60. Have a super-clean floor and super-good abrasives. If you happen to hit a nail, change out your belt. Your buffer will not take that scratch out (but my Trio will). Work your grit up until at least 100 before you start buffing. There is a certain art to understanding what you’re doing to a floor while sanding it.
Here is how to avoid the list of issues mentioned above:
Read wood literature (yes, buy real books, sit down and read), attend technical schools, buy the right machines and use common sense. Unfortunately, sense is not that common, so focus on attending schools and having good machines.
P.S. Notice there wasn’t any “Google it” advice in my blog. You’re a professional. Professionals don’t Google their profession.