Hidey-ho, Keith Long here with Thunderheart Flooring out of Greeley, Colo., to share some of my thoughts on sanding techniques.
Just as I stated before while demonstrating some of my installation techniques, this is my way of doing things. The same concept applies here—I’m not telling you what you should do when it comes to sanding, I’m merely demonstrating what I do. If you see something you’d like to try, great! If you’re happy getting your desired results doing things differently, that’s also great—these blog posts are a (hopefully positive) way to associate.
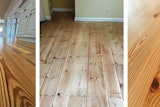
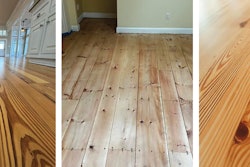
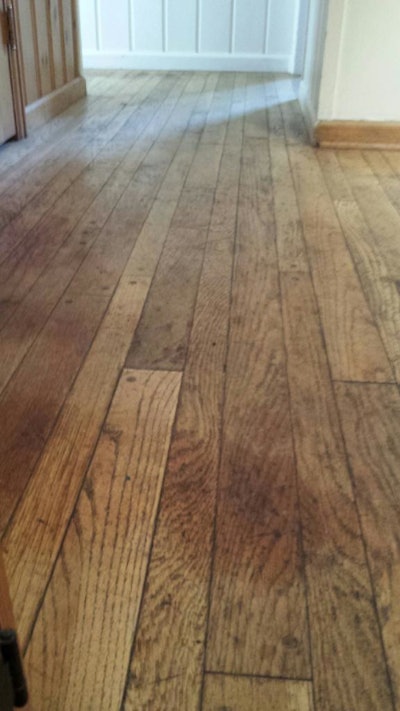
Above is a floor in Greeley, Colo., where the house had been used as a rental, and was recently purchased by a couple renovating it to use as their family home. The entire main level is select white oak rows of alternating 2¼-inch and 3¼-inch with walnut pegs. The new homeowners were concerned with some pet urine stains by the fireplace, and although they weren’t looking for perfection, they were wondering if I could make those areas look any better. I told them that sounded realistic—I was certain I could minimize their appearance but maybe not erase them completely. (Has anyone figured out a way to keep the original wood and get all the ammonia marks out? If you have, please leave a comment and tell us about it!)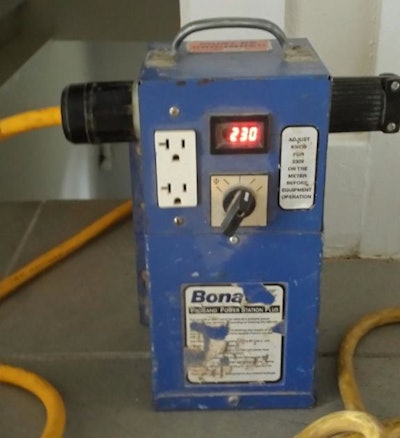
I use a voltage regulator, pictured above. This tool tells a person how much voltage is coming into the box, then allows it to be dialed in to the correct setting going out to any machines that use 220. The manufacturer recommends calibrating to 230 volts for optimum performance. Lots more or lots less electricity than that can bring the big machine or multi-disc sander motors to an early demise; I’d rather be proactive and get the correct voltage to the machine.
When selecting a belt to put on the big machine, I take the one furthest to the outside when they’re packaged together. It would be easier/faster to pull that kidney-shaped one out of the center, however, it’s the belt in the package that’s least like the shape once the belt’s on the machine, hence, it’s the one most prone to transfer something undesirable to the floor. So, to set myself up for success, I take the one from the outside.
This floor was pretty beat, so I decided to perform a grit sequence of 36-60-100 for the big machine, and 60-100 for the edger. In my experience, with as much finish as was on this floor, and as much height variation as there was, this was the overall best choice for the sequence. I’d rather get it flat with a 36 instead of trashing out several 50 or 60 grit belts for the rough cut. That being said, if it were a new install of an American cherry or black walnut floor, I would try starting with a 60-grit; I’ve had success two-cutting those species with the big machine.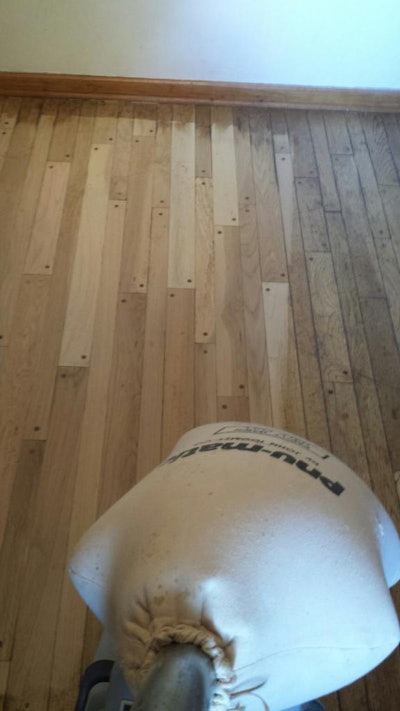
Notice that for this rough cut, I went on a slight angle? The reasoning for this is that overwood or other variations in the level of the floor have less chance of becoming magnified in the final product this way. I cut at an angle with the big machine on the rough cut only. Once it’s flat, then I sand with the grain for subsequent cuts.
Do you see that I’m cutting from left to right with the big machine? Here’s my logic behind that: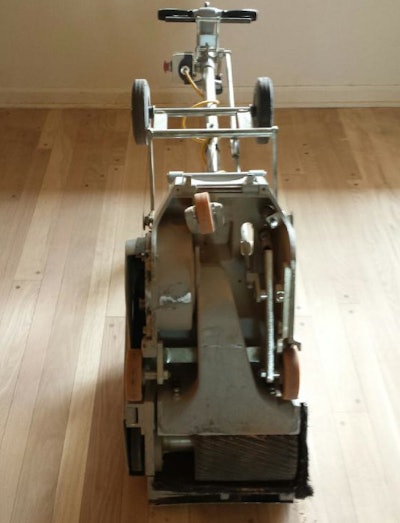
To discern which direction any big machine should cut, simply tip it up and look at the bottom. On mine, there are three wheels. Do you see how one of the front wheels is behind the sanding drum, while the other is not? With this machine, if a person cuts left to right, the left front wheel, which is not behind the drum, will only follow the undulations of the rough floor for the first two or three passes. Then, it will be trailing behind on a flat surface as it follows from left to right. If a person started from the right and cut left with this machine, the left front wheel would be in the lead, rumbling up and down all the way across the rough floor, with the drum following suit. Since I want to avoid transferring the undulations of the unsanded floor to the drum, the way my machine is oriented, I cut from left to right.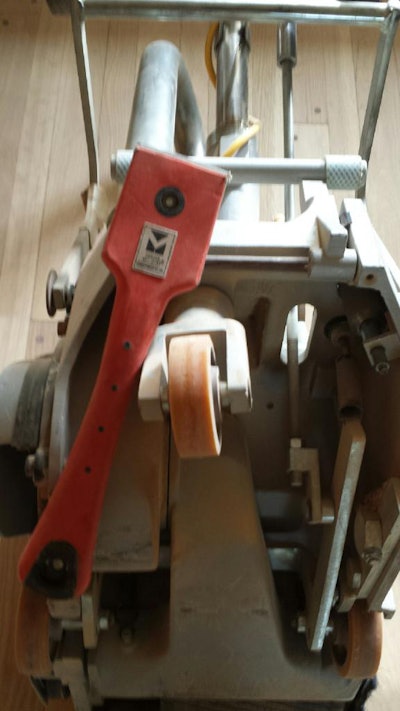
I’ve found it never goes out of style to keep the wheels on the big machine free of debris, so they can turn smoothly and perform well. I check them often. I do a full service for my big machine on average twice a year. I’m of a mindset that preventive maintenance is the most cost-effective and efficient way to go overall. Making sure it is a fine-tuned machine keeps it cutting optimally, which is what I want it to do. [Note from the editor: If you want to see some photos of what happens to your sanding machines when you don’t do preventive maintenance, click on this article.] Urine stains on a wood floor
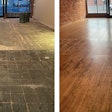
Aahhh … the smell of burnished pet urine in the morning—not my favorite part of what we do, but once a person sands enough floors, it’s bound to happen. After rough-cutting with 36-grit on the big machine, I broke out the edger and also used 36-grit. I avoided spending too long on any one spot, as I didn’t want to heat it up too much. So, I lightly passed from one spot to another, and visited each spot a couple times with 36-grit. This alone took a large percentage of the stains out. After 60-grit with the big machine, I followed up with 60-grit on the edger for these spots, and the same with 100-grit. The stains went away almost completely, and the homeowners were satisfied.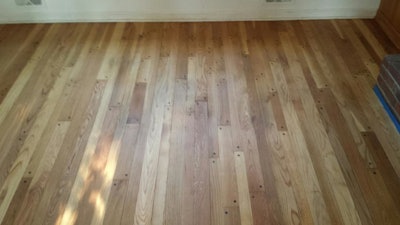
The relative humidity in Colorado is generally low year around. Many of the subfloors I measure are in that 4% to 5% range, and many times hardwood finds its equilibrium here between 6% and 7%. Since the moisture here doesn’t vary as much throughout the year as in many other parts of the country, Colorado is generally a hardwood flooring friendly state. Properly acclimated floors put down here don’t move much with the seasons, and it’s seldom I’m ever called by a potential client to look at a cupped or gapped floor. The norm where I live is to not have base shoe (shoe molding). This particular home was built in the early fifties, and does have it. However, as a general rule, I seldom run across it.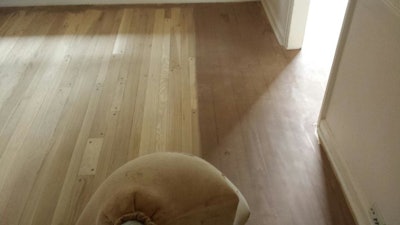
Since floors don’t move much here, a flooring technician can full-trowel-fill in this part of the country without much risk of it working its way out. This floor had quite a few tracks made on it, and where there were small voids, either side was dingy and dark. If I were to have put white oak wood filler in those voids, it would have stood out and drawn the eye, going dingy/light filler/dingy. So, I opted to put down walnut filler instead, which ended up being pleasing to the eye. (I’ve done the same thing with walnut filler on some dingy old red oak and maple floors with success.)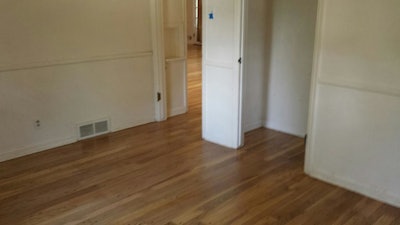
To blend the scratch patterns of the big machine and edger after both had passed at 100-grit, I used 100-grit paper on a multi-disc sander. It seems there has been a good bit of debate about this tool recently. Of the seven years I’ve been on my own as a flooring contractor, I didn’t own a multi-disc sander for the first six. I have had zero resands since I started my business, using a floor buffer to blend the field to the edges for the first couple 100 floors. In my experience, the floor can end up looking great either way. There was a time I didn’t understand the benefits of a multi-disc sander. Then, there was a time that I did understand the benefits, but didn’t have it in my budget to purchase one yet. I own one now, and like the results enough that I even use it on floors that are going natural. That being said, it doesn’t change the fact that I have six years’ worth of clients that love the way their floors look while blended with a buffer.
I find it interesting that there are so many details to discuss/debate in our industry. I intend for the next blog post to be about business.
As always, your comments and feedback are welcome. Stay sharp!


