Common Questions
My customers keep asking me about cleaning their floors with two things: steam mops and vinegar and water. What should I tell them?
Rusty Swindoll, technical services manager at the National Wood Flooring Association, answers:
We don't recommend steam at all for wood floors. With steam cleaners, you are basically forcing steam down into gaps and end joints of the wood floors. When people use them repeatedly that can cause finish to peel off the edges and/or turn cloudy, and the floor is going to look worn out long before it should. Then the floor will probably need to be totally resanded instead of needing just a recoat.
Years ago, vinegar and water was basically all we had for cleaning wood floors with a non-wax finish on them, but that combination isn't something we recommend today. The vinegar is acidic and can make your finish look dull or even damage the finish.
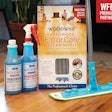
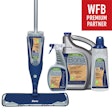
In today's wood flooring world we have plenty of cleaners that are recommended by the finish and flooring manufacturers. Tell your customers that to keep their floors looking as good as possible for the long term, they should use one of those recommended cleaners. Using a non-recommended cleaner or process-even if the cleaner or steam mop manufacturer says it's OK for wood floors-can make recoating a wood floor difficult or even impossible and possibly void the wood flooring or finish manufacturer's warranty. And if they use a cleaner and it seems to leave a residue or make the finish sticky, it's important that they not try to use another cleaner to try to remove the first one. At that point, they just need to call a professional.
Lap Lines
I'm having a hard time getting my waterborne finish down without lap lines. What am I doing wrong?
Bob Goldstein, technical service, training and sales at Hardwick, Vt.-based Vermont Natural Coatings, answers:
Running laps and swimming laps are good things; laps on your wood flooring job site, not so much. Lap lines are typically caused by applying finish (especially water-based) over finish that has either dried or has begun to "skin over," thus creating a thicker coat on the area where the applicator overlaps when applying the next run. Lap marks may be caused by many factors, including:
• Not keeping a wet edge while applying finish with a T-bar: When coating with a T-bar it is necessary to keep a wet edge along the entire length of each run. The wet edge ensures that the coating will not dry too quickly as you are working, especially in larger areas. Also, pull out all turn and stop marks right away. Make it an integral part of your technique to feather out all movements of your applicator onto or off of the floor. Think: airplane landing, airplane taking off (this applies to any type of applicator).
• If rolling, allowing your roller to become too dry: If you can literally hear your roller as it moves across the floor, it's too dry. It should be silent and smooth. Don't press down when using a roller; let the weight of the tool do the work.
• Applying finish over a hot floor: Cover the windows or coat in the evening if possible. You can add water to most water-based floor finishes to slow drying down (check with the manufacturer) and you can chill the finish to slow drying as well.
• Too much air movement: If you can shut down the HVAC system during the coating process, this will allow the finish the time needed to self-level.
• Simply not working fast enough: If this is your issue, then follow this advice: A guy is walking down the street in Manhattan looking lost. He approaches someone he hopes is a local to ask directions. "Excuse me; do you know the way to Carnegie Hall?" The local gentleman answers, "Practice, practice, practice."
Avoiding Swirls
No matter what I do, I seem to end up with swirls in my finish coats. Why?
Scott Avery, marketing specialist at Newcastle, Calif.-based Momentum Agents, answers:
Many factors affect how you sand a floor, but lighting is one of the biggest factors. Difficult lighting, whether it's floor-to-ceiling windows or can lights, generally requires using a finer abrasive and slowing down in order to evenly abrade the previous coat. Slowing down with a finer abrasive will evenly dull the finish coat, preventing the peaks and valleys between the matting agents that impact light refraction and show swirls. It is also important that you start your fresh abrasive in an area that is not well-lit. This will dull the abrasive before you encounter the harsher lighting. The goal should be to avoid cutting deep ridges into the previous coat.
Floor finishes can also be over-abraded, resulting in over-burnishing. This affects light refraction, creating shiny/dull spots, and can affect adhesion potential (if your finish requires a mechanical bond between coats). I prefer abrasives that are more flexible with good surface contact, such as a maroon pad with strips, and find that screens tend to have less flexibility and contact with the floor. Just remember to change the abrasive on the maroon pad before it is too dull, or you can slick off the floor too much and risk finish peeling.


