Oak Matchmaker
My customer had a red oak floor installed in his dining room five years ago. Now he wants the same flooring in the adjacent living room. There's a 4-foot-wide case opening dividing the rooms. Can I get the floors to match?
Rusty Swindoll, assistant technical training director at the National Wood Flooring Association, answers:
It's possible. Following are some things you need to consider before you accept this job:
- What grade and width is the red oak flooring?
- Is the floor stained? Can you match the color?
- What is the finish and sheen?
- In which direction do you need to run the flooring? Can you continue parallel to the existing floor (the easiest)? Or do you have to lace the floor into the existing floor, staggering the end joints? Another option is to use a header board as a transition.
- Trees come from different regions, and that can affect the color of the red oak. So, even if you match the width and grade, if you install Northern red oak next to Southern red oak, the wood may not match.
- Color changes from light exposure can affect the wood flooring and the finish. Putting a final coat over both the new and old flooring will help but doesn't guarantee a match.
- Is the subfloor acceptable according to NWFA's Installation Guidelines and the directions from the flooring manufacturer?
Most importantly, before you accept any job, be confident that you can meet your customer's expectations. Make samples, and have the customer approve them.
Chattering Drum
I love drum sanders, but my new drum sander seems to have chatter marks when I use the drum paper (when I try belt paper, though, it doesn't). How can I get rid of the chatter with the drum paper?
Bill Price Sr., moderator of "Shoptalk" at The Villages, Fla.-based Floormasters.com, answers:
Drum machines can tend to chatter. Old 12-inch machines usually did not chatter because they ran slower than 8-inch machines. A few things to try on the fine sanding are:
- Use the lowest drum pressure setting.
- Fold the new paper using the old paper from the machine, not the template.
- Back off slightly on the cams.
- Check your belts for cracks or chips.
- Check all pulleys for chips.
- Make sure your wheels are clean.
- Check the fan blade in the fan assembly for chips.
- Be sure that your drum is true.
- Check all four corners of the paper to be sure they tighten equally.
Most important, insert your shim behind the flap of the fine paper. This will reduce the size of the slot.
Resanding Engineered
We are refinishing more and more engineered floors. What should we be aware of when sanding this type of flooring?
Genia Smith, president at Durham, N.C.-based Accent Hardwood Flooring Inc., answers:
Good question. If at all possible, determine how thick (or thin!) the top ply is and whether you think the flooring can be sanded at all. If you determine it can't be sanded, recommend replacement or recoating. If it can be sanded, include this type of language in your contract: "There is a possibility that we will sand through the top veneer of this flooring. Should this happen, repair or replacement may be necessary. The cost of this repair will be $__ per hour plus material. The cost of replacement will be $__."
Proceed with sanding as usual. Rotary disc sanders are an excellent choice for refinishing this type of flooring. Be particularly careful not to sand too deep, especially around vents and edges, which are notoriously uneven and/or high. Instead of "sanding flat," you will want your machines to ride on top of the surface.
Unfortunately, you will end up sanding through the top ply occasionally. Be prepared. Keep several types of common engineered flooring on hand in popular widths and sizes for repair jobs. When it happens, chisel the affected area out of the flooring. If the sand-through is on an edge, take out the adjoining board, as well. The trick to this repair is that you must take material off the bottoms of the new boards. We use a table saw and fence to slice through (half at a time to keep your fingers!) the new boards. A planer will work, as well. Dry-fit the new boards until they are slightly below the rest of the flooring. Trimming the boards slightly, as well as using suction cups, makes this process easier. When you get the boards just right, glue them in. The height of the glue will bring the boards back up to the proper level. We put down plenty of glue so we can adjust the height to slightly above the unaffected boards. Now when you sand the new boards there is enough material to sand them flat without taking any more material off of the adjoining area.
Fortunately for us, acres of this flooring is being installed every day and will need to be refinished by a professional at some point. That professional is you.
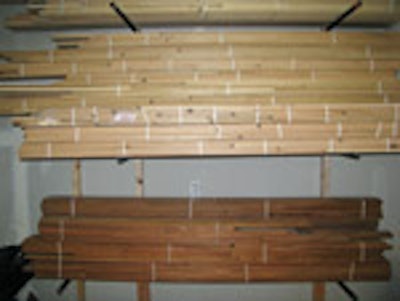
Trick of the Trade
Stacked Up

Thanks to Joshua Crossman for his tip. Do you have a Trick of the Trade? Send it to [email protected].