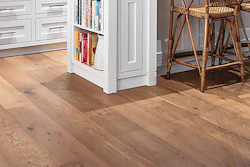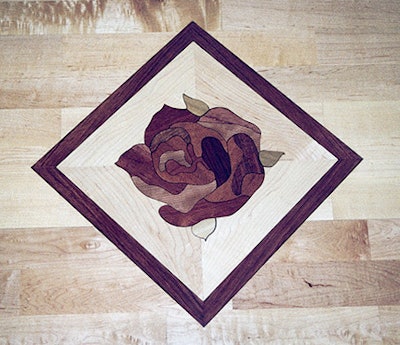

Not long ago, a factory-finished wood floor mean design limitations. Today, options for factory-finished floors run the gamut of possibilities, including prefinished borders and inlays. Inlays may even be installed in floating floors, as is demonstrated in this month's column.
The first step for such an installation is to order the inlay using specific instructions that allow the manufacturer to match the finish, sheen and thickness to that of the wood flooring. Oftentimes, a sample piece of flooring will be sent to the inlay manufacturer.
For installation, each inlay manufacturer's system may vary slightly (for the inlay used here, the inlay has arrived with the appropriate template, the necessary router bit, and double-stick tabs that hold the template in place). Check with the manufacturer before ordering to make sure you'll have the tools and supplies necessary to do the installation. Open it immediately upon delivery to ensure the correct size and finish. And, of course, read the directions that come with every inlay.
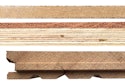
Necessary materials:
- inlay
- two-part epoxy
- packing tape (optional)
Necessary tools:
- tape measure
- router and bit
- vacuum
- small crowbar
- chisel or corner chisel
Step 1:

Choose the position of the inlay on the floor.
Note that the installer is carefully protecting the floor from dents and scratches by kneeling on a towel.
Step 2:

Once the template is positioned in the right spot, mark the correct layout with a pen or pencil.
Step 3:

With the desired layout marked, affix the template securely to the floor. Here, double-stick tabs were supplied for that purpose. The most important thing in this step is to use something that will hold the template securely during router work, but will not permanently mark the prefinished floor.
Step 4:

Now the floor is ready for the first pass with the router. For the first pass, position the bit at a depth that cuts about halfway through the floor. (Trying to cut the entire depth at once makes it more difficult to get a clean cut.) When starting the router, place it an inch or two in from the edge and pull back toward the template. This helps avoid the time-consuming mistake of cutting through the edge of the template (and the floor).
Step 5:

Clean the area thoroughly with a vacuum.
Step 6:

Make a second pass with the router, this time with the bit set at the full depth of the flooring. (Cut only to the top of the foam.)
Step 7:

Remove the section of cut-out floor and again clean the area thoroughly with the vacuum. The template can now be removed. Take care when pulling it off of the floor to prevent damage to the finish.
Step 8:


The router can't reach into the corners; they need to be chiseled out. This may be done using a traditional chisel, or a convenient tool called the corner chisel (often used by cabinetmakers) may be used. If using the corner chisel, protect the floor by using non-marking tape. The corner chisel knocks out corners efficiently with one swift blow of a hammer. Be sure to clean corners carefully.
Step 9:


The inlay needs to be dry-fit into the new space. To make it possible to remove it after dry-fitting, there are a couple of options. One is to simply use clear packing tape across the bottom of the inlay, making handles to easily lift it back out. Or, for gadget lovers, another option is to use a giant suction cup to lift the inlay out of the snug space.
Step 10:

Because this is a floating floor, the inlay needs to float along with the pieces of longstrip. To accomplish this, quick drying two-part epoxy is applied to small shims...
Step 11:

... which are then slid partially under the floor. A small crowbar can make this step relatively easy. Pay attention to where you lay down the epoxy gun, as the nozzle tends to drip, and spots of epoxy on the finished floor could wreak havoc or at least create a headache.
Step 12:

Before the epoxy is cured, wipe off any excess that accumulated on the exposed areas of the shims. If there were a delay before dropping in the medallion and the excess epoxy were left to dry, it could make it difficult for the inlay to lay flat.
Step 13:

Now apply the epoxy to the exposed halves of the shims.
Step 14:

Drop in the inlay, having triple-checked that it will face in the desired direction. If all the steps have been followed, it should fit in seamlessly with the rest of the floor.