Daily Maintenance
Checklist: Edgers
1) Blow them out with an air hose.
2) Check carbon brushes and replace when needed.
3) Check the pad for flat spots or bent areas.
4) Check wheels to make sure they are clean and spin freely.
5) Check power cords for loose connectors, screws or bad spots.
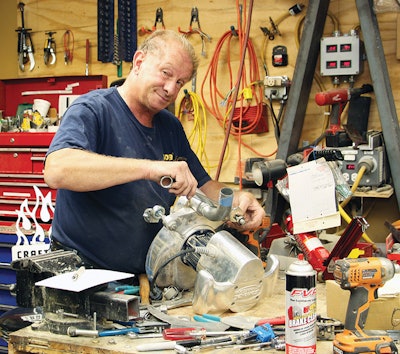
A typical wood flooring contractor is trying to juggle many things at once, so routine machine maintenance is one of the easiest things to let fall by the wayside. But oh, what a mess when it does. Not just a literal mess—dust filling your buffer motor, fire in your edger, perhaps—but a mess of your schedule and your life. When a machine goes down and you can't fix it on the spot, your job profits walk out the door. Every hour you waste taking the machine in, waiting for repairs and going to pick it up is an hour you could have been making money ... and an hour your customers wouldn't have been annoyed that you're off schedule.
On the following pages we've created a collection of real wood flooring sanding machines, and their parts, gone wrong. The vast majority of the problems shown could have been prevented by quick, simple, low-cost or no-cost maintenance practices. Take a look and make sure your machines couldn't be mistaken for the examples we've gathered for this article. We'd like to thank service gurus Mike Brown at Blake-Stevens Wood Flooring; Alex Gilszmer of Palo Duro Hardwoods Inc.; Wayne Lee of Middle Tennessee Lumber and Mike Rocher of Bona US for sharing their expertise for this article.
Drum Problems
Service techs say the No. 1 problem with big machines is the drum. If there's a problem with your drum, there's no two ways about it: You're going to see problems on your floors. Some drums can be dressed, i.e., flattened, but others should never be dressed (it depends on the manufacturer of the machine). Here are some examples of problem drums:
 Although they don't look alike, these are all drums for a Hummel big machine. Hummel drums are manufactured with a very slight football shape, so they should never be dressed. Unfortunately the owner of the one on the left didn't get that memo, and he ruined the drum by trying to dress it. The drum in the middle shows flattening from hitting the ground. The drum on the right is a new drum.
 Replacing a drum can be an expensive lesson about setting nails before sanding; depending on the manufacturer, they range from about $400—$700. The line on this drum shows damage from hitting a nail. If this isn't replaced, the groove from the nail damage will create a weak point in the abrasive that leaves a streak on the floor. Even hard-plating won't remove the streak.
 The owner of this machine said his drum was cutting flat, but the service tech said he could tell otherwise just by looking at the abrasive. They sprayed the drum orange and began to dress it, which showed an obvious unevenness.
Don't Do This
Since Hummel drums have a very, very slight football shape, some people have been known to try to dress the drum by putting a credit card under one side of the wheel, sanding the drum, then doing the other side. But the drum isn't centered on the machine, so that homemade dressing technique will just ruin the drum.
 Drive belts that look like this should be replaced immediately.
Daily Maintenance Checklist: Big Machines
1) Blow the machines out! (Not just off, but out, inside out, etc.)
2) Inspect drive belts to make sure they are in good condition and (depending on the manufacturer) release the tension nightly.
3) Check wheels and clean or replace if needed.
4) Check the top roller and clean if necessary.
5) Check power cords for loose connectors, screws or bad spots.
6) Check for smooth operation of the control rod (the rod that raises and
lowers the drum).
Upper Roller Issues
The upper roller on your big machine is what keeps your sanding belt working. When it gets dirty, bad things can happen, particularly with your paper tracking (see the two photos on the bottom of this page). Unevenness in your upper roller will cause your abrasive belt to "hunt," or constantly go back and forth trying to find center. That in turn causes premature wear on your drum and upper roller, which can give them a cone shape, forcing the abrasive to one side of the drum.
 Upper rollers showing buildup from dust, filler, adhesive and more. Typically they must be replaced, which runs around $200.
 A great example of what can build up in your upper roller if you don't regularly blow it out.
 On this upper roller, the guide roller is worn out. The bearing seized, and the paper ate away the metal, which would have caused the tracking to be off, which can cause chatter on the floor, too.
 Here are two cases on two different types of big machines where the paper tracking was so off it actually cut the metal surrounding it, one on the door (shown above left next to a new door). And the other right through the machine housing (above left).
Edger Essentials
You've probably heard machine experts telling you to make sure you "change your brushes" on your edger on a regular basis. What does that mean? What is a brush? What does it do? The carbon brushes on your edger don't look like "brushes"—they are solid rectangles of carbon—and they are responsible for conducting the electricity through your motor. When you turn the switch on, the electricity travels through the brushes, which contact the commutator face, making it spin. When brushes get worn down, or when the springs in the brush block assembly are worn out, the brushes don't contact the commutator, creating a gap like a spark plug. Then you basically have arc welding happening inside your edger motor, and the motor will start to burn.
 Here are two brushes side by side: The one on the left is worn out, and the one on the right is brand new. Edger manufacturers recommend that brushes be replaced about every 600 hours. They aren't expensive, and that's cheap insurance to keep your edger running and prevent expensive damage.
 The edger brush block assembly is what holds the brushes; it uses springs to push the brushes against the commentator. The brush block holders must be clean so they can work freely. If dirt builds, they can bind up, causing the brushes to not contact the commentator. If the motor gets too hot, it can even melt the brush holder itself. On the left, you can see a damaged one, with a new one on the right.
 In the commutator on the left, you can see where the motor has actually been burned from being run with worn-out brushes. The one on the right shows what it should look like.
 When brushes go really bad, the machine will turn off, but some guys keep restarting it. Doing that damaged this motor so badly that the entire motor has to be replaced, not just the armature, at a cost of around $900.
 Here’s another part that can wear out on your edger: motor pulleys. They should be checked periodically for wear; when they get bad enough the edger will start to make a bad sound and, eventually, the disc won’t turn.
Out of Round
Big machine wheels aren't cheap, and any imperfections in them transfer to the floor, so it's surprising more people don't take better care of them. Service guys say the biggest complaint they get about big machine wheels is that they get out of round. This can happen when the machine is being transported in your truck or van—going over potholes or railroad tracks can create flat spots. It's a good idea to make a platform so your machine isn't resting on its wheels. Some other typical problems are below.
 These wheels show wear from being rolled over rough surfaces like driveways and sidewalks. Any debris stuck in the wheels will transfer right to the floor. Good contractors never let their wheels hit any surface but the wood floor.
 New big machine wheels (an example is on the left) typically are in the range of $60—$75 each. Undoubtedly, the owner of the wheel on the right shouldn't have waited so long to get his replaced! (And, to ensure even sanding, a machine's wheels should all be replaced at the same time.)
 The owner of this big machine felt this chunk missing as soon as he started sanding (nobody in his crew fessed up to knowing how it got there). Experts often say they can tell something is wrong with their big machine just by its feel and sound.
Don't Do This
Filler, pine pitch and more can build up on your wheels, and the buildup can be hard to remove. But don't resort to using abrasives or files on your wheels, which could permanently damage them. Blow the wheels off, and if they aren't soft rubber, you can use mineral spirits to remove any buildup.
Destructive Dust
Dust is unavoidable on a wood flooring job site. If left in your machines, though, eventually it will cause damage and seize up all the moving parts.
 On this three-disc sanding machine, the seal on the bottom of the machine had broken, allowing all the dust to go up inside directly on the belts, bearings and pulleys. Eventually the dust will paralyze the machine, locking up the drivers so it can't spin freely.
 This buffer motor was so clogged that the dust solidified into the solid chunks you see in the photo at right.
 Dust left in a sander, such as this big machine, acts like an insulator and will not allow heat to dissipate from the motor.
Quick Tip for Clarke Super 7R Edger
Maintenance Tip for the Gear Box on a Clarke Super 7R Edger
RELATED: Sanding 101: Wood Floor Sanding Basics