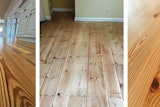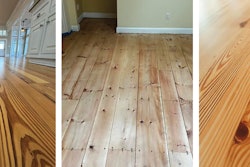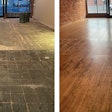
Why do we sand a wood floor? If this question were asked of flooring contractors, typical responses might include: to repair damage to the floor; to change the color; to change the finish sheen; or to protect the investment (preserving and restoring the beauty of a wood floor found under the carpet that was removed, for example). Yes, there are even more reasons, however, the main reason to sand a floor, whether new or existing, is to give beauty to a renewable resource that can usually be repaired instead of replaced. A typical nail-down, ¾-inch, tongue-and-groove wood floor can be resanded several times by a good professional flooring contractor; most beginning floor contractors would have a tendency to sand too much off the floor, decreasing the overall life and leaving little or no wood for the next sanding. Taken from that perspective, contractors sanding a wood floor have a huge responsibility to protect their customer's investment and make that floor last as long as possible.
To that end, I'm going to answer some of the most common questions asked by beginner floor sanders. The answers are aimed at contractors new to sanding, however, if you have been sanding floors for a while, you might want to continue reading, for an old dog can still learn new tricks. For the purposes of covering the basics, here we're assuming you're using the three standard sanding machines: the big machine, the edger and the buffer.
That said, here are 10 common questions about sanding basics:
1) Why can't I skip more than one grit in the sanding sequence?
Your goal in a sanding sequence is to use progressively finer abrasives to flatten the floor and smooth out the wood to get it ready to accept new finish—all while taking off as little wear layer as possible. If you skip more than one grit in the sanding sequence, you end up with the first cut leaving deep scratches into the wood, and the second cut having too fine of a grit to take out the first scratch. This peak-and-valley profile will leave a rough-looking floor and, if stained, cause uneven staining (see the "Guide to Abrasives" sidebar below). Another result of skipping grits is early finish wear in heavy traffic areas. The reason is that the peaks will not have as much finish on them as the valleys, so the finish on the peaks will wear off faster.

2) How do I know what grit to start with?
No two floors are exactly the same—similar, maybe, but not the same. Always inspect, repair and clean (sweep and vacuum) each floor prior to sanding. Yes, this even applies to new wood floor installations, as well as cleaning between grits on the big machine. (In many cases you can pick up an abrasive "hitchhiker" from the previous grit and cause wild scratches.) For new floors, one of the best ways to choose a sequence is to select the finest grade you want to finish with and work back to the coarser grades, skipping one grade between each sanding. For example, if you want your finest grade to be 100, the sequence you would follow is 40-60-100 (skipping only grades 50 and 80). If you want to finish the job with grade 80, use the sequence 36-50-80 (skipping only grades 40 and 60). I've said it a million times at the schools: Use only as heavy a paper as it takes to do the job. If you don't put the deep scratch in, you don't have to take the deep scratch out!
3) How do I know what grit to end with?
A contractor sanding a floor is much like an artist with a blank canvas (the term "starving artist" might be more appropriate in this economy); he has control of how the final result will look. Know what your customers' expectations are—if they expect the floor to look like a baby grand piano, this is your chance to decline the job. If you are capable of such an end result, then you need to charge accordingly, for you will be spending more time than you expect to create that look.
RELATED: The Basics of Sanding Wood Flooring
Again, no two floors are exactly the same. You can use the abrasive guide on this page as a reference. Rarely have I seen floors sanded finer than grit 120 on the big machine. If you are sanding a typical No. 1 common Northern red oak strip floor and it will be finished natural, you have many options; usually either 80 or 100 grit will be the final cut made with the big machine. Keep in mind if there will be stain, what the finish will be, and if there are multiple species. Also remember that too fine of a final cut with the sanding machines can close the grain of the wood, causing poor adhesion of the finish coat and making the stain appear lighter. There is not a good alternative for experience, but you do not have to reinvent the wheel: Search for additional information using your local distributor, manufacturers' technical service experts, fellow contractors and the Internet.
4) Should I use the big machine or edger first?
This depends on the expertise of the person sanding. When you become more experienced and can have smooth cut transitions at the wall lines, then it becomes a preference. For beginners, in most cases I recommend using the big machine before the edger. Beginners with the big machine tend not to have a smooth transition cut at the wall line, often leaving a drum or "beauty" mark in the floor, as well as uneven distances between the walls and the sanded area. Doing the edging afterwards means you know exactly how far out you have to edge, since you can see the sanded area, and if drum marks are made at this point in the sanding sequence, then edging can remove them. An experienced contractor on the big machine cuts the floor as close to the wall lines as possible, leaving less for the person edging (unless you have it in for the person edging—then stop about 2 feet away from the wall!). Making smooth drum cuts with the big machine takes practice, and every big machine needs to be adjusted properly. The motion with the drum should be like a plane with smooth takeoffs and landings, always in motion.
RELATED: How to Safely Power a Wood Flooring Job Site
5) Should I go right to left or left to right with the big machine?
The type of big machine determines the direction. With the older drum-type big machine, you start at the right side of the area to be sanded and move to the left. Belt machine manufacturers recommend the opposite. The reason is because of the carriage wheel location on the big machines. On the split drum machine, the carriage wheels are directly behind the drum, while on the belt machines, the left carriage wheel is left of the drum. As the floor is cut, you want the carriage wheels to follow in an area that has already been sanded so as not to transfer overwood of boards to the drum, causing sanding irregularities.
6) Why should I go at a slight angle with my first pass on the big machine?
Doing this serves a couple of important functions. By going at an angle of 7 to 15 degrees to the direction of the floor boards, you cut the floor flat the fastest. Why? By going at an angle you are cutting slightly across the grain. The cross-grain cut sands the wood floor quicker and also takes out any slight rolling or waves of the floor. Once you create these cross-grain scratches with your first cut, you need to cut straight with the grain so the scratches go with the grain for the second or final cut (depending on the grit sequence).
7) Where do I start edging?
Before you start edging, you need to be aware of where the cutting point is for that edger so you can control the cut pattern. Setting up an edger is an article by itself (see this YouTube video blog from Wayne Lee on setting up the B2 edger). If you do not know how to do it, then contact your manufacturer or local distributor. Assuming the edger is set up and working properly, you start on the left and work to the right around the perimeter of an area. The rotary cut of the edger is the most aggressive cut of all the floor sanding machines; knowing how to keep the scratch pattern with the grain as much as possible minimizes edger swirl marks. A typical first cut with an edger is 60 or 80 grit, then completed with 100 grit after the floor has been filled. To soften the cut of the abrasive, there are edger pads that are used under the bolt with an abrasive disc for the final edging. By using edger pads, the abrasive disc cuts less aggressively and also leaves a finer scratch.
8) When is the best time to trowel-fill the floor?
Trowel-filling the floor prior to the last cut with the big machine and final edging provides a sanding guide for the beginning floor sander on the last abrasive cut. The trowel-fill will show low spots and any other marks or areas that need sanding attention with the next machine, the buffer.
Always let filler dry thoroughly before sanding. If you sand and the filler is not dry, you will load up the abrasive and use more abrasive than necessary (this is good for my 401(k) plan but a waste of time and money for you.) Prior to trowel-filling is a great time to make sure that all nails (called "shiners") are set. If you sand the nail heads, you will leave sanding streaks/lines in the floor from where the abrasive did not cut the floor flat (the abrasive will be missing where it hit the shiner).
In many cases, the sanding screen will not completely flatten the floor there, but you will not detect this phenomenon until the last coat of finish is applied. (This is called Murphy's Law.)
RELATED: Taming the Buffer: Understanding How a Wood Floor Buffer Works, Part I
9) When do I use a sanding screen vs. a hard-plate?
Sanding screens are used with the buffer to refine and blend the final scratch left from the big machine (in the field of the floor) and the final circular scratch left from the edger (around the perimeter). To reduce initial scratching, always start a new screen in a closet or other inconspicuous location. If a closet isn't available, start against a wall and work toward the center. If the screen needs to be changed, start on the opposite wall and work toward the center to make the scratches match— you don't want scratches from a worn screen and a new screen to meet.
The hard-plate, double-sided discs and easy-change abrasive disc systems are used in the same manner, however, because they are more rigid, they cut the floor flatter than a screen. This is particularly critical on floors with multiple species and wood densities; dishout of the soft grain tends to occur on these floors when screening. (To learn more regarding buffer techniques, see "Taming the Buffer, Part II" in the February/March 2006 issue.)
10) Why do I need to check the moisture content (MC) of the floor when I sand it?
Good question. Better question: How many of you have a moisture meter and use it? It is quite common for the installer to check the subfloor and flooring moisture prior to installation, but not as common for people sanding the floor to check the MC. Sanding and finishing should occur when the floor has been acclimated to the proper MC for normal living conditions (temperature and humidity) for that area. It is good practice to record the MC of the floor prior to sanding so you can compare it to the installation MC. It's also important to do this when using waterborne finish because it gives you a baseline value of the MC prior to applying finish; you can tell the finish is dry when the MC reading is at the original reading. Also, it's good insurance to record the MC at all points in the job. There have been situations were the HVAC malfunctioned after the floor was done and the flooring contractor was blamed for the floor problem related to the MC. If you don't have the MC recorded for that job, you cannot prove you checked it.
RELATED: Avoid These Mistakes When Moisture Testing Wood Floors
Hopefully these answers help you have a better understanding of why we do what we do when sanding, creating an easier job for you and a better, longer-lasting floor for your customers. Happy sanding.
On the Safe Side
I would be remiss in any article about sanding if I didn't mention safety. Keep the following in mind:
• Sanding dust is highly flammable. To minimize the risk, never operate the sanding machine when the bag is more than half full. Also, never leave the sanding machine with dust in the bag or any bag of dust in your vehicle, in your shop or on the job site.
• Use eye, ear and respiratory protection devices as required by OSHA. In particular, the sawdust from exotic woods can cause adverse reactions in some people. Don't forget to use approved respiratory protection when emptying dust bags or dust collection systems. (For more on respirators, see "The Air We Breathe: Protecting Your Lungs with a Respirator on a Wood Flooring Job Site" in the October/ November 2007 issue.)
• Make sure you have safe electrical hookup (refer to "Power Up" in the June/July 2008 issue for detailed information on that topic).
• Have all machine guards and grounded plugs in place.
• Keep electrical cords away from the machines' moving parts. Also, keep cords out from underfoot and off your shoulders.
• Unplug all machines when you are repairing or adjusting them, or when changing abrasives.—G.A.F.
Get Educated
Education is important—no matter how long you've been in the business—to keep you abreast of new developments. Go to industry schools, and you might want to catch up on your reading. Check out the Sanding & Finishing link on this site and the Content Toolbox link below.—G.A.F.


