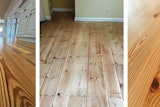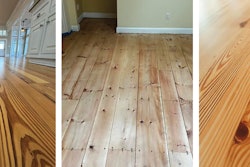
If you were in a room with 20 floor sanding mechanics (scary thought …) discussing how to buff a floor, you would hear 20 different methods to get the job done. Sometimes we follow sanding procedures without necessarily knowing why, other than, "That was what my boss told me to do" or, "My father and grandfather did it that way." Of course, there isn't just one right way to use the buffer. However, there are lots of misconceptions, unique techniques and just plain wrong processes being used in the world of floor sanding. In the following article, I'll try to eliminate some of the confusion surrounding the buffer. Along the way, you might learn some up-to-date sanding methods that will help your flooring business.
Why use a buffer?
There are three main reasons to use a buffer on a wood floor
1) Flatten the floor
2) Remove/blend scratch pattern imperfections from the big machine, edger and scraper
3) Create finish intercoat abrasion.
The buffer really is nothing more than a motor on a stick. The buffer motor rotates counterclockwise at approximately 175 rpm (the most common speed used in the wood flooring industry). The most aggressive cutting area under the buffer is located in the 2 o'clock to 3:30 area (assuming that the handle is at 6 o'clock). The remaining areas feather the cut. Hence, when we refer to "clocking" the buffer, this means turning the buffer in relative position to a clock's numbers, which affects how aggressively the buffer cuts (see Figure 1).
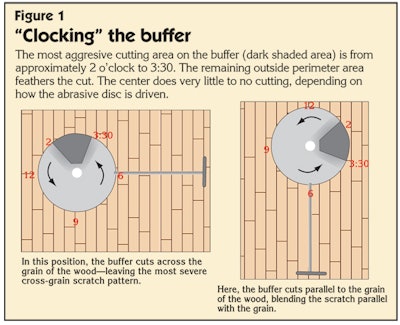
In all wood floor-abrading situations, including buffing, the main objective is to reduce and blend the scratch in the wood or finish so that scratches are not objectionable to the eye. Remember the cardinal rule of sanding: "If you do not put a deep scratch in, you do not have to take it out." Understanding the clocking principle when buffing minimizes objectionable scratches.
How it cuts
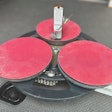
The aggressiveness of the buffer cut is controlled by the handle's height. When the handle is at belt buckle height or 1 to 2 inches lower, the buffer is in its most neutral cut. Raising the handle increases the aggressiveness of the cut and decreases the cutting area of the buffer. By changing the driving assembly pad combination, you can affect the aggressiveness of the attached paper disc, double sided disc or screen. In most cases, the darker the color of the driving pad, the more aggressive and flatter the cut will be.
For example, assume you're going to use a buffer on a 2 1/4 inch, No. 1 common red oak strip floor that's going to be stained medium brown and finished with either oil- or water based urethane. The suggested method is as follows (see Figure 3):
1. Start in a closet or other less visible area to condition a "new" abrasive disc or screen. Make sure the starting area is away from large windows, doorways and other areas with more light, which will be more likely to show scratches.
2. Sand the entire perimeter of the room from right to left using an egg shaped circular motion. The egg-shaped motion helps ensure a complete sanding around the perimeter of the room. When the perimeter is completely sanded, sand the rest of the floor by starting on one end and sanding in a straight row, clocking the buffer so the most aggressive cut is parallel to the grain. Turn the buffer 180 degrees and sand down the same path. Then, overlap about half the width of the buffer and sand another row. Continue this procedure from room end to room end, always overlapping the previous cut by at least 8 inches (if using a 16-inch buffer).
RELATED: Taming the Buffer, Part II: Understanding How a Wood Floor Buffer Works
3. In larger areas, if you need to change or flip your abrasive, be careful to blend the "new" abrasive scratch to the adjoining area. For example, let's say you are using an abrasive in a large room, and in the center of the room, you need to change the abrasive. Do not start in the center of the room with the new abrasive disc. It will cut more aggressively, leaving a different scratch pattern, which will contrast with the old one. Instead, move the buffer (with the new abrasive) to the opposite wall and work toward the center again so the two similar buffer scratches blend together (see Figure 2).

General tips
Buffers can be used with many combinations of pads and abrasives. Regardless of what you're using, remember a few helpful hints when using a buffer: Do not allow the buffer to sit upright on the buffer pad when it is not in operation-after a short period of time, this creates a compression of the pad, causing bumping or "loping" of the buffer. That makes the buffer run unevenly, creating a deeper scratch in the wood floor. When using a double-sided disc, screen or other abrasive under the buffer, positioning the abrasive as close to center as possible also helps the buffer run more smoothly.
Always sweep and vacuum between cuts of sanding and screening. If you don't, the sawdust can turn into little"ball bearings" that lift your machine off the floor, preventing it from cutting the wood. Also, by cleaning between cuts, you remove coarser grit and dirt particles that could cause coarse scratches.
What is hardplating?
"Hardplating," "discing" and "sandplating" all are names that refer to using a large paper disc on a "hardplate" driver under a buffer/polisher. The hardplate method of sanding is used primarily on patterned floors, such as parquets, mixed media or other inlaid floors, to help flatten the floor prior to finishing. Floors that have mixed species of wood, such as a walnut border in a red oak field, dish out very easily when sanded with the big machine. On strip flooring, a hardplate is useful to achieve a flatter floor and also to remove and blend scratch pattern imperfections from the big machine, edger and scraper. It also is useful in hallways or small areas where big machines cannot be used because of space limitations or because of the grain direction of the flooring.
Typically, the hardplate has a felt pad attached to the plate. The paper disc has a slotted center hole (2-inch or 4-inch), which is secured to the bottom of the hardplate with a retainer washer and nut. When you fasten the paper disc to the hardplate, it often helps to use two discs (grade 80 and finer) instead of one. Using two discs offers more support to the abrading disc, lessening the chance of center paper tear-out. The finer the abrasive grade, the more torque the buffer creates for the sandpaper.
Another version of hardplating with less abrasive aggressiveness is accomplished with a double-sided/duplex abrasive disc driven with a non-woven pad. The double-sided abrasive disc is less aggressive because the driver pad softens the cut. In the world of abrasives, the harder the abrasive is backed, the more aggressive the cut. Hence, a double-sided disc driven by a red buffer pad will be more aggressive than one driven by a thick white pad. In most non-woven pad constructions, the lighter the color, the less aggressive the cut; the darker the color, the more aggressive the cut (there are some exceptions, such as a thin white driving pad-its density will cause a more aggressive cut than a thick white pad).

What is screening?
Screening is the process of using the buffer with a driver pad to drive an abrasive screen. It is used to remove raised wood grain in the final sanding stage and to abrade between finish coats. Screening is used to reduce the previous scratch from the big machine or hardplating and helps make the scratches refined enough to not be objectionable, even on a stained floor. Screening also is used to abrade the sealer coat of finish, helping to remove raised wood grain prior to applying multiple coats of finish.
A screen's open-mesh construction keeps loading to a minimum and resists the friction and heat of continuous sanding. The "screen and recoat"process uses sanding screens to abrade the existing finish on the floor, giving it a "tooth" or "scratch" profile prior to recoating. Follow the finish manufacturer's instructions for abrading between coats of finish.
Contractors commonly try to over screen the floor in an attempt to make it flat, but remember that over-screening causes dish-out of spring wood. It also can close the wood grain, creating a potential for finish adhesion problems. To help make the floor flat, hardplating is the recommended process.
Using the maroon pad
The maroon pad was introduced to the floor sanding market in the early '90s because of the need to abrade water based finishes. Sanding screens that were used for abrading the sealer coat of oil finishes were tried, but they loaded and caused severe scratches in the sealer and subsequent finish coats.
The maroon pad works because then on-woven pad has abrasive particles coated and embedded in the pad. When used under a buffer, they abrade the coating, creating a fine, non-distinct scratch in the finish prior to the next coat. In many situations, the pad is not aggressive enough to remove dust and other particles in the first coat of sealer; rather, it simply smooths them over. That is why abrasive strips are used in conjunction with the maroon pad-they cut and smooth the raised grain and other imperfections in the sealer coat. Again, the same pattern of abrading the perimeter and then overlapping in the center of the room is recommended.
RELATED: The Basics of Sanding Wood Flooring
Back to our floor
Let's say you complete sanding the example red oak strip floor with grade 100 on the big machine. You typically would follow that by hardplating with 100-grit abrasive paper. Next, you would use a grade-80 screen backed by a red pad, then a grade-100 screen with a white driving pad. The reason you would use a grade-80 screen is to remove the grade-100 hardplate scratches. Because the grade-100screen does not cut as aggressively as 100-grit paper, you need to go to a grade-80 screen to remove the previous scratches. Different wood species require different sanding grit sequences, so experiment with the species you'll be using before sanding on the job site.
If you were to skip the hardplating process, you would follow the same screen sequence. Personally, I would not skip hardplating. Even if a floor is flat, without chatter marks, drum stops,edger swirls and other imperfections, I still would hardplate. Hardplating is like an insurance policy. Yes, it takes extra time, but it can save you the time and expense of going back for a resand.
An old saying goes that if you do not have enough time to do the job right the first time, you will the second time-particularly if you haven't been paid. Being familiar with your customers' expectations is crucially important. As consumers surf the Internet and become more informed (and, in some cases, oversold), and as wood floors become more popular, it's more important than ever for floor sanding contractors to remember that they are truly artists and craftsmen, and the quality of their work should reflect that.
Top 10 Buffer Mistakes
10. Operating it with a swinging motion like a custodial engineer.
9. Bad cord and hose management reminiscent of an octopus.
8. Saddling the buffer with extra weight (i.e., box of nails, bag of leveling compound or the lightest crew member) for "a better cut."
7. Coupling the abrasive with the incorrect driving pad.
6. Over-buffing the floor, causing soft-grain dish-out.
5. Using the buffer with an abrasive past its cutting endpoint, burnishing the wood and causing picture framing/shadowing around the perimeter.
4. Not cleaning/vacuuming buffer between grit changes and job locations.
3. Not maintaining proper electrical connections (especially removing the ground).
2. Storing the buffer so that the pad and dust skirt are crushed.
1. Having the newest crew member operate the buffer and forgetting the drywaller's phone number.


