Every year, the vast majority of calls made to the National Wood Flooring Association's Technical Hotline are due to moisture-related problems such as warping, cupping, cracking and shrinking. It only makes sense, then, that you should carry the one essential tool that allows you to detect and battle moisture problems—the moisture meter. Although it is a relatively simple tool to use, one mistake made using a moisture meter can prove to be a costly one. Here are seven common moisture meter mistakes and how to avoid them.
1) Using the Wrong Meter
Different meters are calibrated to test the moisture content of different materials. Testing both concrete and wood with one type of meter produces incorrect readings. Concrete meters can only measure concrete, and wood meters can only test wood. Carry two meters to the job site if you know you will be working with both types of materials, and learn how to properly use each meter. For added convenience, some manufacturers offer models with both wood and concrete moisture meters combined into one. Know what your meter is designed to test and use it only for those materials.
RELATED: Understand the Science of Water and Wood Floors
Before using a concrete meter, educate yourself on its capabilities either by reading the instructions or talking to the manufacturer. Generally, both pin and pinless concrete meters qualitatively measure the relative moisture content of the slab, meaning they indicate which areas are dry and which are still wet. Know their limitations, one being that concrete meter signals can only penetrate—at the most—an inch into the material, failing to reveal moisture problems deeper in the slab that can migrate up into your flooring after it's installed. Also, any fast-cure additives or vapor retardants added to the concrete may give your meter a false reading. Consult the manufacturer to determine if further tests are needed, such as the ASTM F 2170 test of drilling a hole into the concrete, waiting 72 hours and then measuring the moisture content with an in-situ probe or using a relative-humidity meter.
Using the right meter for wood can pose a different set of challenges from concrete. With the variety of models available on the market today, it may be difficult to know which one to choose.
Essentially, you need to know there are two basic types of wood meters: pin and pinless. Evaluate which meter best serves your needs for the type of work you do.
Pin meters feature two pins protruding from the end of the meter, between which an electric current travels and measures the moisture resistance in the wood. The pins can either be hammered or stuck into the flooring, and they must be placed in the direction of the grain for the best reading. The pins can be driven into the flooring at varying depths to determine the moisture content of each section of a particular board, making it easier to find the exact source of the moisture. Some meters feature pins insulated with latex or rubber to give a precise measurement in a specific location, which is ideal for gradient testing (measuring the moisture content of the wood at different depths of the board after installation) because the readings come only from the exact area between the ends of the pins. However, if the pins aren't driven down all the way to the bottom of the board, or if the moisture meter is used incorrectly, a pin meter won't detect any moisture that may be sitting at the bottom of the flooring.
RELATED: Understanding How to Measure Moisture Can Avert Job-Site Disasters
The second type of wood moisture meter is a pinless—or nondestructive—meter, which rests on top of the flooring. It transmits low-frequency signals down into the flooring, which travel back up to register the average moisture content of the entire plank. These meters can measure up to 3/4 or 1 1/2 inches into flooring, depending on the meter. But for any flooring with thicknesses less than what the meter is designed to measure, the meter may measure the subfloor underneath and give an inaccurate reading. If you work primarily with 3/4 inch flooring, use a meter that doesn't measure more than 3/4 inch to prevent the meter from measuring the material underneath the flooring. The pinless meters are considered more convenient because they don't require hammering or insertion of pins and are preferable to the pin meters for prefinished flooring because they don't leave any holes. For materials made of multiple species, such as engineered flooring or plywood, testing methods vary, so consult the flooring and moisture meter manufacturers on the proper way to test for moisture content.
2) Not Properly Maintaining the Meter
It doesn't take much to ensure your moisture meter gives accurate readings, but there are a few things to keep in mind for maintenance. Occasionally, the meter's calibration can be lost, in which case you should send it back to the manufacturer for recalibration. Test your meter periodically on flooring with a known moisture content. Build up a historical record of a certain species in different seasons. If you use insulated-pin meters, be sure to change the pins frequently, since every time the pins are stuck in the floor, some of the insulation is scraped off, eventually making the meter more susceptible to inaccurate readings. The pins should be changed depending on how often they are used and for which types of species. Inspectors needing the highest level of accuracy should change the pins with every measurement. In other cases, simply look at the pins to see if any insulation has been scraped off and change the pins accordingly.

3) Not Taking Enough Readings
Another common mistake contractors make with moisture meters is failing to take enough readings. If they measure the acclimated flooring, the middle of the subfloor and once under the window, they think they have covered all their bases. By measuring so few areas, these contractors are less likely to find trouble spots in the floor. At a minimum, measure once for every 100 square feet of subfloor. Test the areas most conducive to moisture—along the exterior walls, under windows, around fireplaces, in exterior doorways, anywhere plumbing comes up through the floor and anywhere there may be discoloration. The center of the room often takes the longest time to dry, so be sure to take several readings there, as well.
RELATED: Can We Be Proactive in Preventing RH Problems for Wood Floors?
After testing the subfloor, contractors often forget to test the stacks of flooring that have been acclimating in the room. Testing the flooring before installation gives you a good idea of what happened to it since it left the warehouse. The more measurements you take, the better you'll be able to determine the overall moisture content of the flooring. Test at least 10 boards per every 1,000 square feet from different locations in the stack—the top, middle and bottom—to ensure the overall moisture content is uniform and that none of the flooring has been exposed to excessive moisture during its delivery.
After thoroughly testing both the subfloor and the flooring, be sure that the moisture content of both don't differ by more than 4 percentage points for strip flooring and 2 percentage points for plank flooring.
4) Not Documenting Everything
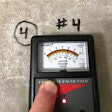
Another common mistake contractors make is not recording their readings well enough. Record the readings from the subfloor and the flooring with either a spreadsheet or with photos of the meter on the flooring with the reading prominently displayed. Some contractors also write the subfloor MC directly onto the subfloor along with the date. This shows you properly measured the moisture content on the job site in the event any moisture-related difficulties arise later.
5) Not Interpreting Data Correctly
Of course, all these measurements are meaningless unless you know what to do with them. Most importantly, know the species of flooring you're working with. Many wood moisture meters aren't calibrated to a particular species or, if they are calibrated, it's to a generic specific gravity such as that of Douglas fir. You need to adjust the readings to the flooring you're working with to determine if the moisture content is acceptable for that particular species.
Consult a chart or do a calculation provided by the manufacturer to get the correct moisture reading. Some meters on the market can calculate this information internally—all you have to do is punch in a certain code.
6) Not Knowing the Area's MC
To interpret the moisture meter's data, you need to know the acceptable moisture content for the area of the country you're in. For example, the meter may read 12 percent moisture content, which is within the normal range for some regions but which is too high in drier, lower-humidity areas. See the "Moisture Content of Wood" chart on page 66, which lists acceptable moisture contents for wood at certain temperatures and relative humidities. More information is available in the NWFA's "Technical Manual A100: Water and Wood—How Moisture Affects Wood Flooring." After you have several successful jobs under your belt, you can work from experience based on the moisture contents you know worked and didn't work.
RELATED: How Inside Air Affects Wood Floors
7) Not Using a Moisture Meter
Ask any expert in the wood flooring industry what the biggest mistake contractors make with moisture meters is and they'll tell you it's not using one at all. Some contractors try to rely on old-fashioned methods of feeling the wood or trusting that the acclimation time was enough.
They may not want to invest in a good meter, or they may be under pressure from the general contractor to get their work done faster. Whatever the reason, with the great potential for problems and the myriad meters available in different price ranges, styles and functions, there's no excuse for installing flooring without a moisture meter.
By learning from the mistakes of others, you can effectively use this tool to protect your floor from the disastrous effects of moisture—and therefore from costly callbacks. Find a moisture meter that you like, suits your needs, and that, most importantly, you'll use.
Sources for this article included Sean Fallon, Tramex Ltd.; Greta Heimerdinger, Lignomat USA Ltd.; Paul Laurenzi, Delmhorst Instrument Co.; Frank Kroupa, NWFA; Dave Posey, Wagner Electronic Products Inc.; and Rusty Swindoll, NWFA.


