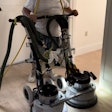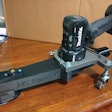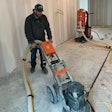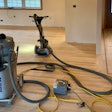
Nikola Tesla built a working AC motor with Westinghouse several years before the math was put to paper. Tesla literally envisioned the concept, layout, schematics of the AC motor in his head before one was ever built. He was obviously a genius, while I can't remember what I had for breakfast. However, after a lifetime in the wood flooring industry, I can explain the basics of the motors we use to power the machines that sand our wood floors, and I can also offer some insights for troubleshooting common problems. Let's start by understanding our motors.
Motor Basics: How They Work
All motors are based on electromagnetic force. Remember playing with horseshoe magnets when you were a kid? The north pole of one magnet attracts the south pole of a second magnet, while the north pole of one magnet repels the other magnet's north pole. So we have the common saying: like poles repel, unlike poles attract. A magnet creates an invisible area of magnetism all around it called a magnetic field.
In a motor, the electromagnet is placed between the poles of another magnet. When current from the voltage source flows through the coil, a magnetic field is produced around the electromagnet. The poles of the magnet interact with the poles of the electromagnet, causing the motor to turn. Sounds simple? Consider that it took many years until this concept was put to practical use and a motor was built that could actually do work (in 1834, Thomas Davenport of Vermont developed the first real electric motor, i.e., powerful enough to do a task).
Two Types of Motors
While all motors run by electromagnetic force, how that force is initiated is different. We wood floor folks should know that there are basically two types of motors: a brush motor and a brushless motor. There is a third hybrid electric motor used in Tesla automobiles, which is a combination of alternating and direct current. I actually learned on a Porter Cable 12-inch split-drum sander with a 3-hp brush motor that could be toggled from 110-volt to 220-volt, but that's a story for another time.
Brush Motors
Brush motors use carbon brushes, which ride on the top of a wire winding called an armature, and through a commutator to transmit power. Edgers and smaller tools like most drills, random orbital sanders, routers, contractor table saws and more use brush motors.
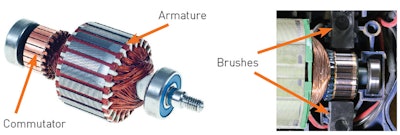
Brushless Motors
Brushless motors, also called induction motors, use capacitors, which store energy to "kickstart" the armature and keep the magnetic field functioning. Big machines use brushless motors, as they are more efficient.
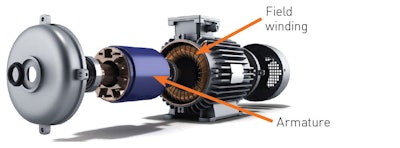
KISS
Sticking to KISS (keep it simple, stupid) for our purposes, we should know that brush motors are less efficient in the long term than induction motors and require more maintenance. There are newer types of brushless motors used in small battery-operated tools. They use tiny computer circuits instead of more cumbersome capacitors. As the technology progresses, brush motors may go the way of the dinosaurs.
What to know about brushesFor machines that use brush motors, it is important to keep in mind that carbon brushes wear and must be replaced, and the commutator that the brushes ride on must be kept clean. Friction and heat wear the carbon, which is relatively soft. When they are too worn, they reduce the power output (not enough contact), throw a lot of blue sparks (arcing, trying to create contact) and prematurely wear the commutator, which may lead to having to replace the very expensive armature. Keep an eye on the brushes, bearings and other moving parts as part of a regular maintenance schedule. |
Some Useful Capacitor Facts
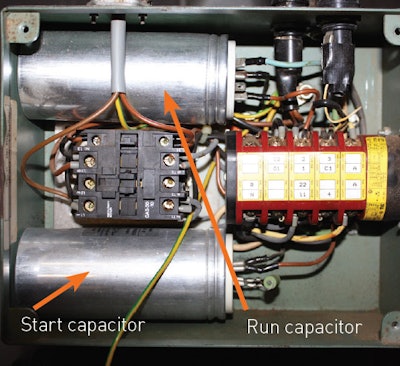
As I mentioned, capacitors store energy to both start and keep an induction motor running. Some induction motors have multiple capacitors for starting and running; some use a single start/run capacitor.
Induction motors are more efficient than brushed motors and have fewer wear surfaces, but they do require maintenance, as capacitors will weaken and fail, and bearings will wear over time, as with any motor.
I have had many calls over the years with these two complaints that are actually capacitor issues:
1. My big machine just stopped running and the motor seems unusually hot. When it cooled off, it started right up again only to stop later. This condition often is caused by a failing run capacitor.
2. My motor takes longer to reach full RPMs, and it seems to be getting worse. This is an indication of a failing start capacitor. It may be a good idea to replace both when having new capacitors installed. If you must do the work yourself, keep in mind that capacitors store energy, so if you touch the wires without "discharging" first, you may be in for a shocking surprise. Use an insulated tool like a screwdriver with a good handle, and bridge the poles of the capacitor to discharge it. Be prepared for a loud popping sound. No matter how many times you have done it, it is always startling.
CORRECT STORAGE:
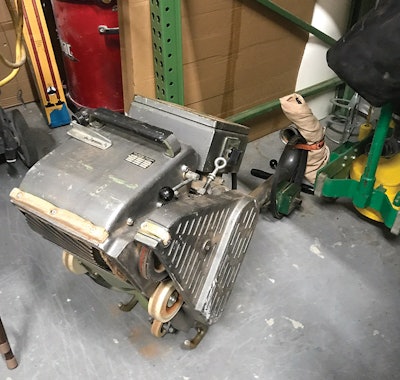
NEVER store your machines on the wheels or drum. On belt machines, remember to remove the tension on the drum belt and vacuum belt. On split drums, remove the paper. If you still use a split drum machine (as many gym floor pros do), remember to place shims in the split, don't over-tighten the paper, and check for vibration before use. Change the shims as needed for smooth operation and the grit of paper being used.
FACT:
Keeping up with regular maintenance, including keeping your equipment clean and changing worn parts before they fail, will help eliminate unwanted sanding marks and self-inflicted wounds.
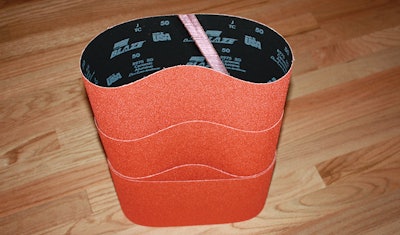
Quality abrasives matterAn important thing to keep in mind to ensure chatter-free and wave-free work is the selection and use of abrasives. Do not be "penny wise and pound foolish." Use good practices with your abrasives:
|
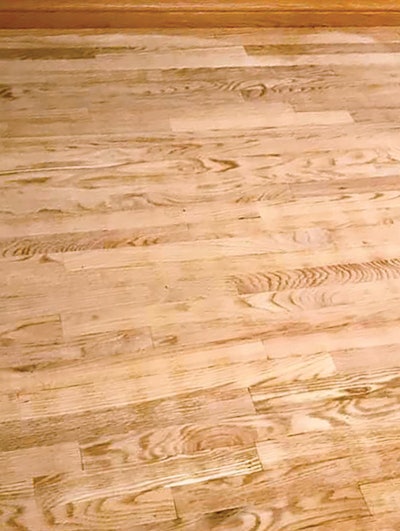
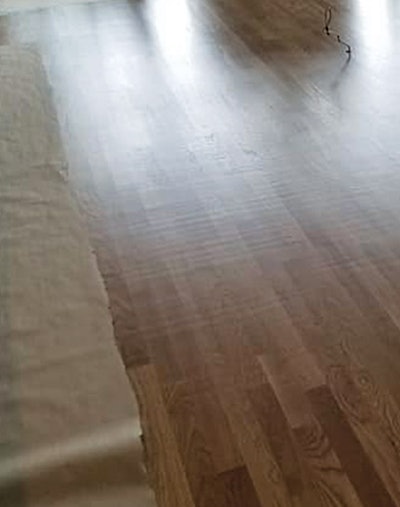
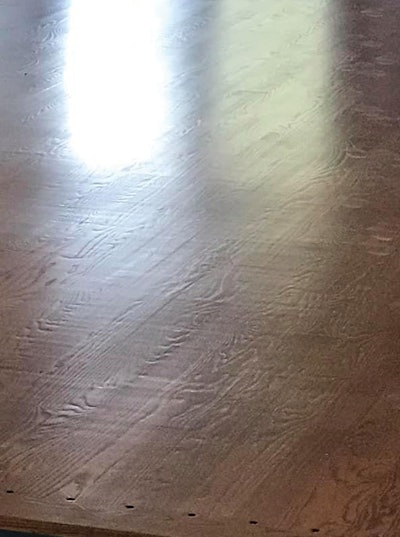 Top, classic chatter. Middle, this floor appears to have wave (note the different spacing on some passes). Bottom, this one appears to have wave, along with a ton of dishout of the soft grain.
Things That Cause Chatter + Wave
There are various types of unwanted marks a big machine can leave on a wood floor, such as: close chatter, waves, drum impressions, stop marks, etc. Let's focus on chatter and waves here, chatter being close repeating marks about the width of the drum being used and waves being marks that are farther apart and may vary in the spacing between them. All chatter or wave marks are due to either vibration of one form or another, and/or a physical defect in the machine itself. We can categorize the causes like this:
1) Physical defects: These can include: out-of-round wheels, especially the back wheel or wheels; debris on the wheels; or flat or worn spots on the wheels. Other common issues can be: out-of-balance drums or drums that need to be dressed to ensure roundness (but remember that not all drums can or should be dressed!); worn or frozen bearings, including motor bearings, wheel bearings, fan bearings, all bearings associated with upper roller mechanisms, especially guide roller bearings; out-of-round, worn, chipped or dirty upper rollers; using worn, cracked or improper drive belts; or leaving drive belts under tension while not in use.
2) Electrical issues: Another cause is varying flow of electricity that causes the motor to change its harmonics or natural waves produced by electric motors. This can be caused by using too much extension cord without adding a power booster (see the "Electricity for wood flooring pros 101" article from the June/July 2020 issue), failing capacitors, loose or burned plug connections and, rarely, failing windings in the motor itself.
3) Harmonic resonance: I have seen instances where there was chatter and wave in floors where the machine was pristine and being used exactly as it is intended. Remember how I mentioned vibration? Well, sometimes it is caused by the movement of the floor system as that system begins vibrating in harmony with the machine. This can happen on certain joist systems and floating systems. It may be imperceptible to the person doing the sanding but then show up when applying stain or finish. (For more on this, see the article "This unidentified flooring oddity turned out to be 'resonance'" in the April/May 2020 issue of WFB.)
4) User error: One other cause of wave is "the nut behind the machine." You might have a pristine, perfectly tuned machine with the proper quality abrasives and no harmonics issue, yet there are waves in the floor. I went to a job to check out the contractor's machine after he called, complaining about continuing issues with intermittent waves since he had purchased a new big machine. I could find no problem with the machine and sanded a room myself with his machine to be sure. Then I asked him to demonstrate his technique. His previous machines had not come with a back belt, but his machine did. He strapped himself to the handle so close that the drum was forced up and down with each stride he took! Problem solved.
Troubleshooting chatter + wave
If you find you do have chatter or wave on your floor, here's my suggested process of elimination. After each step, test your machine again to see if you have eliminated the problem. If not, keep going down the list:
1) Wheels. Look for damage to the wheels, and replace as needed. Clean off any buildup of filler, finish or debris; use a sharp scraper (very carefully!) to clean. Using a straightedge held next to each wheel, turn the wheel to see if it touches the straightedge in one spot but not evenly all around. If the wheel is out- of-round or egg-shaped, you will see it. Replace as needed. Never try to sand or cut a wheel in an attempt to make it round … trust me.
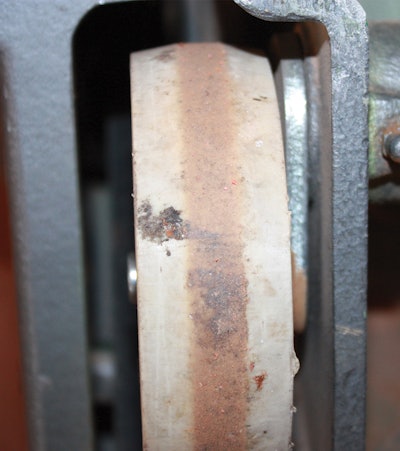

2) Bearings, upper roller, belts and more. Look, feel and listen.
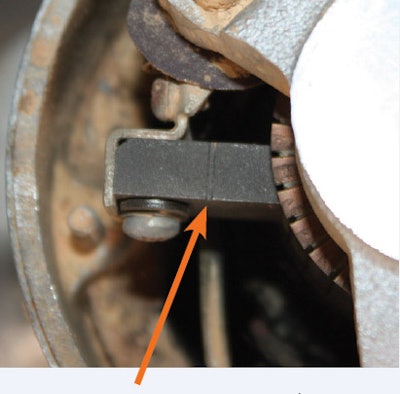
- Turn each spinning component, i.e., wheels, upper roller, guide rollers, and drum, and make sure they are spinning without obvious drag and are quiet (no squeaking). Imperfections in the upper roller assembly ((photo 1) shows one in good condition) will create a vibration, leaving a mark on the floor. Periodically it should be taken apart and cleaned; it's a really expensive part if you have to replace it. You might see debris built up on the rubber—I've seen upper rollers that look sparkly because they've got bits of metal embedded in them from running over nails.
- Look for obvious damage to guide roller bearings (photo 2a), (photo 2b)—make sure they spin freely and are not being eaten by the sandpaper. Feel for drag on the bearings, and listen for any unusual noise or grinding. Drum, fan and roller bearings are easy to check by removing belts and running the machine. The one you see here is a brand-new one I took off a Hummel. The conical shape of the bearings is designed to keep the abrasive centered, but if the paper isn't aligned between the two bearings it can eat the bearings alive, which transfers to the wood floor.
- Run the machine with only the fan belt on by removing the drum belt. Feel and listen. You can feel excessive vibration and hear the sound of worn bearings.
- Take a good look at the belt (photo 3). Look for cracks or missing chunks, making sure it is not stiff or brittle.
- Run the machine with only the drum belt on (no sandpaper or fan belt). Feel for vibration by placing a hand on the machine (stay away from the spinning drum and belt). If everything is smooth, put on a 100- or 120-grit sanding belt and run the machine without the fan belt on. Again, feel for vibration and listen to the bearings. Replace (or have a shop do it) any worn bearings right away. They will only get worse over time, and the wear and vibration will show up in your work.
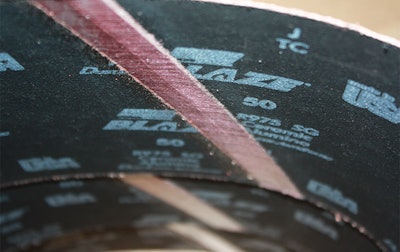
- Look at wear on a new abrasive belt (photo 4). The wear on the belt should be even across the belt, not heavy on one side. Uneven wear usually indicates that the truck wheels are not set up properly (or other footprint "cut" settings are not adjusted properly).

3) Motor. Turn the motor by hand and make sure it spins freely and quietly. Always use the proper gauge wire (#10) and never run more than 100 lineal feet of cable without adding a booster. Listen to the motor and feel it as you sand. With experience, you will know if it is lagging or simply sounds different as you work. The machine will always speak to an experienced operator.
4) Deflection or trampolining. Some joist systems have more "movement" than others. As we discussed earlier, all motors have a distinct wave or harmonic vibration. This may be exacerbated by the movement of the floor you are sanding and show up as chatter or waves. In some cases you can eliminate this by changing the speed at which you walk the machine. On some floors the issue is so excessive that you have to use a rotary-type machine to sand the floor flat. Again, in time you will be able to feel and hear this excessive movement and harmonics of the machine.
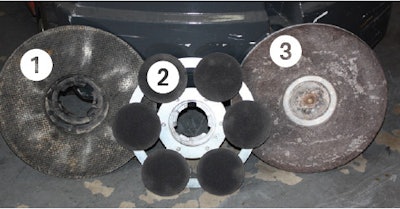
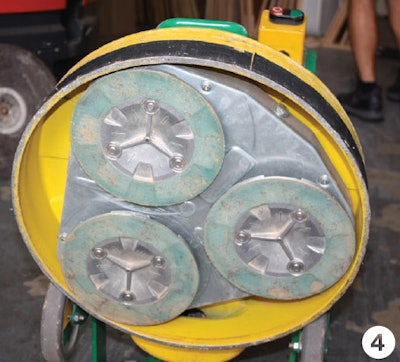
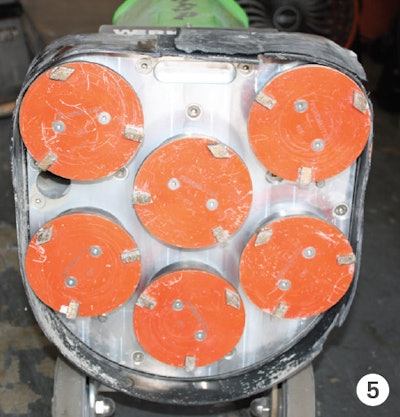
Using a 'hard plate'One way to help prevent sanding marks from ending up in your floor is to "hard plate" every floor after sanding with the big machine. By "hard plate," I mean ALL the options that are available to us now. That could be a pad driver (1), multi-disc attachment (2), or a traditional hard plate (3). Some of the multi-disc attachments (like the one in the first picture) are not driven—each disc is slightly cocked so that the weight on the edge of the disc forces it to rotate. Other multi-head sanders (like the Trio, (4) have small sanding discs that turn, and the big disc is driven and also turns. On other multi-head sanders, like this Rasp (5), only the small sanding heads rotate. Someone who knows what they are doing can create a flat, scratch-free, pristine floor with the old-fashioned hard plate. It's an aluminum disc with a big ol' heavy felt back. (Back in the day we would sand millions of square feet by bolting sandpaper on a hard-plate; we would keep sanding until dust was up to our shoelaces. When we swept the floor, my mustache would turn the color of oak.) |
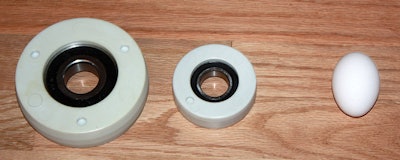
Why wheels matterI took these wheels off of a Hummel—you can see that the big wheel is the truck wheel and the little wheel is the back wheel. Common sense tells you that if you turn the big wheel one rotation the small wheel will turn multiple times, like sprockets on a bicycle. So if one or both of these wheels take on any imperfections of the shapes of the eggs you see below, think of the up-and-down movement you'll have in your machine. |
RELATED: Your Sanding Machines Don't Look Like This, Do They?
Watch these videos by the author:
Why you should release tension on your upper roller:
What to check when your big machine or edger start shocking you:
How to check your wheels on your big machine:
Discharging a capacitor on a big machine:
Quick Quiz about Motors 101:


