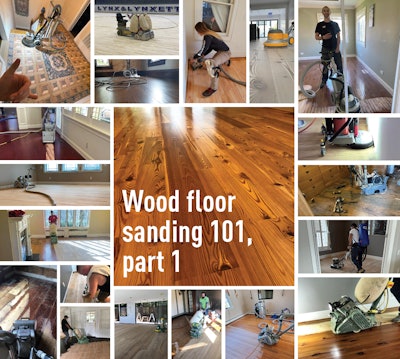
We could write an entire book on wood floor sanding, of course, but for now we’re offering the basics as a two-part series. On the following pages two sanding gurus, Todd Schutte from Bona US and Daniel Boone from American Sanders, offer their wisdom on abrasives and the fundamentals of the big machine, edger and buffer. In Part 2 in the next issue, we’ll dive into multi-head sanding with Russ Watts of Lägler and common sanding mistakes with Mark Opperman of Norton Abrasives. I’d like to thank all the readers who shared their sanding photos with us to include in these articles.—K.M.W.
Wood Floor Abrasive basics
By Todd Schutte

Sandpaper. Pretty uninteresting, right?!? Just rocks glued onto paper?!? Those statements have never been further from the truth given today’s world of high-tech abrasives. The floor results you’re producing and their long-term performance greatly depend on your understanding of the abrasive products and systems that you’re using to “create the perfect surface.” Right machine, great finish, but wrong abrasives equals less-than-stellar results—and vice versa. Making sure you and your team are constantly updating your knowledge about all the products and systems that you are using is the sign of a true craftsman.
First, understand how widespread and important that the applications of abrasives are in creating a better surface. Take a look around you: Everything manmade that you can see has been touched by abrasives at some point in its production. Wood furniture; the glass, plastic, and electronics in your computer; your clothes; all the elements that make up your house, vehicles, and tools–everything! So, it’s not just making something in a general shape, but optimizing the “fit and finish” that is the important endgame, and abrasives make that happen. In the wood flooring industry, perhaps no bigger technological gains have been made in the past two decades than with abrasives—and that’s good for all of us.
It used to be that most contractors chose one line of abrasives (e.g., blue or purple) and used that all the way through their system of sand, edge, sand, edge, sand, edge, screen. Some still use a system like that today—which is fine and will still turn out a decent floor—but so many things have changed with sanding machines, abrasives, and the whole sanding process in the past 15–20 years that it might be time to reevaluate your approach, as a change in any one category often requires or offers the opportunity to improve your overall processes.
So, what’s important to know about abrasives that may help you rethink your systems and sanding approach?

BACKING
The “backing” is typically a certain thickness/quality/type of paper or cloth; it might be treated to minimize tearing of the paper and/or stretching for cloth. This is the foundation of your abrasive product (i.e., long-term durability) and also largely determines how stiff or soft your system will be; with stiffer products (thicker or treated paper backing) generally producing flatter surfaces (but with perhaps more aggressive scratches) and softer products (treated or untreated cloth) resulting in varying degrees of grain dish-out and lesser scratches, as they better conform to the surface.
Your backing can also greatly affect the abrasive’s cost, so going cheap may mean you’re buying a lesser backing that probably won’t stand up to the job (won’t outlast the actual abrasive) and costs you more in the long run with too many changeouts; while too expensive may be overkill in the backing (and not the important minerals) from products brought over from another industry, but not necessarily optimized for wood floor sanding.
MINERALS
The bread and butter of any abrasive product are the abrasive minerals chosen to make up a particular line. The main mineral options in our industry are:

Aluminum oxide (uses: metal and wood): excellent for all woodworking and the least expensive mineral choice.

Silicon carbide (uses: cast iron, stone, hardwood, glass, chipboard): a harder, sharper, and more brittle mineral than aluminum oxide (easier to break down into lots of smaller teeth).

Zirconia alumina (uses: alloy steels): a bit softer but actually tougher, resulting in a more aggressive cut with long life.

Ceramic (uses: high-alloy steels): similar attributes to zirconia but just a tad harder and slightly more brittle.
Synthetic diamonds (uses: hard surfaces needing a fine finish): the hardest but most brittle of our group; being very long-lasting and able to break down into and maintain very fine cutting teeth. Wood and finish are not hard enough to dull these minerals.
How do you pick one?
The key criteria in choosing which abrasives grain or blend to place on a specific abrasive product are:
How hard and brittle is the mineral? How much heat and pressure are needed to break the mineral down into new teeth?
What machine will I most likely be using this product on? How much heat and pressure is generated here?
At which stage of the sanding process am I? Rough, medium, fine, extra-fine cuts; between coats; raw wood, cutting finish/sealer/stain off, etc.?


The Deep Scratch
To me, this is a good example of “it’s sanded”—but with the wrong choice of abrasive/mineral/grit selection, because it’s going to take a lot of extra work to remove all those scratches and get the wood smooth enough to accept stain/sealer/finish the way we need it to from a visual and performance point of view. We always say, “Choose the least aggressive paper/grit that you need to get the job done—but still get it done.” With today’s abrasives, you may be able to choose a higher grit (with scratches that aren’t as deep) to do the same job that may require a lower grit if using an aluminum oxide or silicon-carbide-based abrasive on your rough/medium cuts; but then switch over to an aluminum-oxide, silicon-carbide, and or diamond abrasive for your fine and extra-fine cuts for your final surface.
ABRASIVES: THEN AND NOW
You’ve got a lot more abrasive choices these days (to go along with all the new machine technology) to formulate more focused systems for the specifics of every floor that you sand and finish. Let’s look at a couple of examples from yesteryear and today to see the differences.
Sand-and-finish
2000: You probably would have used aluminum oxide or ceramic abrasives throughout your sander and edger processes (say 36-, 50-, and 80-grit), finishing out with an abrasive screen (80 to 120); perhaps hitting between coats with a screen (used 150) and/or conditioning pads (320) with a sandpaper strip or two (150 to 240).
2022: Nowadays, we might start with a 50-grit ceramic blend (for aggressiveness plus long life) on our belt sander for the main field; then switch to a 60-grit zirconia blend (to help get out the last scratches and blend for a smoother finish) on a multi-head sander, possibly with steel disc backers and weights for the second cut in the field and to minimize edging. Then we’ve got less edger work around the perimeter and detail areas, hitting it with 80–100 zirconia blend on our edger; and then final everything with 80–120-grit aluminum oxide or diamond for the finest finish on a multi-head (possibly with weights and steel backer options), depending on the species, stain or natural, sealers and finishes planned, and degree of flatness desired.
Abrade and recoat
2000: Back then, the norm was to screen and recoat with a used 150 to 220 grit screen (silicon carbide) on a 16-inch buffer plate, although conditioning pads (320-grit non-woven silicon carbide) and abrasive strips/discs had recently come on the scene and would prove to be a better alternative by more thoroughly abrading the surface and producing much finer scratches than traditional screens. This finer surface structure also resulted in better adhesion of all finishes because of the greater surface area produced. Screens cut deeper but much fewer and farther between, often leaving visible swirl marks and not enough fresh surface area.

2022: Abrade and recoat processes most commonly still use some version of a pad-and-strip system, or they might utilize something newer like diamond abrasive discs (180–240 grit) on a multi-head sander.

New-school vs. old-school
This photo shows the difference in scratch pattern and surface quality on a recoat when abrading with the traditional method of used 150 screens (shown on the lower left) and a newer abrasion method on a multi-head sander (abrading with diamonds is shown in the upper right).
The old-school method of screen and recoat:
- Only hits the high points on the finish surface due to the relative stiffness of the screen, which tend to show through as dull spots or blotchiness
- Doesn’t abrade the whole surface (poor surface energy, wetting out, and adhesion)
- Leaves deeper swirl marks.
Newer abrasion methods are softer and more flexible and:
- Fully abrade the whole surface (enhanced surface energy, wetting, and adhesion).
- Better remove contamination, scuffs and scratches.
- Don’t leave noticeable swirls (due to both the softness of the system and because of smaller discs on a multi-head system).

Todd Schutte is director of global elearning and claims mitigation at Englewood, Colo.-based Bona US.
BASICS OF SANDING MACHINES
By Daniel Boone
When it comes to sanding a floor and using all the different sanding equipment available today, everybody’s got their own way of doing things, but when I teach I like to show the importance of using each machine as intended. Here are the basics of the machines traditionally used to sand wood floors.
BIG MACHINE
Purpose: To cut a wood floor flat (whether new wood or an existing floor with finish). The big machine will get a floor flat more efficiently than any other machine. There are two types of “big machine”: drum and belt.
 It takes skill to put the abrasive on a drum machine the right way.
 Drum machines have a reputation for leaving chatter, but that’s usually from not putting the paper on correctly.
Drum sanders are the oldest version of the big machine. The user cuts a length of abrasive sheet and mounts it onto the split drum by fitting the ends into the slots in the drum.
PROS:
Power: It cuts harder and faster than almost any belt machine.
CONS:
Putting abrasive on: There is an art to putting the paper on the drum so you don’t create chatter or pop the paper (if you pop the paper as you’re running the machine, you’ll think someone shot you with a shotgun). You slide your paper in the slots and lock the cams down to tighten it on the drum. Depending on what abrasive you’re using, you’ll need to use shims of different grits to make sure the paper is tight: If you’re using something fine like 100-grit, you might have to put a 36-grit shim in the slot so that the cams bite. If you are using something rough like 36-grit, you’ll be rubbing the paper together to get some of that grit off, because otherwise it will be too thick to get into the slot. You also have to cut the corner of the paper to get it to fit correctly. If your paper is too tight or too loose, it will pop off.
Chatter: Many people who use drum machines use them for efficiency—they are good for cutting a lot of wood or old finish off quickly—but then they use a belt machine to fine the floor out. The reason they do this is that usually they can’t get the chatter out when trying to use the drum machine for their final sanding, but in that case, I’d say probably 90 percent of them don’t have the paper on correctly.
Weight: Drum machines are heavy to lift.
Belt sanders are by far the most popular big machines now. Modern belt machines were invented by Eugen Lägler in Germany in 1969, so they were more widely used in Europe before taking over most of the U.S. market.
PROS:
Changing abrasives: It’s simple to change the abrasive belt (but always check your tracking, no matter what).
Lighter weight: No big machine is easy to lift, but belt machines are lighter than drums, and it’s usually pretty easy to take the motor off to make them safer to lift with one person.
Less chatter: They tend to create less chatter (but any big machine can have chatter).
CONS:
Cutting: Most belt machines aren’t as aggressive as a drum.
Cleanup: Oily/sappy woods will load up the abrasive, drum and upper roller, so abrasives need to be changed and the drum and upper roller need to be cleaned frequently during sanding.
Sizes:
Today, big machines are available in 8- or 12-inch sizes (the size is the width of the drum). People doing residential work almost always use 8-inch machines, while 12-inch machines are usually used for gym work.
 Drum marks like the ones visible here happen when you don’t keep the big machine moving as you sand.
Technique:
Keep the machine moving forward as you let the drum down, then do the same when you reach the wall and come to a stop. Then back up in the same path and repeat the same process of letting down and lifting the drum while you’re in motion. We always say the motion of the sanding drum should be like an airplane landing and taking off—NEVER lower the drum while the machine is standing still, or you’ll dig a hole to China. For the next sanding pass, I recommend moving over no more than 3 inches at a time. Some people like to take off 4 to 5 inches at a time, and that’s why they will have problems like sidecutting, where you get abrasive lines in your floor. Start with your first pass at a 7–15 degree angle, then cut the floor straight (I always finish up at about a 2-degree angle).
Usually you’ll sand about two thirds of the room, then turn around and do shorter passes to sand the other third. When you back up, make sure you stagger where your sanding passes meet in the field so you don’t have a line going straight across the floor. If you don’t stagger them, you’ll have to cut out that line with your next sanding.
All big machines are different. When I watch someone start sanding at a school, I can tell which machine they usually run by how they use it, how fast they walk, etc. Many times when people think the machine isn’t performing as well as they would like, it’s an issue with their technique, not the machine. Going to training schools held by the manufacturer is the best way to learn how to run their machines.
DRUM PRESSURE
Every big machine has adjustable drum pressure, usually from 50 to 90 pounds or low/medium/high. I’d say the most common pressure is 70 pounds/medium, but you can change it depending on the species, the abrasive grit, if the floor has existing finish you’re taking off, etc. If I’m sanding walnut or American cherry with 60 grit, I’m going to take the pressure down to 50 or 60 pounds. If I’m sanding Brazilian cherry with 40 grit, I would probably want 70 or 80 pounds. A rare job here or there may need 90 pounds of head pressure.
BIG MACHINE TIPS:
- I do the big machine before the edger because it makes less work for the edger person. Get as close to walls as you can with the big machine, and anywhere you can fit the big machine into a hallway, closet, nook or small room, cut as much off as you can. Then the person on the edger can see exactly what they need to cut. I’ll go on jobs where people are cutting 18 inches into the field with the edger—that’s a waste of time, abrasives and backache.
- Empty the dust bag when it’s half full. A heavy, full bag can affect your sanding cut. If you have a swivel neck for the dust bag, use that bag to your advantage in cutting: If you’re cutting left to right, you don’t want it hanging heavy off the left side, because you’ll be more likely to leave side-cutting. Also, emptying the dust bag when it’s half full keeps your vacuum working efficiently at the correct CFM.
Big Machine Direction
 Photo: Dave Byrnes
Almost every drum machine (like the gym setup above) is made to cut from right to left; that’s how the chassis is set up, giving a slight angle to the drum.

All belt machines (like the one above) are made to cut left to right. That way your wheels are always rolling on a smooth surface that’s already been sanded. Most belt machines are designed to get a flat 8 inches of cut all the way across where the abrasive contacts the floor (Hummel drums have a very slight football shape).
I still see people all the time who run a belt machine in the wrong direction; they tend to have more problems like wave, side-cutting (shown below) and dishout because of it.

EDGERS
 Don’t make edging more work than it already is: On this job they are edging too far out into the field.
 The edger is the most aggressive sanding machine, and if it isn’t set up well and in the hands of a skilled person, you’ll see it.
Purpose:
Sanding the floor along all the wall lines and in all the places where a big machine can’t reach, from next to a toilet to under a desk in a kitchen and stairways and landings.
Types:
Besides the usual design, there are toe-kick edgers that will sand under a toe-kick cabinet or radiator. There are also edgers with different attachments for different purposes and an edger for sanding stair treads.
Sizes:
Edgers might have a pad that is 5-, 6- or 7-inch—it basically just depends on the manufacturer.
Techniques:
I’ve seen every kind of edger technique you can imagine. The most basic thing to know is that the edger disc spins clockwise, and you go left to right around the edges as you run the edger, clocking the edger to smooth out the scratches as you cut the floor flat. You’ll see people swinging the edger back and forth in front of them, but to minimize scratches, try to keep the edger focused straight ahead at the wall at 12 o’clock, then clock it from 12 to 3, letting the machine do the work—the machine is aggressive. Know that the cutting area on the edger is only about the size of a quarter. I teach that you should only take ⅜ to ½ inch at a time, moving from the field to the base, flattening the floor from left to right but also front to back.
Adjusting where exactly your edger cuts is different depending on the edger—get the exact directions from the manufacturer of your edger.
Putting the new person on the edger can be a disaster. The joke has always been that the edger (and the backaches it creates) is for the new person on the job, but the edger is aggressive, and it can do a lot of damage. If you don’t have that edger fine-tuned and the person trained, the edges of the floor will look like you’ve been digging a trench that you need a chisel and a hammer to remove. Like always, staining a floor will make bad sanding even more obvious, as you can see in the photo at left.
EDGER TIPS:
Edger maintenance and setup are critical. Your brushes, wiring, wheel bearings, pad … everything should be kept in tune with your edger, because the least little thing that goes wrong can leave a footprint in the floor. Your pad needs to be in good shape, with no bends or bouncy vibration to it and no chunks missing where you hit a nail or a piece of metal trim. Just use over time with no specific damage can wear a pad out. When your edger is set up and maintained correctly, you should be able to run it with one hand.
Always keep the edger moving! People will say the edger is digging too much, but if you keep it moving, it won’t dig. Just like with every other machine, going to a school put on the by the manufacturer of that machine will help you learn how to run it correctly.
Clocking the Edger
Here we’re looking at how I edge when on the sidewall:
I start out close to the 3 o’clock position. As I’m moving left to right, at a fast pace I start clocking to 12 o’clock. As I back out toward the field, I take out scratches I put across the grain.


BUFFERS

Purpose:
To smooth and remove scratches from the big machine and edger, blending wall lines and edges back into the field—the buffer is NOT for correcting bad sanding machine marks that have been put into the floor. Unless you are using a multi-head sander, the buffer is the last machine on the floor before you stain or finish, and it’s what you use to abrade between coats.
Types/Sizes:
Almost all traditional buffers in the U.S. are 110-volt and turn counter-clockwise at 175 rpms (in Australia they are 220-volt and turn clockwise). The 16-inch buffer is the staple of the industry; there are 20-inch buffers but they are mostly used on the gym floor and janitorial side of the business.
Technique:
Just like with an edger, using the buffer is all about technique, and you have a lot of options depending on what abrasive and pad you’re using, in addition to potentially using a hardplate. Things to know about buffer technique:
- The buffer cuts hard on the right side from about 2 to 5:30 p.m., with 2:15 to 4:15 being your most aggressive cut. When the handle is perpendicular to the direction of the wood (for strip or plank), that’s when you’re cutting across the grain most aggressively. When you clock the buffer to cut with the direction of the grain, you are feathering those scratches back out.
- I teach that people should go down and back on the same path, clocking the buffer as they come back to smooth their scratches, then move no more than half a buffer at a time for their next pass. If you don’t go down and back on same pass or if you try to move too much from row to row, you’ll see an irregular pattern in how you’re abrading.
- Going forward with the buffer is more aggressive than when you’re backing.
- You have to be intentional about your buffer path, always thinking about the footprint you are leaving on every single inch of the floor. I see people running the buffer swinging it back and forth like they are cleaning a floor at the mall. When you do that, you’re missing random places, and you’ll see that in your stain and finish. Those aren’t issues with the stain or finish, they are completely operator error.
Clean Between Grits
 Photo: Bill Powell III
Clean between grits every single time you sand a wood foor. When you run any abrasive, you’re shelling little pieces of grit onto the floor. With a buffer, if you don’t clean and vac before your next sanding, you’ll get an oddball scratch pattern that doesn’t match up with your abrasive, because your buffer is smearing those little bits of abrasive all over the floor.
I had a customer tell me, “You’re the cleanest guy I know.” I told him, “That’s what makes a perfect job.”
BUFFER TIP:

Never leave the buffer standing on the pad. Always stand the handle up and lay the buffer back so you don’t crush your pad, no matter what you have on it. If you leave it standing while it’s hot and come back and turn it on, it will bounce because it’s out of balance.
The hardplate

A hardplate makes a floor flat quickly. There are a lot of other options these days to help you sand a floor flat, and an advantage of most multi-head sanders is that you don’t need much skill to be able to run them. An old-school option for your final sanding, especially when sanding parquets and borders, is to use a hard-plate on the buffer. You can still do any floor with a big machine, edger and buffer, but if you’re only using those machines, you need more skill to get good results.

Daniel Boone is the training manager at Sparta, N.C.-based American Sanders.
RELATED: Wood Floor Sanding 101, Part 2