


Good day, Keith Long here with Thunderheart Flooring to wrap up the herringbone project done in Kansas City with Kimminau Wood Floors [see Part 1, Part 2 and Part 3].
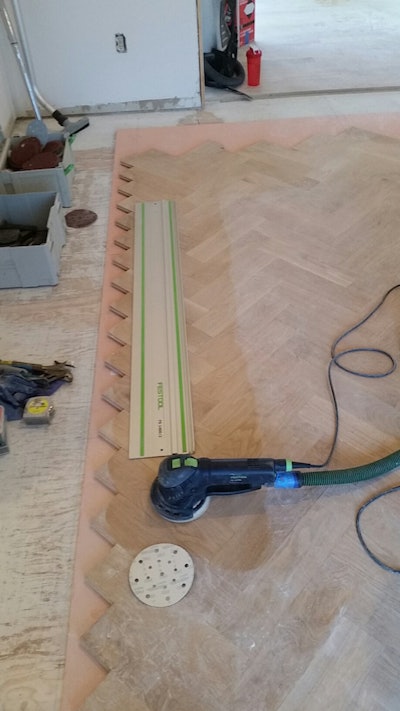
Last week we left off with the field of the herringbone glued and nailed in place. After it dried overnight, we got out a 6-inch rotary sander and flattened where we would snap our lines and cut off for the border.

A flooring edger would also work to accomplish this. The idea is to get it flat, so that the guide rail sets flat, and the track saw subsequently cuts straight and true.

We transferred our center lines up onto the hardwood flooring. Then, we measured equally off these lines to arrive at where the field would terminate, and the border begin. Once all the lines were established, Aaron cut off the excess with the track saw.
![]()
Once all excess wood was removed, I ran a D-handled router with a groove bit around the perimeter.


We built the perimeter where the border would go with 3/16-inch plywood, and we glued and crown-stapled it down. Normally spline would be installed at this point. However, since it was just one 5-inch row required to picture-frame the field, we opted to use Titebond (yellow glue) in the groove and urethane adhesive on the floor, and install the tongue side of the 5-inch border pieces into this groove. We supplemented the adhesives by blind-nailing through the groove side of the border.

We then left about 1/8-inch space and shimmed up with 3/16-inch plywood and face-nailed a row of 2¼-inch wide flooring with no glue to protect the edge of the border until the marble setters arrive.
For sanding, Domenic put on a 50-grit belt and sanded straight north and south. That way, each piece of the herringbone was sanded at a 45-degree angle, while no piece was cut completely across the grain. TJ did an up-close inspection with a light to verify that we were getting the floor flat with this rough cut.


We then put 60-grit paper with no donuts straight onto the drive plates of a multi-disc sander. I noticed that the machine was slow to spool up when we tried to start it. So, we removed the eight fasteners from the bottom and took off the cover plate to clean the dust that accumulates in the inner workings of the machine. I clean my machine in this manner about every 12 to 15 jobs.
After the multi-disc sander with 60-grit, we vacuumed and full-trowel-filled with white oak filler. We followed up with 100-grit on the big machine, and 100-grit on the edger. Will hooked up a light to the front of the multi-disc sander, and did a pass of 120-grit paper with donuts.

It’s always fun to bounce ideas off one another about sand-and-finish techniques. Kimminau Wood Floors stains many floors dark, there are many requests for expresso and ebony in Kansas City these days. They have found that the 3M 120 Gold paper on the buffer is a nice final pass after the multi-disc sander.

TJ sprayed a light mist of water with this pump-style garden sprayer, while Domenic wiped behind him with a washable microfiber mop attachment. Once dry, they buffed in dark walnut stain.


Tom and Will coated using water-based finish with the grain on each run and the border. These two do many of the finish coats at Kimminau Wood Floors and have great attention to detail.

It was a pleasure working with all of these young men. I look forward to future projects where we can make more positive things happen.
Let’s meet up again next week to discuss some of the finer points of business and finance. I get feedback from wood flooring contractors that they would like to know more about how to get ahead financially and prepare for retirement. I’ll begin to share some of the principles I have implemented that have served me well. Until then, stay sharp!


