


Hello, Keith Long here with Thunderheart Flooring to go through the third of four parts of the herringbone project recently completed in Kansas City in conjunction with Kimminau Wood Floors [also see Part 1 and Part 2].
When working with up-and-coming wood flooring technicians, one analogy I like to put out there is that getting a custom floor from raw materials to finished product in a timely and efficient manner is much like planning out how to get a multiple course meal to all come together and be hot and ready when we want it to.
Let’s say we’re having Alaskan wild-caught sockeye salmon, baked yam, asparagus and pumpkin pie for dinner (or supper, if you’re from the South). The pie takes an hour to bake and an hour to cool. The yams take an hour to bake. The asparagus takes 20 minutes to steam. The famous chef Julia Child once said on the subject of preparing salmon that all you had to do was “pass it through a warm room…”—so let’s say we’ll put it on the grill for 12 minutes.

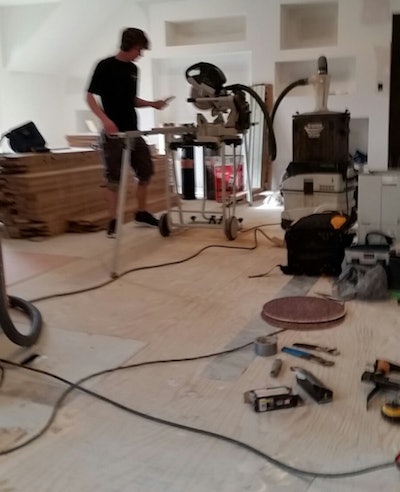
Jace, Aaron and I put our heads together on this herringbone installation, and mutually decided the thing that would take the longest would be the fabrication of the herringbone from 8-foot nested bundles. So, we set a stop on the miter saw and got it dialed in cutting this 4-inch-wide select white oak at 16 inches long. Every 30 pieces or so, Aaron would verify that our stop was still in the correct place. It ended up holding true for the duration.
With Aaron methodically cutting away (as seen at right) to produce the herringbone, Jace and I started working on the next thing in order to complete the project, the mapping out of where the first two rows of herringbone would go. When we measured the width of the room the day before, we discovered that east to west on the south end of the room was 1/2 inch more narrow than east to west on the north end of the room. We had marked center on both the north and south ends, and now that the 3/16 inch ply was in, we simply transferred that existing centerline up to on top of the plywood. We had also measured the day before off the centerline to snap lines for where the herringbone pattern would end and the border begin. We also transferred those lines up onto the 3/16 inch plywood.

Do you see how the centerline of the floor runs through the center of the 4-inch width of the pattern? That’s what we’re looking for. If one corner of the 4-inch width is on the centerline, the sides of the pattern at the border will not end equidistant. I would like to point out that before setting this backer block or any pieces of the herringbone permanently, Jace and I dry-fit out a course of the pattern:

We also snapped out two reference lines, one on either side of the centerline. These indicate where the corners of the 4-inch-wide material will land while installing. For the first two rows, we had no grooves on either of the butt ends of the stock, and it didn’t foul us up. For each subsequent row, we needed a groove on the left side for one row, and a groove on the right side for the next row. We had as many factory grooves on the left as we needed to complete this project, and passed what we needed for grooves on the right through a router station with a groove bit at the appropriate height. We screwed down this backer block, with the two factory edges pointing in toward the field, for a true 90-degree starting point.

It doesn’t matter which reference line the tip of this block touches so long as it meets with one of the reference lines and not the centerline. We opted to set this block into the field enough so that the first full-length board would just clear where it would be cut off for the border. Once the pattern was run through on these first two rows, we removed the backer block and no longer used it for the rest of this project.
Since we had the manpower, for the first two rows I buttered up each board with adhesive and a notched trowel while Jace installed them with three 2-inch 15-gauge finish nails per board.

What did Hannibal used to say on the 1980s hit television show “The A-Team?” “I love it when a plan comes together!” The tips of the stock are running along the reference lines, while the centerline is running through the center of the width of the material.

The sides of the field will be cut off for the border equidistant to one another, just as we mapped it out. Aaron completed the required amount of cuts for the field and hopped in to install and learn about all of these finer points from Jace as he took over buttering up the boards.
It sure didn’t take these couple of young bucks long to put the rest of the pattern in.

I passed what we needed for right-hand grooves on the butt ends through the router station, and kept material staged where it needed to be while these two worked their magic. During two days of the week after, we installed another herringbone pattern, this time a 3-inch black walnut. Jace took on the role I had on this job, while Aaron took on the role Jace had on this one. Two other Kimminau Wood Floors employees took on the role Aaron had on this this job, and the cycle of learning continued. I was around for them to be able to reference if needed, but I ended up mainly being the guy pulling trim, getting tools in and out as needed, keeping scraps out of the way, and putting wood, fasteners, and adhesive where it was useful. It was just like I had shared with Ben Kimminau how I had hoped it would go the second time: They have the concepts down pat, and I go back to Colorado, and they have new skill sets! Planned obsolescence, I love it…

Once the row of boards cleared the line for where the pattern was to be cut off for the border, we opted to turn the floor around there and get the next row of boards going the other direction. Our reasoning for this was to keep from burning up full-length boards that would just be cut off. Once the field was in to this point, we took some of the not-full-length scraps from having cut the pieces of herringbone from nested bundles, and glued them into place in the appropriate pattern.

For some of the smaller pieces right up next to what will be cut off for the border, we glued up to the line with both adhesive on the floor and Titebond (yellow glue) on the tongue and groove, set the boards in place, and let them run wild past the line. We then placed a finish nail on the face of each board beyond where the border would be cut to hold it in place overnight. Once the border was cut off, we used a pry bar and took up the extra part of these boards and the face nails that were in them.
Let’s meet up one more time next week on this project to get the border in and sand and finish this baby up. Until then, stay sharp!


