There is no more doubt that measuring moisture is important in the flooring industry.
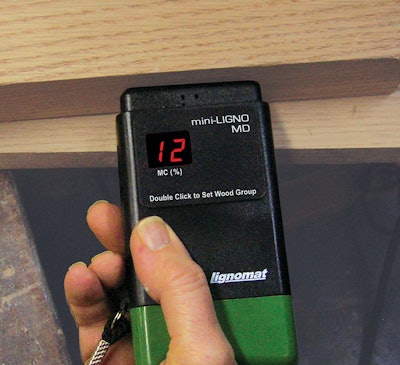
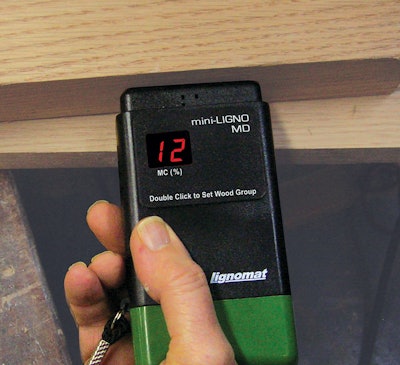 There are big differences in price for moisture meters. For small budgets, pin meters such as the mini-Ligno MD cost less money.
Every floor installer should have a moisture meter. When buying a moisture meter, you will find that there are large price differences between moisture meters on the market today. The higher end models have more stable circuitry, which will produce more stable, more comparable, and more accurate results. However, there are low-cost reliable meters on the market that will serve a floor installer well if the more expensive meters are not affordable.
When you have decided you need a meter, the choice to be made is pin or pinless. Both technologies have good usage in the floor industry. And combination meters which offer both would be the best choice.
Part 1: Checking if the moisture meter is functioning
Once a moisture meter has been purchased, the meter should be checked periodically to see if it is functioning correctly. This can be done by the finger checks described below. If it becomes necessary to prove that the meter is working correctly for legal purposes, this finger check is not sufficient. For the "official" proof we recommend using external check blocks. All of Lignomat meters check the calibration internally before each measurement and adjust the calibration if necessary. That assures calibration stability for all meters at all times. However, for a real proof an external calibration check block is available.
Quick Finger Checkup for Pin Meters With Built-In Pins
 Left: Zero-test gives the lowest possible value, when the meter is on and nothing is touching the pins. Right: Continuity test shows a value above 14%, when the meter is on and both pins are touched.
This is a very simple procedure that can be done at anytime, anywhere, without the test block. Turn the meter on and do not touch the pins. The lowest possible reading for the set wood species will appear on the display. If values above 9% appear, there is definitely something wrong with the meter. If the meter has a short the highest possible value for the set wood species will appear.
The next check shows if the meter can pick up a measurement by touching both pins at the same time. Depending on the moisture of the skin and the pressure from the fingers against the pins, readings should appear above 14%. If the value stays at the same low number as without touching the pins, the meter is faulty. If the number indicates out of range, reduce the pressure towards the pins and see if you can get a real reading. If that is not possible, the meter has a short.
Quick Finger Checkup for Pin Meters with Cable and Electrode
 To check if the meter will pick up measurements touch both pins with two fingers. A value higher than 14% should be displayed.
Connect the cable to the electrode and to the meter. Push the read button but do not touch the pins. If the lowest value for the set wood species at 5% appears, meter, cable and probe passed the zero-test. If that is not the case, remove the probe from the cable and push the read button again. If the meter with cable will now jump to the low value, the electrode is faulty, but the meter and the cable have passed the zero-test.
If there is still a high value displayed, you can remove the cable and push the read button again. If the meter jumps to the low reading, then the meter by itself is OK but the cable is faulty.
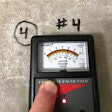
Next the electric continuity should be checked. The test will make sure that the meter can pick up measurements. See the photo where both pins of the probe are touched at the same time with two fingers and a relatively high reading appears on the display. That confirms that the meter, cable and probe are functioning and accurate measurements are produced by meter, cable and electrode. The value will differ if the skin has more moisture or the pressure towards the pins is changed, but the value should be above 14%. If only the lowest value is displayed, the meter, cable or probe are faulty.
Check Block for Pin Meters
 The pin test block from Lignomat should indicate 12% with a permissible range of +/-0.5%.
If you want to prove to yourself or to a third party that the calibration is correct, you need to use an external check block. The tests described before allow you to check basic functions of the meter. To really confirm the calibration of the meter, you need an external check block. You may wonder how one test block can check all wood groups the meter can be set for. Pin meters have one base calibration curve. For Lignomat pin meters, that is wood group number 1. All other wood group corrections are done mathematically by different algorithms. Therefore, if you have checked the calibration for one setting, you have checked all settings.
When performing the test, follow the manufacturer's instructions. A moisture value has to be given that will indicate if the calibration is correct. For the Lignomat test block, a value of 12 and 20% is expected. The permissible range is +/-1%.
This calibration test can replace the continuity test described before. However, it will not replace the zero-test described before.
Here is why: If the area between the pins is contaminated by dirt or/and moisture, the zero-test will produce a higher value. Then the moisture meter cannot read any values below that value. For instance, if the zero test produced a measurement of 9%, that moisture meter can now only measure above 9%. For all wood with a moisture content lower than 9%, this meter will indicate 9%. For all values above 9%, the meter will still be accurate.
Quick Checkup for Pinless Meters
The quick test is simple again and can be done anywhere at any time. Turn the meter on and hold the meter in the air. Make sure nothing touches the measuring pads in the back. The lowest possible value for the set wood species should appear. Lignomat's pinless meters show "Min" on the display for all zero-test values. The indicated number is the lowest value the meter can indicate.
 Left: The zero-test for Lignomat's pinless meters indicate 'Min' on the display. The value will change for different correction settings. Right: Calibration confirmation with external test block. Instructions on the back of the block indicate the correct moisture value and the measuring range. All of Lignomat's pinless meters can be checked with the same check block.
Next is the continuity test. Place the meter on a stack of papers and take a measurement, you should get a higher value than the zero-test and the "Min" sign will be replaced by wood group and measuring depth settings. To get a really high value, place the meter on your forearm and push read.
Check Block
If you need to prove the calibration for a pinless meter, you would need a check block for pinless meters. All of Lignomat's pinless meters can be checked with the same check block. The correct moisture percentage is listed on the back of the test block. Those values can be different from block to block. However, the same block can be used to check all and any of Lignomat's pinless meters: Ligno-Scanners, Ligno-DuoTec BW and Ligno-VersaTec.
When the meter is placed on the check block, make sure the meter sits in the center of the block and while you are checking, put light pressure on the meter towards the check block.
And again, we recommend to do the zero-test for your pinless meter in addition to using the test block.
The tests described above guarantee the functioning and the accuracy of the pre-programmed calibration curve in the meter. Much more is necessary to obtain meaningful measurements, although proper functioning of the meter is a basic requirement for any moisture measurements.
Part 2 Using the Meter to Obtain Accurate Measurements
 Mini-Ligno DX/C with slide-hammer electrode allows measuring sub floors without removing floor planks.
Measuring with your Pin Moisture Meter
Pin meters measure the electrical resistance between two or more pins. If there is more water in the test sample, the resistance gets lower, and the meter indicates a higher moisture value. Less water and the electrical resistance gets higher, the meter indicates a lower moisture value. This happens until the electrical resistance gets so high that the meter cannot measure any more.
Measurements are obtained from the small area between the pins. If pins are Teflon-coated, the meter measures moisture where the tips of the pins are placed. This is the only way to obtain core measurements or measurements from a subfloor without removing the floor planks.
Three factors affect the indicated moisture value by a pin meter:
1. Differences between different boards of the same wood species
Each piece of wood even within the same wood species is different in color, structure and the electrical characteristics. Moisture readings from sample boards of the same species at the same MC show.
2. Differences between different wood species
More significant variations are found between different wood species. In order to stay within the variations of 1-2% mentioned above, moisture readings have to be corrected for the wood species you are measuring at the moment.
Calibration corrections are done internally by the moisture meters. The user selects either a wood group (species with similar correction algorithms are in the same wood group) or the individual wood species. Wood group codes and species settings are specified by the manufacturer. Note, the correction algorithms for pin meters are not based on specific gravity, they have to be found by oven tests and mathematical calculations.
3. Differences between different wood temperatures
Measuring moisture of hot or cold lumber requires further corrections. The electrical resistance changes with the wood temperature. Moisture meters are calibrated for a wood temperature of 70 F. If the wood is between 55-85 F, the difference in readings is small. Above 85 F or below 55 F the measured value should be corrected for the actual wood temperature. Some pin meters have built-in temperature corrections others come with a correction table. Caution: It is hard to establish the correct wood temperature at the measuring depth where the tip of the pin has been driven to.
If the ambient temperature has been stable for the last few hours, you can take the ambient temperature. If the ambient temperature has changed, then use the average over the last few hours.
Measuring with your pinless or scan moisture meter
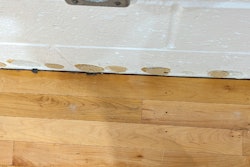
 Readings should be taken, while the meter is slightly pressed toward the floor. An area by a window is chosen for the photo to easily identify the location of the measurement.
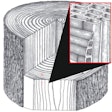
Most pinless meters use electromagnetic wave technology. The indicated MC includes all materials in a three dimensional field underneath the measuring plate(s). See photo the entire area between surface and core is included in the measuring field. If there is more water in the test sample, the indicated MC is higher. Less water gives a lower MC until the meter cannot measure any more. Some pinless meters indicate moisture to a lower level than pin meters.
If moisture varies within the three dimensional measuring field, the average moisture is indicated. If different materials, for example wood and concrete, are within the 3-dimentional measuring field, the indicated value is not a true moisture percentage.
If there is not enough material underneath the measuring plates, the indicated moisture value is not correct either. It could be, because the test sample is too narrow to cover the entire measuring field or maybe, because the test sample is not thick enough and there is not enough material underneath the measuring plates.
In other words, if the measuring depth indicated by the manufacturer is ¾" deep, then at least a ¾" thick test sample is required. Wood planks only ½" thick cannot be measured correctly. Dual-depth meters offer more flexibility. They have two sets of calibrations for ¼" measuring depth and for ¾" measuring depth, allowing you to take accurate readings in material ¾" thick and materials thinner than ¾". If measuring with the ¼" depth setting, you can always be sure that the material underneath the floor planks is not included in the measuring field.
 When the floor plank is thick enough to fill the entire measuring field, true moisture percentages are displayed if the meter is set to measure that particular wood species.
Two factors affect the moisture value indicated by a pinless meter:
1. Differences between different boards of the same wood species
Pinless meters change the indicated moisture value based on the material inside the measuring field. Each piece of wood even within the same species differs in structure and density, which causes small variations between measurements within the same wood species at the same moisture level. These variations mostly stay within the 1-2% if the MC is below the fiber saturation point at 25%. However, if the density within the same wood species varies too much, those limits will be exceeded.
2. Differences between different wood species
Corrections for different wood species are necessary because of density changes between different wood species. There is a large difference in density between a lightweight cedar board at Specific Gravity of 0.3 and a tropical hardwood with a SG of 1.1. To obtain accurate moisture percentages, the meter needs to be adjusted for different wood species.
Most meters now use built-in corrections because printed correction tables are cumbersome to use. Wood species with the same density are put into the same wood groups. Most meters use the average density of the wood species as code number. For instance, the wood group number 45 is for wood species with a density of 0.45.
Temperature of the wood does not have a great impact on the indicated moisture values when using a pinless meter.
It is very obvious that moisture meter measurements with any meter, pin or pinless, need to be corrected for the wood species measured. If you keep notes of moisture measurements, it is crucial to always note the make of meter, the wood species settings and where applicable the wood temperature correction settings.
With the right moisture meter, following the manufacturer's instructions, anyone can get moisture measurements that represent the moisture distribution of the wood floor at the time the moisture readings were obtained.


