
People not familiar with the process of installing a wood floor may think it's simply banging in the floor, running over it with a sander and slapping on a few coats of finish. Little do they know how complicated the installation process can be and all that is involved in getting the job site ready— even before the first nail or bit of adhesive hits the floor.
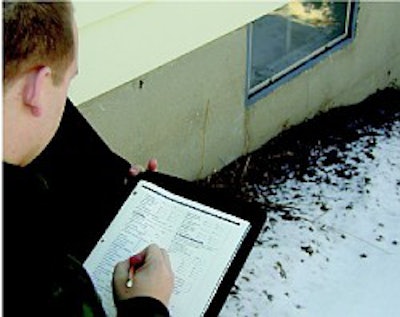
Experienced contractors know that some of the most important steps a wood flooring professional takes are those before the floor is installed—steps that can prevent costly callbacks. The more thorough the pre-installation job-site check, the less of a chance there is of problems occurring with the floor later. Those experienced contractors consider a pen and paper some of their most valuable tools and use them to take copious notes, keeping detailed records of all their findings on every job-site visit.
Here are five things to take into consideration on your next job-site evaluation.
1) The Customer
The customer should be involved in every step of the process, but it's critical that you meet beforehand to cover all the details of the job and determine her expectations—of you and the wood flooring. Preferably, you should meet with the homeowner as opposed to the designer or specifier. In new construction, many spec homes are built before they are sold, so the general contractor or builder may be your contact.
For an installation job, the first step is choosing flooring. Some homeowners know exactly what they want, while others look to you for advice. There are many factors that determine which flooring to use, but the main ones are where the flooring will be installed, the lifestyle of the homeowners, the home's décor and budget. Where the flooring will be installed refers to both the geographic location and the room location. Areas of the country that have severe temperature and humidity swings may not be the best choice for floors that are dimensionally unstable, such as solid wide plank. If the flooring is below-grade, then a solid, 3/4 -inch floor isn't recommended.
The customer's lifestyle also impacts the flooring choice. For example, durability is a priority for homeowners with kids, pets and high traffic. The flooring also has to match the home's décor. A rustic, hand-scraped floor is probably not the best option for a contemporary, chic penthouse.
Finally, the challenge is meeting all the customer's criteria and keeping the project within a budget. Show the homeowner several samples and explain the pros and cons of different species, grades and finishes. The more information you can give the customer in writing, the better. You also can refer the customer to NWFA's consumer Web site at www.woodfloors.org.
When explaining the features and benefits of different flooring, be realistic about how the floor will perform. A 25-year or more finish warranty offered on many of today's factory-finished floors doesn't mean that the floor won't need to be recoated for 25 years. Explain that the floor is a natural product that could experience movement between seasons, and that the floor may show dents and scratches. Also explain that eventually the floor will have to be recoated. Set up the homeowner with a floor maintenance program, and explain how routine care extends the life of the floor.
Photosensitivity and color change also are issues to cover with the customer. Species such as domestic cherry and many exotics, including Brazilian cherry, look substantially different after being freshly sanded and finished compared with how they look weeks, months, or sometimes only days later. Some species lighten, and some species darken, so be familiar with what to expect from every species you sell, and explain that change to the customer. Also explain that the floor may experience a dramatically different color change depending where furniture and area rugs are placed.
Once the floor is chosen, the customer needs to know the logistics and timing of each step of the job. If the homeowners occupy the home, determine who is responsible for removing existing floor coverings and for moving furniture and appliances, and explain the importance of keeping the work area clean. This means occupants and other trades need to be off the floor when it comes time for finishing. Decide beforehand who is responsible for trim work such as moldings and bullnosing around staircases.
The job's timeline also is a factor— once you take into account all the variables on the job site, give the homeowner a realistic schedule, but explain that it is subject to change. Put everything in writing, and verbally go over each item with the customer.
2) Moisture Conditions
Any contractor knows that moisture is the enemy of wood, so a thorough check outside and inside is essential. Outside, the key is understanding the basics of rainwater management and drainage. Start with a walk around the property, looking for signs of flooding or water damage. Ask the homeowner if she notices problem areas when it rains or when snow melts. Check the grading of the property to make sure it slopes away from the house, not back into the foundation. Inspect all the gutters and downspouts to see that they are in working order. If you notice problems, explain that they need to be fixed before you install wood flooring. Also keep in mind that if any part of the slab has 4 inches or more of earth above it, it is considered below grade for installation purposes.
If you are installing flooring in new construction, the landscaping or exterior features such as gutters, brickwork and soffits may not be completed when you first bid the job, but the house should be weathersealed, and the roof, windows and doors should be completely installed. Include a clause in your estimate stating that all rainwater management should be in place before installation.
Inside, thorough moisture checks are essential before you start the job. Before you test the inside environment, the home should be at normal living conditions, with the heating and cooling system having been running for a week or more. Use a hygrometer to test the relative humidity of the home. If the humidity falls outside the average range for your geographical location, the floor could have large gaps, or it could cup. Wait to deliver the wood until the environment has reached the target humidity levels and temperature.
Check the basement or crawlspace to make sure it is dry. Take several moisture readings of the concrete slab with a concrete moisture meter or perform a calcium chloride test. On new construction, the concrete slab should be at least 30 days old and sealed before testing. Take 20 to 40 readings of the subfloor, then average those numbers. If there are areas with high readings, some detective work may be necessary to find the source of moisture, such as a water leak from a bad pipe or an improperly sealed door.
3) Job-Site Conditions
Whether on new construction or a remodel, there are several job-site conditions that can affect how a wood floor performs. If other work is being performed on the house, other trades can present challenges. All the wet trades, such as drywall, painting and tile, should be completed before the flooring is installed. Make the customer aware that if one or all these trades fall behind schedule, it could delay installation of the wood flooring. Make periodic visits to the job site to get an idea of how the job is progressing, and note job-site conditions.
If other trades need to mix wet materials like drywall, suggest they put a plastic covering on the subfloor or mix it in a room that is not going to have hardwood floors installed. If the general contractor says the job site is ready for the wood, check the job site first before you send in your crew. If other trades left sheet rock or glue behind, you may need to use a buffer to clean the subfloor.
Before you install, make sure the subfloor is dry, flat and clean. Especially in new construction, many contractors assume that the subfloor is flat, but quite often this is not the case. Check every subfloor for high and low spots. The general rule is that the subfloor should be within 1/8 inch in a 10-foot radius. If the subfloor needs to be fixed, it's easier to adjust your estimate ahead of time rather than expect to be paid for the extra work later.
Walk over the subfloor, checking for squeaks or loose areas that need to be repaired. Make sure the subfloor is appropriate for wood flooring, is adequate thickness, is installed correctly and that it meets the requirements for the product to be installed. If you're doing a glue-down installation, it's a good idea to install on a small test area first to make sure the floor adheres correctly.
Also check the power supply. Figure out where you'll get 220-volt electrical service. Common sources are appliance outlets in the kitchen, air conditioners and dryers. With new construction, power may have to be run from a common pole in the development. If you need to tap into the main box at the house, it's required by law that you use a licensed electrician, so figure that expense into your estimate.
4) The Flooring
Whether the flooring is in bundles on the job site or already installed, carefully inspect it. The bundles should be broken up on the job site so the wood can acclimate evenly, unless the manufacturer of the flooring directs otherwise. Take several moisture readings of the flooring to make sure the wood is properly acclimated to the job site and the subfloor. Acclimation doesn't refer to the amount of time the wood has been sitting on the job site, but rather how close the moisture content is to that of the subfloor. NWFA Installation Guidelines dictate that the flooring should be within 4 percentage points of the subfloor. An even smaller range is highly recommended for plank flooring. Other basic checks with new flooring include making sure the floor is the species and grade that the customer ordered and that there is enough wood on site to cover the job.
If it's a sand-and-finish job, carefully inspect the existing floor to find potential problems. If the floor is covered with carpeting, lift up a corner or check in a closet to see what's underneath. Explain to the customer and put in writing that the labor and, therefore, cost of the job can't be determined until the old floor covering is removed. Flooring littered with nails, marred by stains or filled with damaged boards requires extra labor. Severe water damage or pet stains may require a total board replacement instead of just a re-sand.
Also check that there is a sufficient wear layer left to sand, and get as good an idea as you can of what type of finish is already on the floor. Determine how much time and materials are needed to remove existing finish— an older floor or one with aluminumoxide finish requires more time and more abrasives.
5) The Big Picture
Once you have gone over all of the variables of the job site, evaluate the job as a whole. Ask yourself if it will be worth your time and reputation to take on the job. If you find too many potential problems, or if the customer is difficult to work with, as hard as it may be, the best option may be to turn down the job. Problems that exist on the job site could result in a failed floor and turn into your liability, no matter how often you warned the customer ahead of time.
When pressured to install a wood floor under questionable job-site conditions, some contractors try to protect themselves by having the customer sign a waiver of responsibility, but keep in mind that such waivers will not protect you if you end up in court. Legally, as a wood flooring professional, you are expected to install, sand and finish according to the correct industry standards, whether you have a signed waiver of responsibility or not.
The evaluation process is about gathering as much information as you can about the job ahead of time. If you are thorough, professional and up front with the customer, you increase your chances of a flawless job and a happy customer.
Sources for this story included: Evandro Carvalho, Maximum Hardwood Flooring; Todd McDonald, ACME Supply Co.; Mickey Moore, NOFMA: The Wood Flooring Manufacturers Association; Glenn Paris, Phillips Floor to Ceiling; and Steve Seabaugh, NWFA.
On the List
On your next job-site evaluation, be armed and ready with the Job Site Check List available in NWFA's Technical Manual A400: Jobsite Evaluation, Estimating and Preparation. The publication also lists questions you should answer before you begin a job. One copy is included with an NWFA membership. To order additional copies, call 800/4224556 (U.S.), 800/848-8824 (Canada), 636/519-9663 (local and international), e-mail [email protected] or visit www.nwfa.org.