The Problem
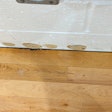
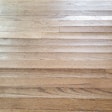
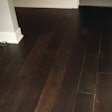
I was recently contacted by a customer who specializes in catastrophe restoration services for insurance companies. He installed approximately 1,200 square feet of 2 1/4 -inch select red oak flooring in a house that had suffered water damage, and the floor was now cupping. Now, I don't know how you feel about it, but to me that's a lot like having your mother-in-law for a dentist—one is bad enough without the other.
The Procedure
The contractor picked up the flooring from our warehouse, took it to the job site and left it to acclimate for about a week. The homeowner moved out prior to the restoration work, and the temperature controls had been off ever since. The wood flooring was installed in early January and sanded and finished three to four months later. Within a few weeks, the flooring began to cup.
The Cause
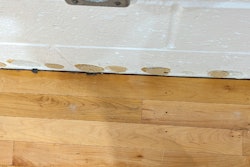
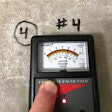
As I drove up to the house, it looked like it was on a plateau carved from the side of a steep hill. Upon entering, I noticed the temperature and humidity inside was about the same as it was outside. The floor was obviously cupped, and it was worse in the back of the house. Moisture meter readings confirmed this, but since cupping can happen when the bottom of a board is wetter than the top, I wanted to check the moisture in the crawlspace, too.
Entering the crawlspace, there was approximately 3 feet of clearance between the ground and the floor joist. Closer to the back of the house there was only 18 inches. The bricks in the foundation wall were wet, and there were also watermarks on the foundation vents where water and muddy debris had run downhill, directly under the house. With the rainwater encouraged to wash under the home, the crawlspace plastic actually held the runoff water in puddles. All this crawlspace was lacking was a Class IV rapid and a rubber raft tour.
I moved to an area directly under the room with the most evident cupping. Here, mold and mildew were growing on the exposed wooden joists, and the wire rod used to hold the insulation between the floor joists had rusted. I even photographed the reading on my hygrometer at 96.4 percent, seeing as it was the highest reading I had ever gotten in my 15-year career. Needless to say, I was starting to get an idea where the moisture was coming from.
How to Fix the Floor
Fixing this floor was a two-part process. First, the moisture problem had to be addressed. If not, even if the contractor had torn out and replaced this floor, he would have been faced with the same situation again. The back of the house was even with the ground level, encouraging runoff water to be channeled under the house and into the crawlspace.
This water had to be diverted away so that some moisture control could be reached under the house.
Also, environmental controls had to be used to stabilize the conditions inside. A pump was employed to empty the standing water from under the house.
Oftentimes, when brought back to optimal conditions, a cupped floor can correct itself, and this one did. The decision to sand a cupped floor should not be made in haste, since this could just lead to more problems down the road.
In the Future
This case is a perfect example of the need to properly check your job site. A basic inspection of the crawlspace would have exposed most of these problems. This case also highlights one of my best tidbits of advice: Sometimes, it's best to turn a job down. Let's face it, we are in business to do business, but like momma says, "If it smells like it, and it looks like it, then for God's sake, don't step in it!"


