The Problem
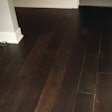
Early last spring I received a call from a homeowner who needed an inspection because her interior designer told her the hardwood on the second level of the house was cupped and she needed to discover the cause prior to having additional hardwood flooring installed on the main level of the home.
The Procedure
The flooring was 3¼-inch prefinished plainsawn red oak with eased edges and ends. It was installed in three bedrooms, a sitting room and the hallway on the second level of the home. The homeowner said the floor had been installed the previous spring, and since she had thought the cupping was normal, she could not say when it started.
The Cause
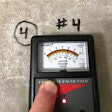
I did a site survey before entering the home. There appeared to be proper drainage away from the house and no obvious areas of moisture. Upon entering the home, my initial visual inspection confirmed the floor was cupped. The interior temperature was 71 degrees Fahrenheit with a relative humidity (RH) reading of 57 percent. Outside readings were 48 degrees and a RH of 40 percent. The home had a humidifier on the heating system, and the homeowners said they kept the environment around 72 degrees year-round with a RH between 50 and 60 percent. I began taking moisture content readings, which were normal for our area at this time of year, ranging from 6.9 to 8.5 percent.
I removed quarter round in several areas and observed spacing of ¼ to ½ inch. Several individual board measurements were taken and found to be within the tolerance of the product. Ten- and 20-board measurements were also taken throughout the installation and were within anticipated measurements.
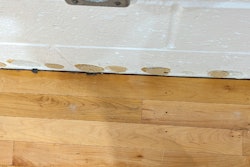
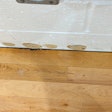
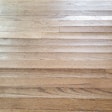
The cupping measurements ranged from 0.012 to 0.017 inches. Inspection with a magnifying scope did not reveal any edge crushing or fractured finish. I used rare earth magnets in several areas; they showed fasteners were placed 8 to 12 inches apart. I was beginning to scratch my head when I noticed the cupping actually was not occurring on every board, but every other board. I got the rare earth magnets out again to do a more thorough survey and found that in the areas with the worst cupping, the installation contractor had done what is sometimes called "skip-nailing," i.e., nailing every other board. I found this to be prevalent throughout 60 percent of the installation. The majority of what looked like cupping was actually peaking where two unnailed sides came together.
The cupping/peaking was coming from a combination of factors. The higher relative humidity the home was kept at during the colder months helped maintain the stability of the floor so that it was not subject to seasonal movement, but in doing so it prevented the floor from shrinking, which would have helped minimize the cupping/ peaking. Further surveying of the floor with a heavier person revealed slight up-and-down movement of the boards due to not being nailed.
How to Fix the Floor
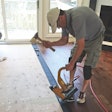
Unfortunately, because the nailing pattern was so erratic and haphazard, the entire floor had to be replaced. Fortunately, the retailer finally recognized that the installation did not meet minimum standards and agreed to replace the floor without the homeowner pursuing legal remedies.
In the Future
Maintaining the proper fastening schedule and installation practices as well as knowing what the environmental conditions will be in the home can all help ensure a successful installation.


