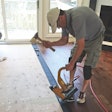

The best wood flooring contractors seem to have a knack for seeing into the future. That is, on their initial visit to a job site, they can already anticipate complications that may happen with the installation, sanding and finishing processes at that job. And, even more importantly, they can also spot potential long-term problems for the life of the wood floor.
Following are steps that proactive contractors take when they do their first job-site walkthrough, long before they ever pick up a nailer. Some apply to all jobs, regardless of the type, while others may apply only to new construction or remodels, for example. To that end, please note that the following photos were taken at several different job sites in order to be able to demonstrate all the steps for various types of situations.
SUPPLY LIST
- Camera
- Moisture meter
- Hygrometer
- Tape measure
- Job-site log (printed or electronic)
Step 1

Check the exterior of the home for moisture (when possible). Are downspouts in place and directed away from the foundation? Are there window wells with water in them? Is there a sprinkler system adjoining the foundation (inset)? Check the foundation for cracks.
Step 2

Examine the grading around the house to make sure soil is graded away from the foundation. Also look to see if water will drain down a hill toward the house. In this case, an incredibly steep backyard graded directly at the house's foundation may be cause for concern.
Step 3

For new construction or major remodels, is the home completely closed in, with all the doors and windows in place? Are the wet trades, such as plaster and painting, complete?
Step 4

Is the HVAC system in place and running? Is there an in-line humidification system (inset)?
Step 5

How will you get materials and your machines in and out of the job site? Can one person do it alone? Are there lots of stairs or narrow hallways to navigate through? For multistory job sites, a freight elevator may be the only option (and there may be restricted hours when it can be used).
Step 6

How are you going to get your 220 power? Are there appliance outlets where you can use a pigtail to hook up power, or will you need to hook up to the box? Will you need an electrician to hook up to the box or to install the right 220 plug? Here, the right pigtail with a dryer outlet will provide the necessary power.
Step 7

Take a look to see the direction of the joists. For solid strip or plank, the direction of the floor should run perpendicular to the joists. If not, you'll need to add a 1/2-inch layer of plywood or bracing between the joists. In this home, most of the basement is finished, so the small room with the mechanicals is the only place where the joists are visible.
Step 8

Check the basement (if applicable). Does it look dry? Does it have evidence of previous water damage? What is its relative humidity (RH)? In this case, the homeowner explained that water damage was from a malfunctioning sump pump the previous spring.
Step 9

For a crawlspace, does it have the right vapor barrier completely covering the ground? Does it have the required ventilation? Are there at least 18 inches between the ground and the bottom of the joists? In this crawlspace, nothing covers the ground, but it is well-ventilated. There is no evidence of moisture or humidity damage.
Step 10

For a renovation, what's the existing floorcovering (if any)? Who is responsible for removing it? If you are, does it have the possibility of containing lead or asbestos? In this case, since this house was built in 2000, the existing vinyl flooring isn't a cause for concern. (For more on this, see the "Playing it Safe" article on page 52 of this issue.)
Step 11

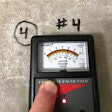
What is the subfloor? You may need to find a place like a floor vent to see it. Is the type and the thickness appropriate for the wood floor you'll be installing? What is the moisture content? Now is the time to start taking those moisture readings, as well as job-site RH readings.


