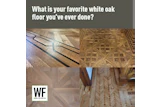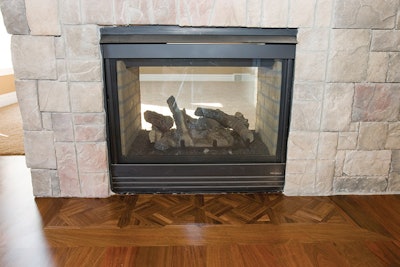

What sets an experienced flooring contractor apart from an ordinary installer are the details. One detail that adds interest and value to a wood flooring installation is a picture-framed fireplace. We picture-frame every fireplace we do. Most often, the wood picture frame surrounds a tile hearth. Before we make our first cut, we verify the hearth size with the tile contractor and ask how much space to allow for the grout, which can add 1/8 to 1/4 inch between each tile. Accuracy is key, so we measure and dry-fit often. There are times when you may have to improvise. On this job, the builder decided at the last minute against using tile and left it up to me to fill in the space I had already picture-framed. The result was a parquet pattern, shown at left. Here we used ipé for everything, but adding a contrasting species for the entire picture frame or as a feature strip is a great way to draw attention to the focal point. Whatever the case, be sure to charge for the extra time it takes to create the picture frame.
SUPPLY LIST
- Miter saw
- Spline
- Table saw
- Tape measure
- Router with grooving bit
- Nailer
- Finish nailer
- Carpenter square
- Wood glue
Step 1

Find the center of the fireplace and mark it on the subfloor. Also mark the length and width of the hearth. Be sure to check the placement of the fireplace relative to the wall and the floor. Oftentimes, the fireplace and the floor may not be square to each other, and the tile contractor is limited in how much he can adjust for this. You may need to make some adjustments to keep everything square.
Step 2

Miter-cut the two end pieces for the frame. Their length should be the depth of the hearth plus the width of the board. In this case, that adds up to 13 1 / 4 inches.
Step 3

Groove and insert spline into the outer edge and miter of the board, adhering the spline with wood glue.
Step 4

Make the miter cuts for the long board in the front of the picture frame. To determine the total length, add the width of the flooring times two (for a board on each side) to the length of the fireplace hearth. Here, the hearth is 53 inches wide and the flooring is 5 inches wide, for a total of 63 inches. Rout the mitered ends and glue in spline to create a tongue.
Step 5

Dry-fit the frame and verify the distance in front of the fireplace to the back of the board. In this case, it should measure 13 1/4 inches. Trace the inside edge of the boards on the subfloor so you know where to apply the glue.
Step 6

I've installed the field almost up to the edge of the picture frame. Before I install my first board in the picture frame, I like to cut (and groove) the partial board that will go next to it. If I don't do that now, I'll have to struggle to slide it in later. Here, I start with the board on the left.
Step 7

Verify that the picture frame is square to the floor, then dry-fit the pre-cut board with the outside of the frame. Once you are satisfied everything lines up, nail the pre-cut board to the field.
Step 8

Glue the side board of the picture frame first, then glue the front piece.
Step 9

Rack out the floor around the frame. Then nail the side board.
Step 10

When you get to the other side, you'll need to rip another board to fit. Mark, measure, rip and rout the board so it seamlessly fits the frame. Groove the cut area.
Step 11

Dry-fit the side piece with the board you just ripped. If it's a good fit, glue the last side of the picture frame.
Step 12

It never hurts to double-check the measurements and ensure everything is square before you nail in the last board.
Step 13

Use the nailer on the board you cut in Step 10 only where it meets the field.
Step 14

Use a finish nailer to nail near the wall and in the tongue on the side of the board where it meets the picture frame (so you don't push the frame out of position). Once that board is secured, you can nail in the last side piece of the picture frame.